Hello! Welcome to the next lesson in our journey through the fundamentals of editing.
In the last lesson, we focused on the most essential editing actions: making cuts, trimming clips, and using ripple edits to assemble a basic sequence. We established that the hard cut—one shot immediately replacing another—is the fundamental building block of video storytelling.
Today, we'll explore what happens when a hard cut isn't quite right. Our learning outcome is to apply transitions between clips and identify when they enhance versus detract from storytelling. You'll learn about different types of transitions, from simple fades to more complex cuts, and most importantly, develop the critical judgment to know when to use them. For your goal of creating short films and YouTube content, this skill is crucial for controlling mood and ensuring your edits feel polished and intentional, not amateurish.
The Editor's Golden Rule: Less is More
Before we even look at a transition effect, let's start with a piece of advice from nearly every professional editor.
Video Transitions: What you NEED to know when editing!
Watch the very beginning of this video from Justin Brown - Primal Video. It makes a powerful point about the built-in transition effects that come with most editing software.
Watch the first 40 seconds (00:00 - 00:40). Notice the strong warning against using flashy, built-in transitions and the emphasis on the idea that the best transition is one the viewer doesn't even notice.
This might seem counterintuitive, but it's the most important principle of this lesson. A transition's job is to serve the story, not to draw attention to itself. An unnecessary or flashy transition can pull the viewer out of the narrative you're trying to build.
To guide your decisions, let's establish some foundational "Dos and Don'ts."
How to make video transition effects like a pro
The article 'How to make video transition effects like a pro' from the Vimeo blog provides a fantastic set of guidelines. We'll focus on the core principles.
Please read the section titled 'Dos and don’ts for your video transitions'. Think of these as your core rules for applying any transition. Pay close attention to the concepts of subtlety, consistency, and avoiding distraction.
Transitions as Punctuation
A great way to think about transitions is to see them as the punctuation of visual language. A hard cut is like a period (.), marking a clear stop and start. Other transitions function differently, suggesting different relationships between shots.
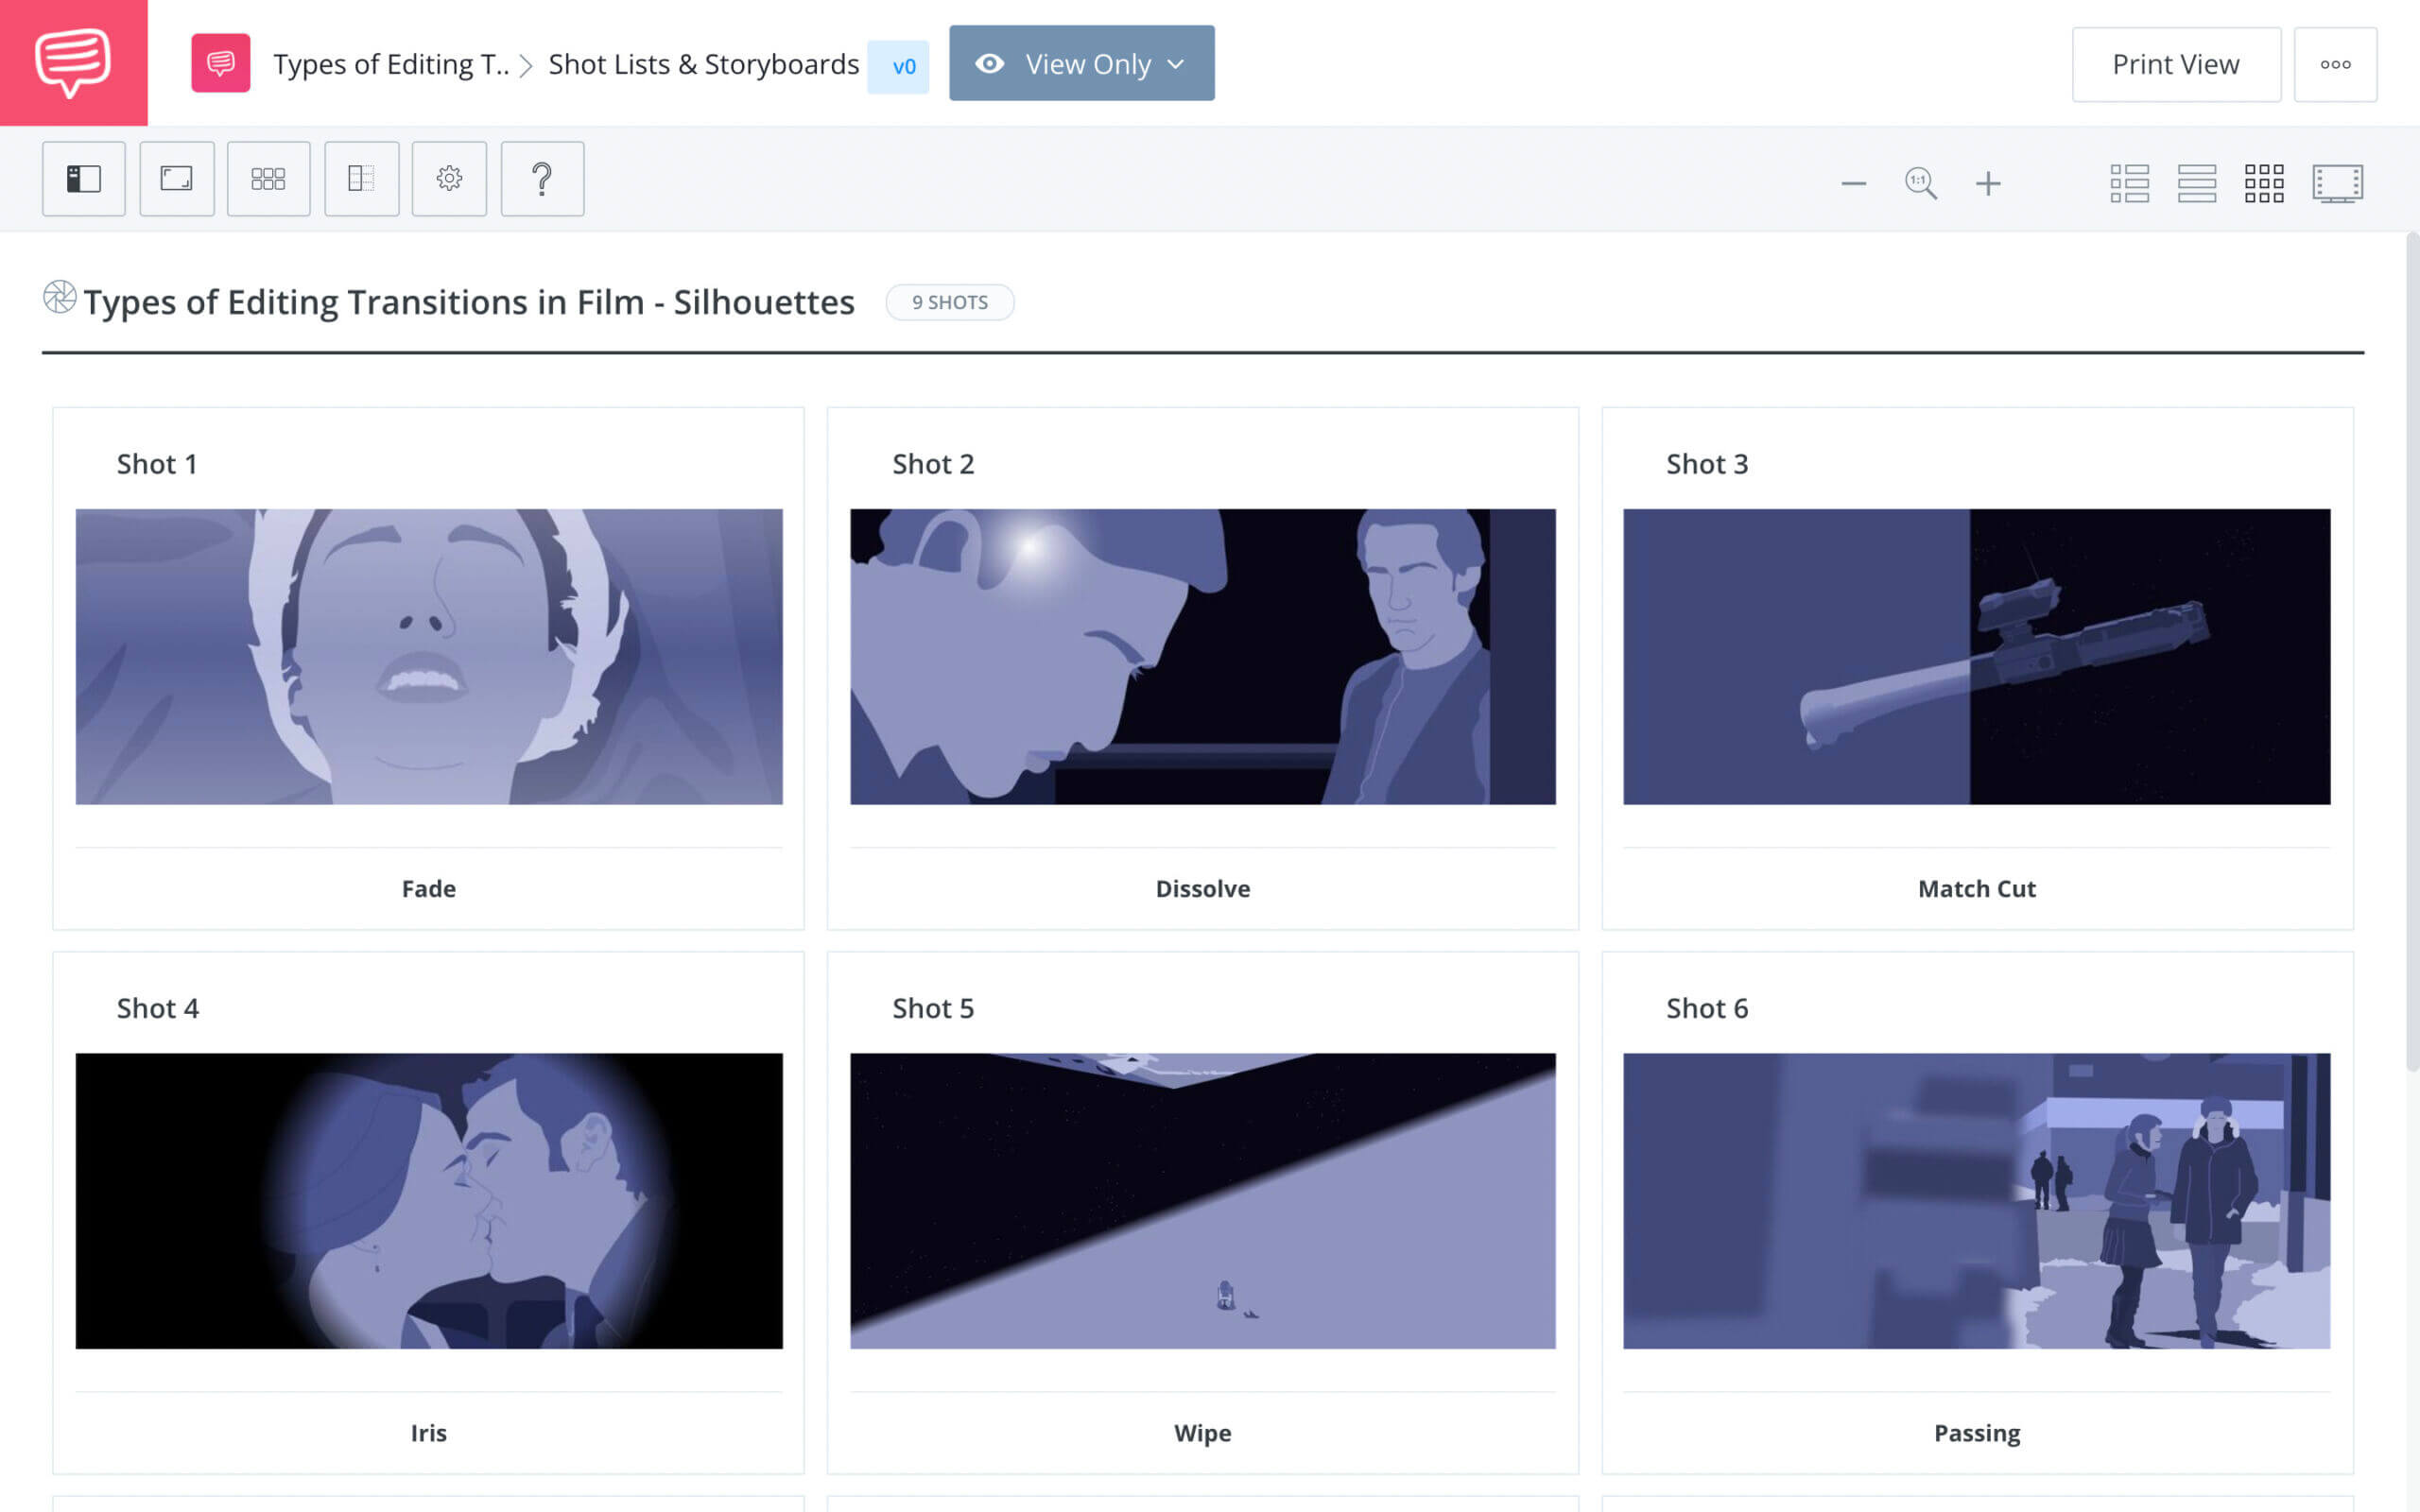
As we explore different types, keep this punctuation analogy in mind. Are you making a definitive statement (a cut), suggesting a lingering thought (a dissolve), or starting a new paragraph (a fade)?
The Professional's Toolkit: "Invisible" Transitions
Interestingly, most of the "transitions" used in professional filmmaking are actually specific types of cuts designed to be as seamless as possible. They connect shots so smoothly that the audience often doesn't consciously register the edit. Since you're interested in narrative short films, mastering these is key.
The following video provides an excellent overview of the most common and effective cuts and transitions used in Hollywood. We'll go through it in sections.
12 Most Used CUTS & Transitions in Hollywood
Let's watch '12 Most Used CUTS & Transitions in Hollywood' from Full Time Filmmaker. This is a fantastic resource that we'll break down to understand the editor's core toolkit.
We will watch specific segments of this video throughout the next section.
1. The Foundation: Standard Cut and Jump Cut
First, let's review the hard cut and its problematic sibling, the jump cut.
12 Most Used CUTS & Transitions in Hollywood
Watch this first segment, which covers the basic 'clean cut' and the 'jump cut.'
Watch from 01:05 to 04:00. Pay attention to how a jump cut can be both an unintentional error and a creative tool for showing the passage of time or creating urgency.
2. Audio-Led Transitions: The J-Cut and L-Cut
These are essential for editing dialogue. Instead of cutting the picture and sound at the exact same time, you let the audio from one clip lead into or extend over the other.
- L-Cut: The audio from the first clip continues playing over the visual of the second clip. This is great for showing a character's reaction while another character is still speaking.
- J-Cut: The audio from the second clip starts before we see the corresponding visual. This is perfect for leading the audience into a new scene or thought.
12 Most Used CUTS & Transitions in Hollywood
Now, let's see the J-Cut and L-Cut in action.
Watch from 04:00 to 05:29. Notice how the shape of the clips on the timeline gives these cuts their names ('L' and 'J'). You'll use these constantly when editing conversations.
3. Motion-Led Transitions: Cutting on Action and Match Cuts
Hiding an edit within a character's movement is one of the most effective ways to make it invisible.
- Cutting on Action: You cut from one shot to another (e.g., from a wide shot to a close-up) in the middle of a specific action, like a person opening a door or sitting down. The viewer's brain is focused on the action, not the cut.
- Match Cut: You connect two different shots that have a similar composition, action, or subject. This creates a strong visual and thematic link.
12 Most Used CUTS & Transitions in Hollywood
Let's look at transitions that rely on movement and composition.
Watch from 05:29 to 06:31 and then from 08:30 to 09:08. Observe how cutting on the peak of an action feels much smoother than cutting before or after it. For the match cut, see how it connects different scenes through visual similarity.
The Standard Effects: Dissolves and Fades
Now we move to what most people think of as transitions: effects you apply between clips. The most common and useful are fades and dissolves.
- Fade In/Out: Fading from or to a solid color (usually black). A fade-out provides a strong sense of finality, like the end of a chapter. A fade-in signals a new beginning.
- Cross Dissolve (or Crossfade): One shot gradually disappears while the next shot gradually appears. This is often used to show a passage of time, a change in location, or to create a gentle, dreamlike connection between scenes.
Let's return to our video guide to hear a crucial warning about their use.
12 Most Used CUTS & Transitions in Hollywood
This segment discusses fades and dissolves but also contains a key piece of advice for new editors.
Watch from 09:47 to 11:02. The presenter calls the crossfade a 'lazy man's way of editing' when used improperly. This reinforces our main principle: use transitions with purpose, not as a crutch to fix poorly planned cuts.
Putting It Into Practice
Now for the 'how'. The process of applying a transition is similar across most editing software, including Shotcut and CapCut. It typically involves finding the transitions panel and dragging an effect to the cut point between two clips on your timeline.
How to make video transition effects like a pro
Let's look at the general steps for applying a transition from the Vimeo blog article.
Read the short section 'How to add transitions to your videos'. It describes the simple drag-and-drop process common to most editors. You don't need to worry about the specific software mentioned; the concept is universal.
Your Turn:
Open Shotcut or CapCut with a couple of test clips.
- Place two video clips next to each other on the timeline.
- Find the transitions panel (in Shotcut, you do this by overlapping the clips; in CapCut, there's a dedicated 'Transitions' tab).
- Apply a Cross Dissolve (it may be called 'Dissolve' or 'Crossfade') between the two clips.
- Play it back. Now, try to adjust the duration of the transition. Make it very short (a few frames) and then very long (a few seconds). Notice how the timing dramatically changes the feeling of the edit.
Test your understanding!
You are editing a short film. You have a scene where a character sits by a window looking sad as day turns to night. You want to convey the passage of several hours in a single moment. Which of the following is the most appropriate choice and why?
- A hard cut from the day shot to the night shot.
- A fast, energetic "whip pan" transition.
- A slow cross-dissolve between the day and night shots.
Show answer
The best choice is 3. A slow cross-dissolve. A hard cut would be too abrupt and wouldn't convey the sense of time passing smoothly. A whip pan is high-energy and completely wrong for the sad, reflective mood. The slow dissolve visually blends the two moments, effectively communicating the passage of time while maintaining the quiet, somber tone of the scene.
Making the Right Choice: A Decision Framework
So, how do you decide? Here are some questions to ask yourself every time you're tempted to use a transition instead of a simple cut.
Transition to Better Editing... Using Transitions!
To wrap up the theory, let's read about using transitions effectively. This will give us a framework for making smart editing choices.
Read the first three parts of 'Section 3: Using Transitions Effectively' (up to 'Creating a Smooth Flow'). This section provides excellent advice on matching the transition to the narrative need and exercising restraint.
Based on that reading, here's your decision-making checklist:
- What is my narrative purpose? Am I showing time passing? Changing locations? Creating a link between ideas? Shifting the mood?
- Does the transition match the pace and mood? Don't use a slow, gentle dissolve in a fast-paced action sequence.
- Is a hard cut more effective? Always ask this first. If a cut works, use it.
- Am I being consistent? If you use a specific transition to mean something (e.g., a dissolve for a flashback), use it consistently for that purpose.
Conclusion
Today we've moved beyond the simple cut to understand transitions as a nuanced part of the editor's craft. You've learned that the most powerful transitions are often invisible cuts that rely on audio and motion, and that standard effects like dissolves should be used with clear, story-driven intent.
Key Takeaways:
- Story First, Transition Second: A transition must always enhance the story, pace, or mood. If it distracts, it's the wrong choice.
- The Hard Cut is King: It is your default and most-used tool.
- Master "Invisible" Cuts: J-Cuts, L-Cuts, and cutting on action are the hallmarks of a professional editor.
- Use Effects with Purpose: Use dissolves and fades for specific reasons like showing time passing or signaling a major scene change.
- Avoid the Gimmicks: Stay away from the library of star wipes, page peels, and other flashy built-in effects unless you have a very specific, stylistic reason (e.g., creating a retro feel).
In our next lesson, we will continue building our sequence by learning how to add and format titles and text overlays. This will allow you to add context, introduce speakers, and enhance the clarity of your videos.