Hello! Welcome back to our module on Vector Illustration Techniques.
In the last lesson, you learned how to use the Pen tool to create custom vector paths from scratch. You practiced creating straight lines, sharp corners, and basic curves. This was a huge step in moving beyond Figma's basic shape tools.
Today, we'll build directly on that foundation. This lesson focuses on how to modify vector shapes by editing points, handles, and curves. It's rare to draw a perfect shape on the first try; the real art and precision come from refining and editing your paths. Mastering these editing skills will give you the fine control needed to create polished, professional illustrations and icons.
1. Entering Vector Edit Mode and Basic Adjustments
Whenever you want to edit the individual points and paths of a vector shape (whether it's one you drew with the Pen tool or a basic shape like a rectangle), you need to enter Vector Edit Mode. You can do this by selecting the shape and pressing Enter or by double-clicking on it.
Once you're in this mode, you'll see the underlying vector points (or nodes) and the paths connecting them. Your main tools for editing here will be the Move tool (V) and the Bend tool.
Let's watch a quick video from Figma that demonstrates how to use these tools to manipulate points and curves.
Figma Tutorial: Pen Tool Basics & Vector Networks
This clip from the official Figma channel will show you how to use the Move tool to reposition points and the Bend tool to adjust curves. It also introduces a key shortcut for controlling handles.
Watch the section from 02:19 to 02:52. Pay close attention to how the Bend tool is used to pull out and adjust Bezier handles, and note the use of the Alt or Option key to control the handles independently.
To summarize:
- Move Tool (V): Select and drag individual points to change the fundamental structure of your shape.
- Bend Tool (Ctrl/Cmd + Drag): Click and drag on a straight path to pull out handles and create a curve, or click and drag an existing handle to modify a curve.
2. The Art of the Curve: Mastering Bezier Handles
The key to creating beautiful, fluid curves lies in understanding and manipulating Bezier handles. As you saw in the previous lesson, these handles appear when you create a curved point. Each handle has two properties that you can control:
- Angle/Direction: Determines the direction the path will take as it leaves the point.
- Length/Magnitude: Determines how far the curve extends, influencing its depth or "bulge."
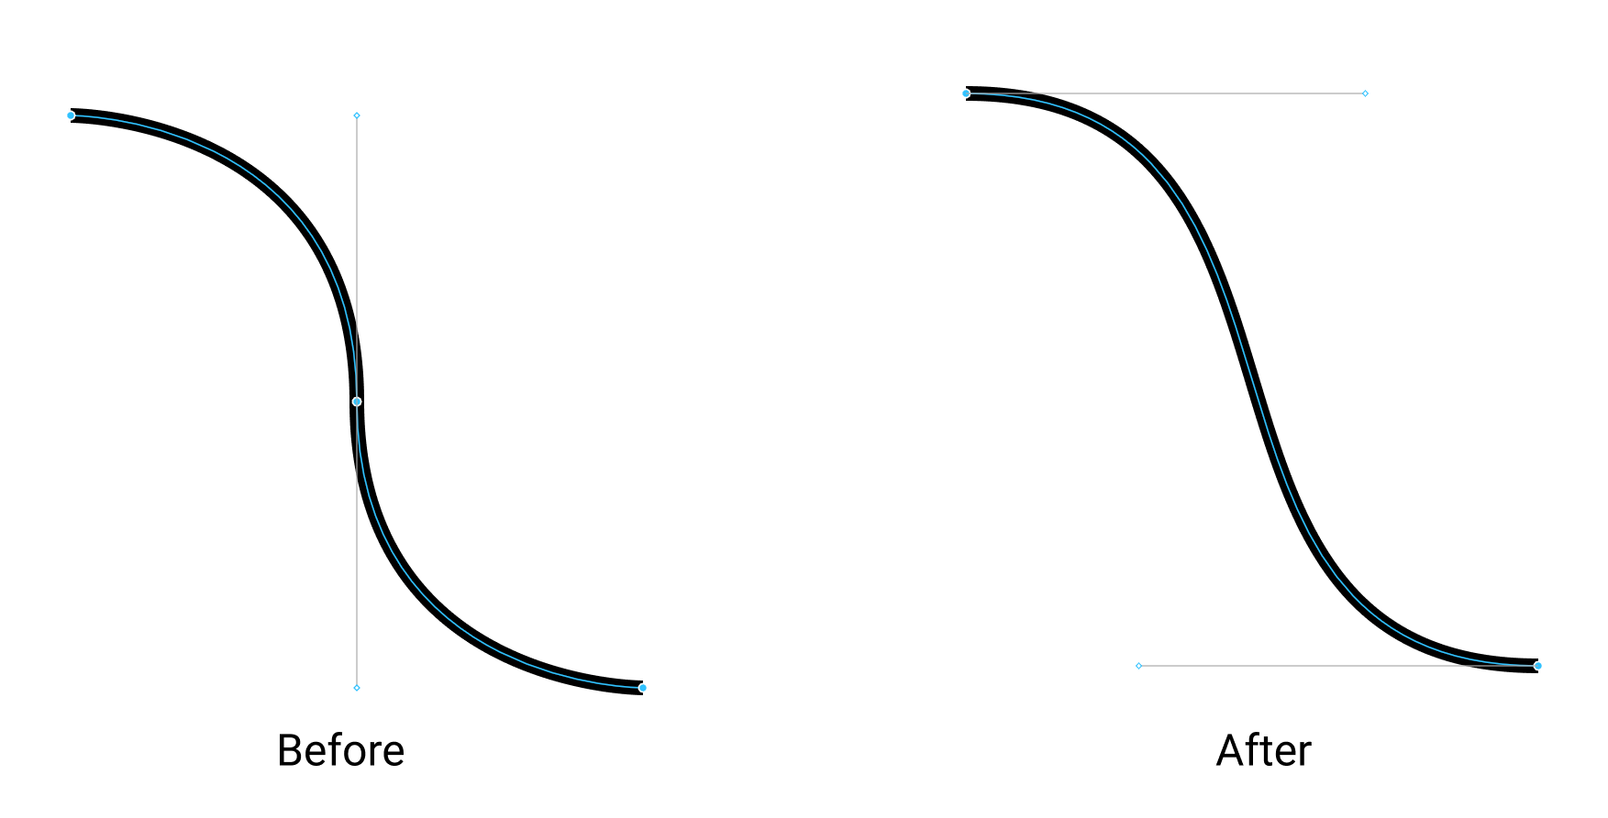
To give you even more control, Figma provides three Handle Mirroring settings in the right-hand panel when you have a point selected in Vector Edit Mode.
- No Mirroring: The default for corner points. Each handle moves completely independently. This is what you use to create a sharp corner where two curves meet, like the point of a heart.
- Mirror Angle: The handles will always stay in a straight line (180° apart), but you can change their lengths independently. This is great for creating smooth, flowing curves that aren't perfectly symmetrical.
- Mirror Angle and Length: The handles are perfectly symmetrical. Whatever you do to one handle (change its angle or length), the other one will mirror it exactly. This is essential for creating perfectly balanced shapes like circles and arches.
Let's watch a detailed explanation of these mirroring options.
Figma Tutorial: Master The Figma Pen Tool (2024)
This segment from the 'Master The Figma Pen Tool' tutorial by DesignWithArash clearly demonstrates the three handle mirroring options and how they affect your curves.
Watch from 03:56 to 04:38. Try to replicate what's shown in your own Figma file. Create a point, select it, and switch between the three mirroring modes to see how they behave when you drag a handle.
Test your understanding!
You are trying to draw a leaf shape. Which handle mirroring setting would be best for the sharp tip of the leaf, and which would be best for the smooth, curved base where it connects to the stem?
Show answer
For the sharp tip of the leaf, you would use No Mirroring to create a sharp corner (a cusp). For the smooth, curved base, you would likely use Mirror Angle or Mirror Angle and Length to ensure the curve is smooth and symmetrical as it transitions into the stem.
3. Practical Exercise: Shaping a Strawberry
Now let's put this theory into practice. We'll start with a basic ellipse and modify it to create a more organic strawberry shape. This exercise will combine moving points and adjusting handles.
To solidify your understanding, please read through the following short guide and then try to replicate the steps in Figma.
Create an illustration using pattern fills, vector networks ...
This guide from Figma's official documentation, 'Create an illustration', walks you through the exact steps of modifying a shape to create a strawberry body. It's a perfect, simple exercise for practicing vector modification.
Read the section titled 'Create the strawberry'. Follow the 8 steps described to turn a basic ellipse into a strawberry shape. Focus on how moving the bottom point and then adjusting the handles with 'Mirror angle and length' selected creates the final form.
This is the essence of vector editing: starting with a simple form and gradually refining it into something more complex and detailed.
4. Mini-Project: Creating a Perfect Circle
As a final challenge to test your handle manipulation skills, try creating a perfect circle using only the Pen tool and the Bend tool. It might sound difficult, but it's surprisingly simple if you use the right mirroring setting.
The following video clip will show you exactly how it's done. Watch it, and then try to do it yourself without looking.
Figma Tutorial: Master The Figma Pen Tool (2024)
This final clip from the 'Master The Figma Pen Tool' tutorial demonstrates an elegant way to create a perfect circle from a square. This is an excellent test of your understanding of the 'Mirror Angle and Length' setting.
Watch from 06:14 to 07:42. The key steps are: 1. Create a square with the Pen tool. 2. Set the handle mirroring to 'Mirror angle and length'. 3. Use the Bend tool on each corner point.
This exercise is fantastic because it proves that with precise control over points and handles, you can construct even geometrically perfect shapes from scratch.
Conclusion
Great job today! You've moved from simply creating paths to skillfully editing and refining them. This is a critical skill that separates beginners from proficient designers. You now have the power to sculpt your vector shapes with intention and precision.
Key Takeaways:
- To edit a vector shape, select it and press
Enterto go into Vector Edit Mode. - The Move Tool (V) repositions points, while the Bend Tool (Ctrl/Cmd) creates and adjusts curves.
- Bezier handles give you fine-tuned control over the direction and depth of your curves.
- The three handle mirroring options (No Mirroring, Mirror Angle, Mirror Angle and Length) are essential for creating different types of corners and curves.
In our next lesson, we'll take another big step forward. Now that you can create and modify individual shapes, we'll learn how to combine and subtract shapes to create complex forms using boolean operations. This will allow you to build intricate designs by merging simple elements together.