Introduction
In the previous lesson, you created the client-facing documentation for your portfolio project: a clear system diagram and a comprehensive user guide. You learned to communicate the value and function of a system to a business stakeholder.
This lesson completes your professional delivery toolkit by addressing the learning outcome: Develop technical handoff documentation, including maintenance procedures, for seamless project delivery.
We now shift our focus from the client to the engineer. The audience is no longer the sales manager who uses the system, but the IT team, the next developer, or your future self who will be tasked with maintaining, debugging, and extending it. This documentation answers the critical "why" and "how-to-fix" questions that are intentionally omitted from client-facing materials.
Mastering this skill is the final step in transitioning from an implementer to a systems architect. It is the foundation upon which professional services like ongoing maintenance retainers are built, and it is a non-negotiable standard for delivering production-grade systems.
Part 1: The Engineer's Blueprint: In-Workflow and External Docs
Technical documentation lives in two places: inside the workflow itself and in external files that accompany it. Both are essential for creating a maintainable system.
The most comprehensive guide for this is a blog post by Evalics. It covers the full spectrum of n8n documentation best practices. We will use it as our primary reference.
n8n Workflow Documentation & Best Practices: A Complete Guide ...
This guide, 'n8n Workflow Documentation & Best Practices', is your new standard operating procedure. It covers everything from inline comments to version control. We will dissect its key components.
Study these sections in order: 'Comments and Annotations in Workflow Definitions': Read this entire section. Pay close attention to the best practices for using Sticky Notes, Node Descriptions, and the crucial principle of 'Document the Why, Not Just the What'. This is the first layer of documentation. 'Best Practices for Inline Documentation': Reinforce the core principles of effective commenting. 'Documenting Workflows (JSON Export + README)': Focus on the 'Creating README Files' subsection. Internalize the provided README template. This external document is the central pillar of your technical handoff.
Synthesizing the Principles
From this reading, we can establish a two-pronged documentation strategy:
-
Inside the Workflow (The "Why"): Use Sticky Notes and node descriptions to explain complex logic, business rules, and design choices. Why was this API endpoint chosen over another? Why is there a
setTimeouthere? This context is invaluable for anyone who has to debug or modify the workflow. A well-annotated workflow should be understandable at a glance. -
Outside the Workflow (The "What" and "How"): For every workflow you build, you will now create a corresponding
README.mdfile. This Markdown file lives alongside the workflow's exported JSON file (which you should be versioning in Git). It serves as the formal technical manual and must contain:- Purpose: What business problem does this solve?
- Trigger: How is this workflow initiated? (Webhook URL, schedule, etc.)
- Dependencies: What credentials, external services, or other workflows does it rely on?
- Configuration: Which environment variables or key settings need to be configured for it to run? This is critical for deployment in a new environment.
- Testing: How can a developer test that the workflow is functioning correctly? What sample data should be used? What is the expected outcome?
- Maintenance Info: Who owns it, and when was it last updated?
Part 2: The Technical Walkthrough: Accelerating Understanding
Written documentation is essential for reference, but a recorded walkthrough can drastically reduce the time it takes for another engineer to get up to speed. This is not the high-level demo you give to a client; this is a screen-share for a peer.
You will demonstrate the process, explaining the data flow, node configurations, and any non-obvious logic.
How To Deliver Your AI Automation Project To Clients Like a PRO!
While this video is framed for client delivery, the technique shown is perfectly suited for creating a technical walkthrough. Pay attention to how a detailed video can be repurposed into a written Standard Operating Procedure (SOP).
Watch the segment from 17:11 to 21:45. Focus on: The Style of Narration: Notice how the presenter walks through each node, explaining its purpose and configuration in simple terms. The Free SOP Method: Observe the process: record the video, get the transcript from Loom, and use ChatGPT to structure it into a written document. You can then add screenshots and integrate this into your README.md file. This is a highly efficient, no-cost workflow.
This combination of a README.md file and a brief technical video walkthrough provides a powerful and comprehensive handoff package.
Part 3: Engineering for Failure: The Runbook
A professional system isn't just about the happy path. It's about having a documented, repeatable procedure for when things go wrong. In Site Reliability Engineering (SRE), these procedures are called runbooks. Creating them is a hallmark of a true systems architect.
A runbook is a detailed guide for completing a specific operational task, such as diagnosing a failure, performing a manual data correction, or recovering from an outage.
Create Effective Runbook Templates for enhancing ...
This article from Squadcast provides a clear introduction to the concept of runbooks from an SRE perspective. This is the level of operational rigor you should be aiming for.
Read these sections to understand the philosophy and structure of a runbook: Read the introduction to understand the purpose of a runbook (e.g., reducing Mean Time To Resolve). Study the 'Runbook template basics' table to learn the core components of a runbook. Review the 'Recommendations for designing a runbook template' to understand the best practices.
To visualize a structured runbook, consider this template.
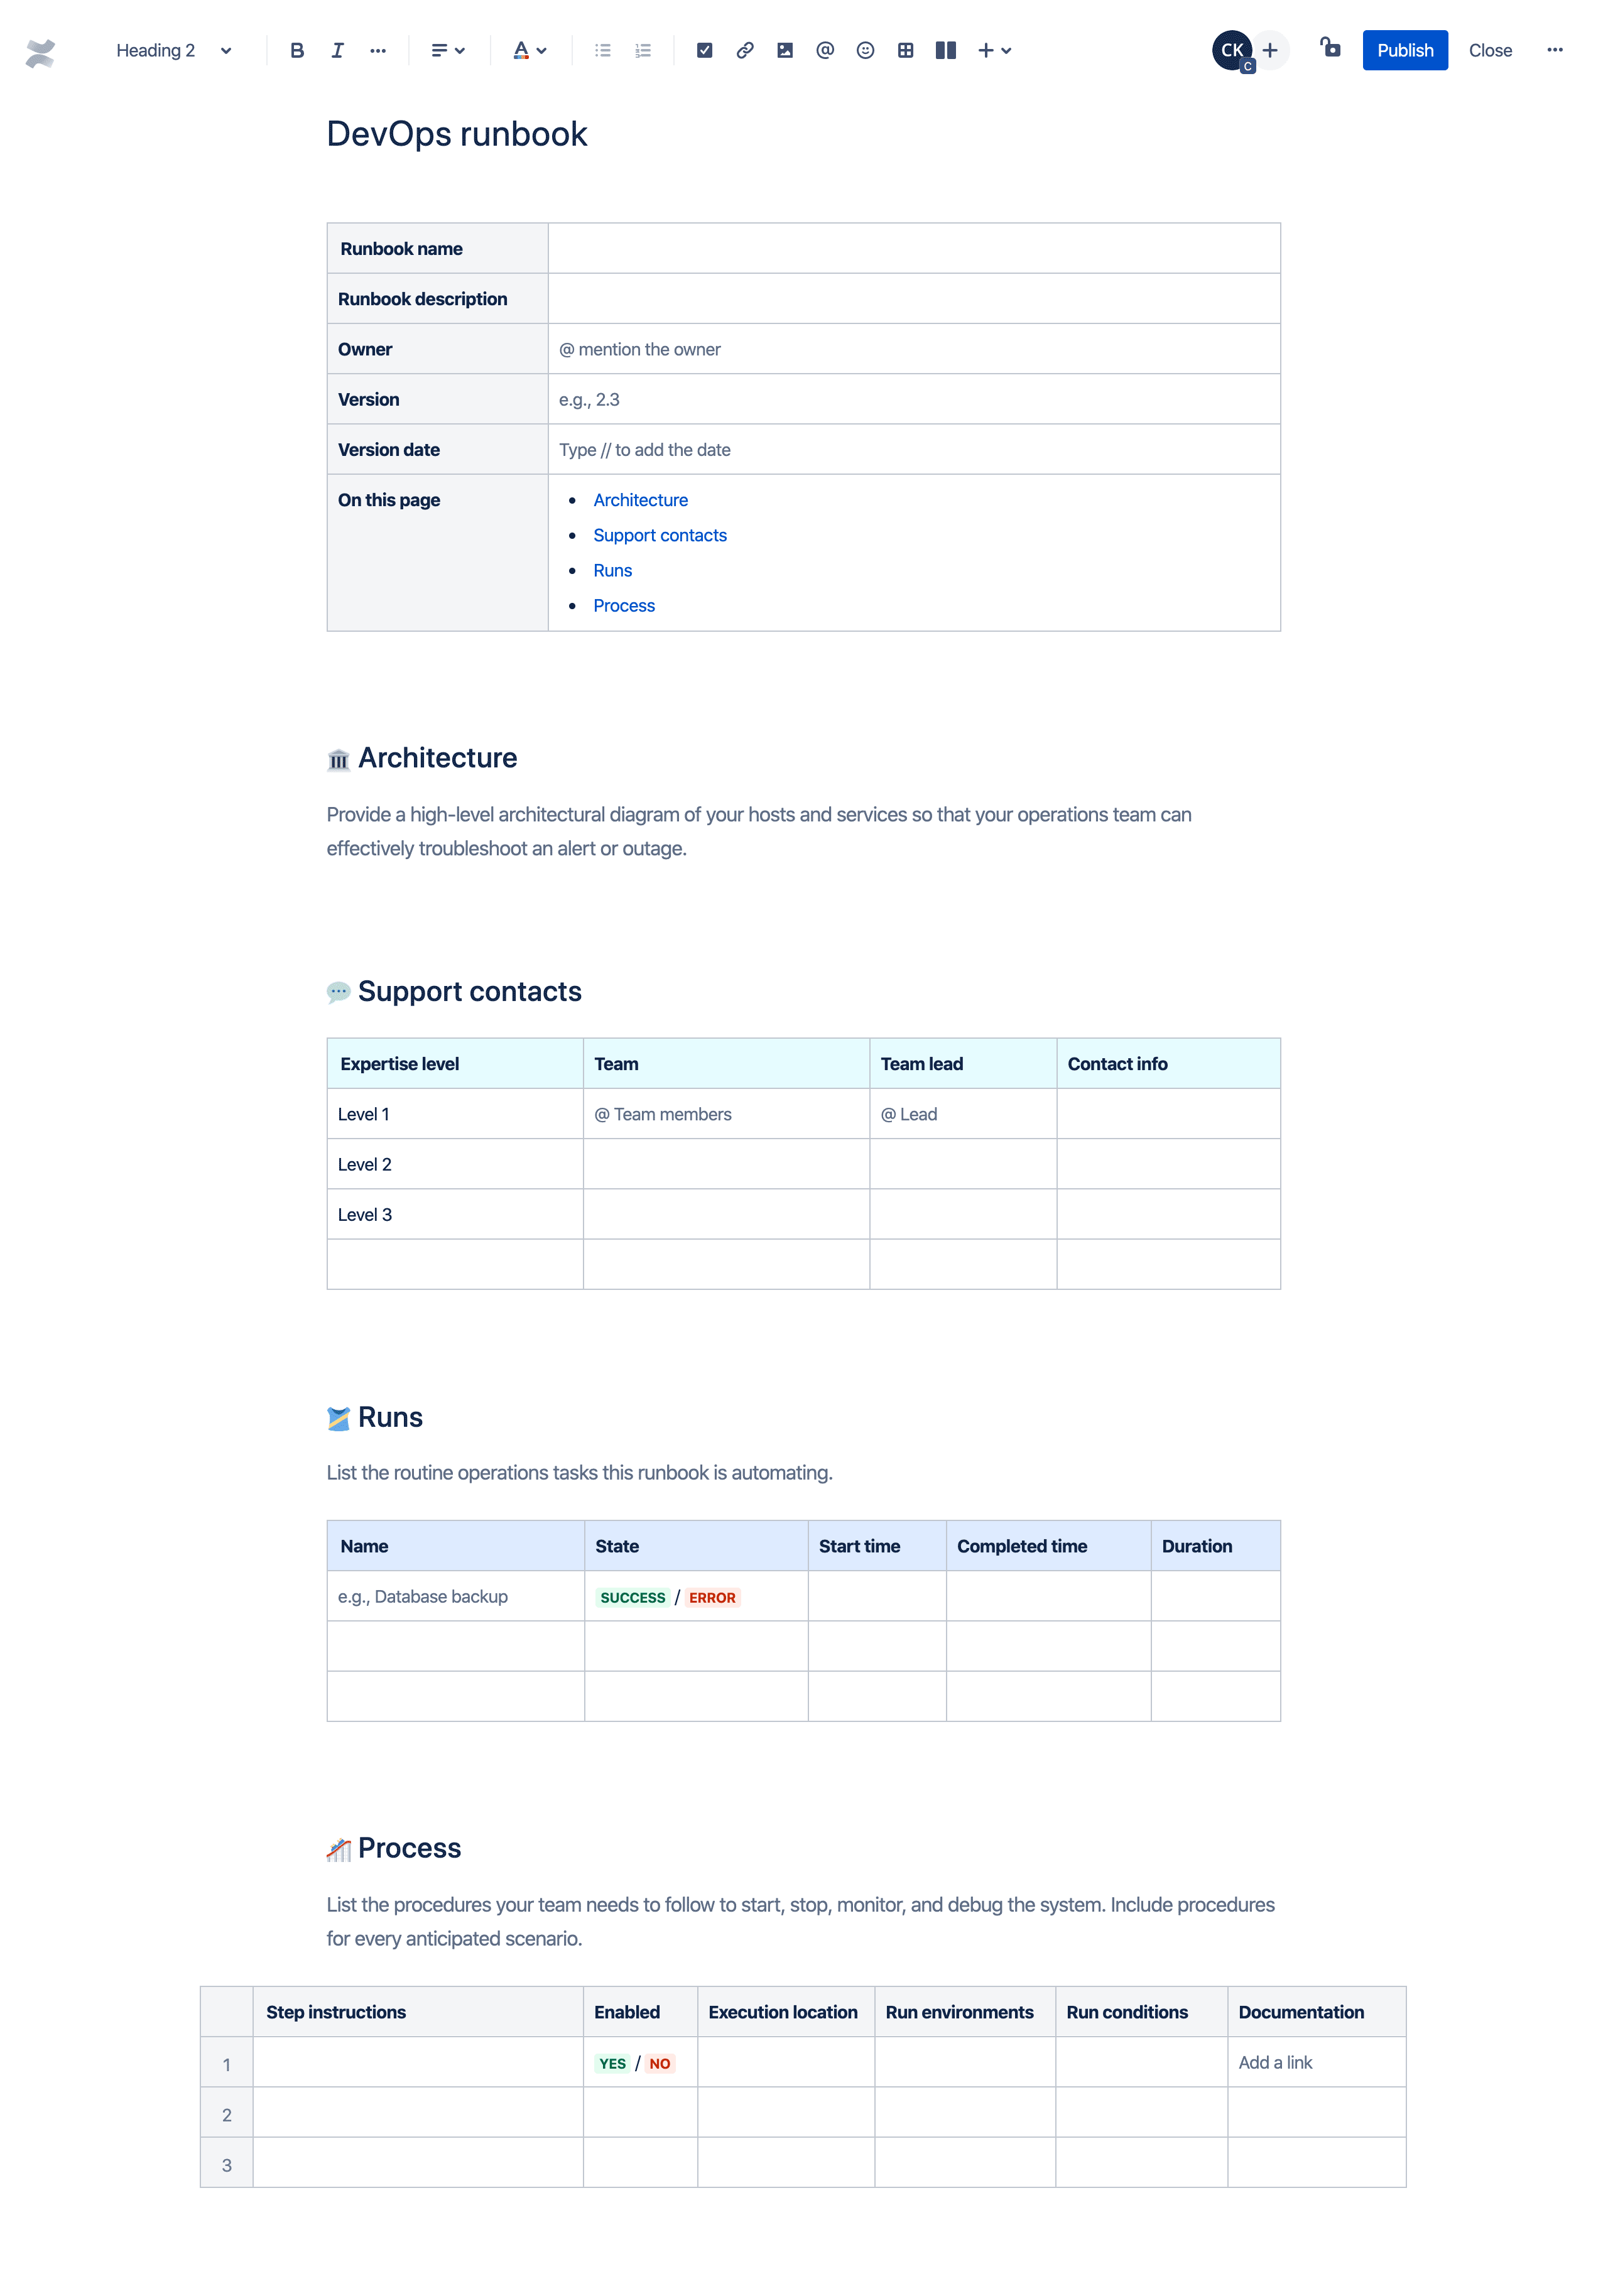
For your n8n projects, you should create runbooks for predictable failures or essential maintenance tasks. Examples include:
- Runbook: Reprocessing a Failed Payment.
- Trigger: A payment fails and is sent to the dead-letter queue.
- Steps: 1. Locate the failed item in the execution log. 2. Identify the error reason. 3. Correct the source data (e.g., in the CRM). 4. Manually trigger a sub-workflow to re-attempt the charge.
- Runbook: Rotating an Expired API Key.
- Trigger: A workflow fails with a
401 Unauthorizederror. - Steps: 1. Go to the service provider's developer console. 2. Generate a new API key. 3. Navigate to the n8n credentials page. 4. Update the relevant credential with the new key. 5. Rerun the failed execution.
- Trigger: A workflow fails with a
Practical Task: The Full Technical Handoff
You will now create the complete technical handoff package for the "AI Lead Intelligence Engine" from your portfolio. This complements the client-facing documents you created in the last lesson.
Scenario:
You have successfully delivered the project. The client is happy. Now, you are handing over the system to their newly hired in-house IT specialist, "Alex," for long-term maintenance. Alex is a competent developer but has never seen this n8n workflow before. Your documentation must enable Alex to understand, maintain, and troubleshoot the system without needing to contact you.
Your Task:
Create the technical handoff package for Alex.
Deliverables
-
Annotated Workflow (Conceptual): In your actual n8n project, add Sticky Notes and descriptions to the key nodes of the "AI Lead Intelligence Engine" workflow. For this exercise, describe in 2-3 sentences the content of two Sticky Notes you would add and why. For example: "A note explaining the data validation block, detailing the regex used for email validation and the reason for checking company size > 1."
-
README.mdFile: Create a comprehensiveREADME.mdfile for the workflow. It must be written in Markdown and follow the structure from theevalics.comarticle (Purpose, Trigger, Dependencies, Configuration, etc.). This document must be written for a technical audience and include details about environment variables for API keys and webhook URLs. -
Maintenance Runbook: Create a simple runbook in Markdown format for the following scenario: "Procedure for Handling and Reprocessing Leads from the Dead-Letter Queue." This runbook should follow the structured format from the Squadcast article, including sections for Task ID, Description, Step-by-step Details, Validation, etc.
Evaluation Criteria
- Technical Depth: Does the documentation provide sufficient technical detail for another developer to maintain the system? Are environment variables, dependencies, and API endpoints clearly specified?
- Clarity and Structure: Is the
README.mdwell-structured and easy to navigate? Is the runbook clear, actionable, and unambiguous? - Maintainability Focus: Does the documentation effectively explain the "why" behind design decisions? Does it empower a new owner to confidently manage the system?
- Professional Standard: Does the complete package represent the level of rigor expected from a senior systems architect delivering a production-ready solution?
Conclusion
You have now built the two critical pillars of professional project delivery: the client-facing guide and the technical handoff package. By creating documentation for both the user and the maintainer, you demonstrate a level of thoroughness that commands higher rates and builds lasting trust. This documentation is not an optional extra; it is a deliverable that protects the client's investment and your professional reputation.
Key Takeaways:
- Differentiate Your Audience: Documentation for users focuses on "how to use," while documentation for engineers focuses on "how to maintain and why it was built this way."
- Document Inside and Out: Use in-workflow annotations (Sticky Notes) for context-specific "why" explanations and a
README.mdfile for the formal "what" and "how." - Embrace Runbooks: Proactively document procedures for common failures and maintenance tasks. This demonstrates foresight and builds resilient systems.
- Technical Documentation is a System Asset: Treat it as a core component of the project, as valuable as the code or workflow itself.
Preview of the Next Phase:
With this lesson, you complete the "Professional Delivery and Client Management" module. You have mastered the technical and procedural standards of a high-end automation engineer. Now, it's time to commercialize that expertise. The next phase, Freelance Business Strategy, will shift our focus from building systems to building a business. You will learn how to position your skills, find clients, structure winning proposals, and land your first paid project.