Hello! Welcome back to our module on Visual Storytelling with AI.
In our last lesson, you learned how to generate compelling cover art concepts using AI text-to-image tools. We focused on crafting detailed prompts based on genre conventions to create the core visual for your book.
Today, we'll take that raw artwork and transform it into a professional, market-ready book cover. This lesson will guide you through the process of assembling a complete book cover by combining your AI-generated imagery with text using the free design tool, Canva. We will cover everything from setting up your file for both ebook and print formats to adding typography and exporting a final product ready for Amazon KDP.
1. Preparing Your Canvas in Canva
Before we can start designing, we need a correctly sized canvas. The requirements for an ebook cover (front only) are different from a print cover (front, back, and spine). Since your goal is to publish on platforms like Amazon KDP, we'll use their specifications.
Canva is an excellent choice for this task, as it's a powerful and free browser-based tool that doesn't require the steep learning curve of software like Photoshop, aligning perfectly with your preference for accessible tools.
How to Design a Book Cover: A 13-Step Complete Guide ...
To understand why Canva is a great fit for self-publishers, take a quick look at this article from Online Books Publishing.
Read the short sections 'Why Canva Is a Solid Photoshop Alternative' and 'Who This Canva Book Cover Design Tutorial Is For'. This will reinforce why we're choosing this tool for our workflow.
Ebook Cover Setup (The Simple Start)
For an ebook, you only need the front cover. This is the easiest format to begin with.
- Go to Canva.com.
- On the home page, search for "Book Cover" or "Ebook Cover".
- Canva will offer numerous templates and a blank canvas sized appropriately for most ebook retailers. A common size is 1600 x 2560 pixels.

Print Cover Setup (The Professional Workflow)
Print covers are more complex because they include the front, back, and spine in a single "wraparound" image. The width of the spine depends on your paper type and final page count, so it's unique to every book.
The best practice is to use Amazon KDP's own calculator to get the exact dimensions. The following video provides an essential walkthrough of this process.
How To Design A PRINT Book Cover For Amazon KDP For Beginners! EASY Canva Tutorial | Book Covers DIY
The YouTube channel BookCoversDIY has an excellent, detailed tutorial on setting up a print cover. This video will show you how to get the precise dimensions for your project.
Watch the video from the beginning until 13:20. This critical segment will walk you through: Using the KDP Cover Calculator to find your book's exact dimensions. Downloading the KDP template. Creating a custom-sized canvas in Canva. Uploading and understanding the template's zones (safe area, bleed, spine).
After following these steps, you will have a Canva project with the official KDP template overlaid, clearly showing where your front cover, back cover, spine, and barcode will be.
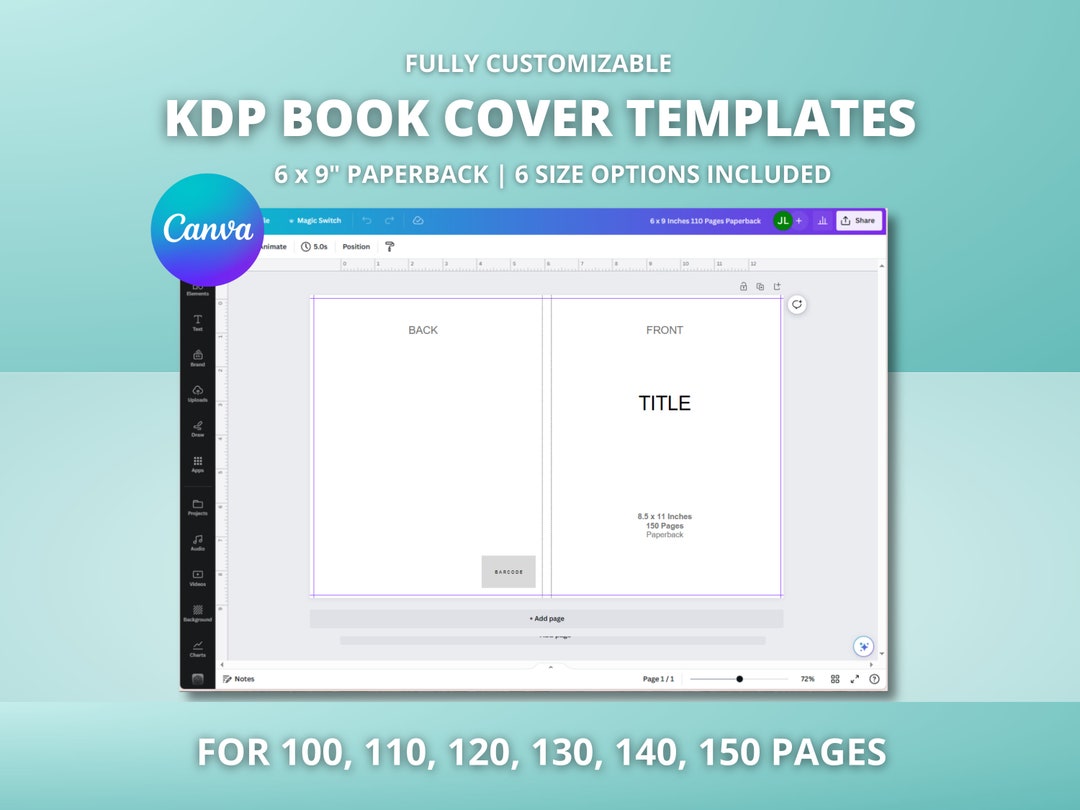
2. Assembling Your Cover: Image and Typography
Now for the creative part. We'll upload the AI image you generated in the last lesson and add the text elements that make it a cover.
The process involves:
- Uploading your AI-generated artwork to Canva.
- Positioning the artwork on the canvas. For a print cover, you might have it wrap around the entire cover or just use it for the front.
- Adding text for your title, author name, and subtitle (if any).
- Choosing fonts that match your genre and are highly readable. A good rule of thumb is to use no more than two different fonts.
- Establishing hierarchy. The title should be the most prominent text. Use size, color, and placement to guide the reader's eye.
- Ensuring readability. Your text must stand out from the background image. You can achieve this by placing text over a less-busy part of the image, or by adding effects like a subtle shadow or a semi-transparent shape behind the text.
The following video is a fantastic demonstration of bringing these elements together in Canva, using images generated from Leonardo.AI.
How To Create Book Covers Using Leonardo AI | Step-By-Step Tutorial For Beginners
Let's watch how a designer takes AI-generated images and turns them into multiple, polished cover designs in Canva. This video is packed with practical techniques.
Watch the segment from 28:50 to 44:28. Pay close attention to how the creator: Uploads the AI art into Canva. Experiments with different layouts (full image, framed image). Adds and styles the title and author name. Uses shapes and color palettes extracted from the image to create a cohesive design. Creates multiple versions to compare, a key professional practice.
Test your understanding!
Imagine your AI-generated artwork is very detailed and "busy" across the entire image. What are three different strategies you could use in Canva to ensure your book title is still easy to read when placed over it?
Show answer
- Use a Shape Overlay: Place a semi-transparent rectangle or shape behind the text. This mutes the background image just enough for the text to pop without completely obscuring the art.
- Apply Text Effects: Add a subtle "Lift" or "Shadow" effect to the text. This creates a small amount of separation between the letters and the background, increasing contrast.
- Frame the Image: Instead of making the artwork a full-bleed background, place it within a frame on the cover and put the title in the clear space above or below it.
3. Finalizing for Print and Exporting
Once your design is complete, there are a few technical checks before you can export your final file for KDP.
Image Resolution and File Format
For print books, Amazon KDP requires images to be at least 300 DPI (dots per inch) to avoid looking blurry. AI image generators often create files at a lower web resolution (e.g., 72 or 96 DPI). You will likely need to upscale your image.
I curated a picture book for Amazon KDP with ChatGPT ...
This article from a Medium user who published a book with AI highlights some critical technical requirements from KDP.
Read the sections 'You might need to upscale the image to meet Amazon KDP’s resolution' and 'Book layout and editing with Canva'. The key takeaways are: The formula to calculate the required pixel dimensions for 300 DPI. The recommendation to use an upscaler (Canva has a built-in 'AI photo enhancer' or you can use external free tools). The crucial tip to select the 'Flatten PDF' option when downloading your print cover.
Final Checks and Export
Before downloading, you must delete the KDP template layer. Then, you can export.
- For Ebooks: Download as a
JPGorPNGfile. - For Print: Download as
PDF Print. Make sure to check the box for "Flatten PDF" to merge all layers into one, which prevents upload errors on KDP.
This final video segment shows you how to do the final quality check and export your print-ready file.
How To Design A PRINT Book Cover For Amazon KDP For Beginners! EASY Canva Tutorial | Book Covers DIY
Let's return to the 'How To Design A PRINT Book Cover' tutorial for the final steps.
Watch the video from 38:31 to the end (53:42). This will show you how to: Use the template with transparency to do a final quality assurance check, ensuring all text is in the safe zones. Delete the template layer before downloading. Name your file and download it in the correct 'PDF Print' format with the PDF flattened.
Conclusion
Congratulations! You have now bridged the gap between raw AI art and a finished, professional book cover. You've learned how to set up your project for both ebook and print, combine imagery with effective typography in Canva, and export a file that meets the technical specifications for Amazon KDP.
Key Takeaways:
- Use the KDP Cover Calculator to get precise dimensions for print covers.
- In Canva, combine your AI image with text, focusing on hierarchy, genre-appropriate fonts, and readability.
- For print, ensure your cover image is upscaled to 300 DPI to guarantee a high-quality, crisp final product.
- Always perform a final check using the KDP template to ensure all elements are in the safe area.
- When exporting a print cover, delete the template layer and download as a flattened PDF Print file.
Preview of the Next Lesson:
With your cover designed, our focus shifts from the outside of the book back to the inside. The next module, "Editing and Polishing Your Manuscript," begins with the lesson "Use AI tools to identify and correct common issues in AI-generated text." We'll explore how to leverage AI once more, this time to refine the logical flow, fix repetition, and improve the overall quality of your written content.