Recommended resources
The freely available resources this lesson will direct you to.
Hello Alex,
Welcome to the sixth lesson in our course on building your secure ThinkPad. In our last session, we delved into the theory of cryptographic hashes and digital signatures, understanding how they provide the essential guarantees of integrity ("what") and authenticity ("who") for software.
Today, we transition from theory to practice. Our learning outcome is to create a bootable Qubes OS installation USB drive. This is the first major hands-on step in our project, where we prepare the physical media needed to install our new, secure operating system. We will download the necessary files from the official source and then use a powerful, fundamental tool to write the installer to a USB drive.
This lesson directly builds on the last one by having you acquire the very files we'll need to verify in our next session, setting the stage for the crucial GPG verification process.
Estimated time to complete: 60 minutes (this includes file download time, which may vary).
Recap from the Previous Lesson
- Cryptographic Hashes (e.g., SHA-256) provide a "digital fingerprint" to verify data integrity.
- Digital Signatures use a public/private key pair to verify the authenticity of the data's source.
- The combination of these two tools allows us to create a verifiable chain of trust, ensuring the software we download is exactly what the developers intended, free from tampering.
1. Preparation: Assembling Your Tools
Before we begin, let's ensure you have everything you need. The integrity of this initial process is important, as it forms the foundation for the security of the entire system.
- A Secure Computer: You should perform these steps on a computer you trust. This means an up-to-date operating system (e.g., a patched Linux distribution, macOS, or Windows) that is not already suspected of compromise. Avoid using public or untrusted computers.
- A Quality USB Drive: You will need a USB drive of at least 8 GB, though 16 GB or 32 GB is recommended to be safe. The Qubes OS ISO is large, and using a reliable, reasonably fast USB drive from a reputable brand can prevent frustrating write errors or installation failures. This USB drive will be completely erased.
- A Stable Internet Connection: The Qubes OS ISO file is several gigabytes. A stable connection will make the download process smoother.
2. Downloading the Qubes OS Installation Files
Our first action is to download the necessary components from the official Qubes OS project website. We need more than just the installer itself; we also need the files that will allow us to verify it.
- Navigate to the [Unknown resource ID: https://www.qubes-os.org/downloads/].
- You will see the latest stable release listed. For that release, you need to download three separate files:
- The ISO Image: This is the main installation file, typically named
Qubes-R[version]-x86_64.iso. - The Detached Signature: This is a small file with a
.ascextension (e.g.,Qubes-R[version]-x86_64.iso.asc). This file contains the digital signature from the Qubes developers, which we will use to verify authenticity. - The Digest (Hash) File: This file, often named with a
-DIGESTSsuffix, contains a list of cryptographic hashes (SHA256, SHA512, etc.) for the ISO. This is the "fingerprint" we will use to verify integrity.
- The ISO Image: This is the main installation file, typically named
Save all three files to the same directory on your computer. We will not use the signature and digest files today, but having them ready is essential for our next lesson.
3. Creating the Bootable Drive with dd
With the ISO file downloaded, we need to write it to your USB drive. This is not a simple file copy. We must perform a block-level, bit-for-bit copy of the ISO image directly onto the drive, which will make it bootable.
For this task, we will use dd, a core command-line utility available on all Unix-like systems (including Linux and macOS).
Why dd?
Given your technical background, dd is the ideal tool. It is powerful, direct, and ubiquitous. More importantly, from a security perspective, it's a fundamental part of the operating system. By using dd, we avoid adding a third-party GUI application to our trusted machine just for this one task. This aligns perfectly with our principle of minimizing the Trusted Computing Base (TCB).
Step 3.1: Identify Your USB Drive
This is the most critical step. An error here can result in wiping your computer's main hard drive. Proceed with caution.
- Open a terminal.
- Before you insert your USB drive, run the command
lsblk. This will list all block devices (your hard drives, SSDs, etc.) connected to your system. Familiarize yourself with the output. You will likely see devices namedsda,sdb, ornvme0n1. - Now, insert your USB drive and run
lsblkagain. You should see a new device appear in the list. This is your USB drive. Note its name (e.g.,/dev/sdc,/dev/sdd). Do not use a partition number like/dev/sdc1. We need the whole device.
Double-check the device name and size to be absolutely certain you have identified the correct one.
Step 3.2: Write the ISO to the USB Drive
Now, we will execute the dd command. The official Qubes OS documentation provides the exact command structure we need.
Reading time: ~5 minutes.
Please review the following section from the official documentation. Focus on understanding the command and its parameters.
Installation guide (Linux ISO to USB)
Based on the guide, the command you will use looks like this. Navigate to the directory where you downloaded your files and execute:
sudo dd if=Qubes-RX-x86_64.iso of=/dev/sdY status=progress bs=1048576 conv=fsync
Let's break this down:
sudo: You need administrator privileges to write directly to a block device.if=Qubes-RX-x86_64.iso: This specifies the input file. Replace the filename with the exact name of the ISO you downloaded.of=/dev/sdY: This specifies the output file (your USB device). Replace/dev/sdYwith the device name you identified in the previous step.status=progress: This provides a helpful status bar so you can see that the process is working.bs=1048576: Sets the block size to 1 MiB (1024*1024bytes). This is not strictly required but can significantly improve the speed of the copy.conv=fsync: This is a crucial parameter. It ensures that the write cache is flushed and all data is physically written to the USB drive before the command reports completion. This prevents data corruption from removing the drive too early.
The process will take several minutes. Once the command completes and you are returned to the prompt, the bootable USB drive is ready.
4. Alternative: GUI-Based Tools
While dd is the recommended method for its directness and security posture, it's useful to be aware of graphical alternatives, especially if you were working on a Windows machine.
The two most common tools are Balena Etcher (cross-platform) and Rufus (Windows).
Qubes OS is the perfect operating system for security- ... (Creating a bootable drive)
The article above demonstrates the process using Balena Etcher. It's a simple three-step process: select the ISO, select the USB drive, and flash.
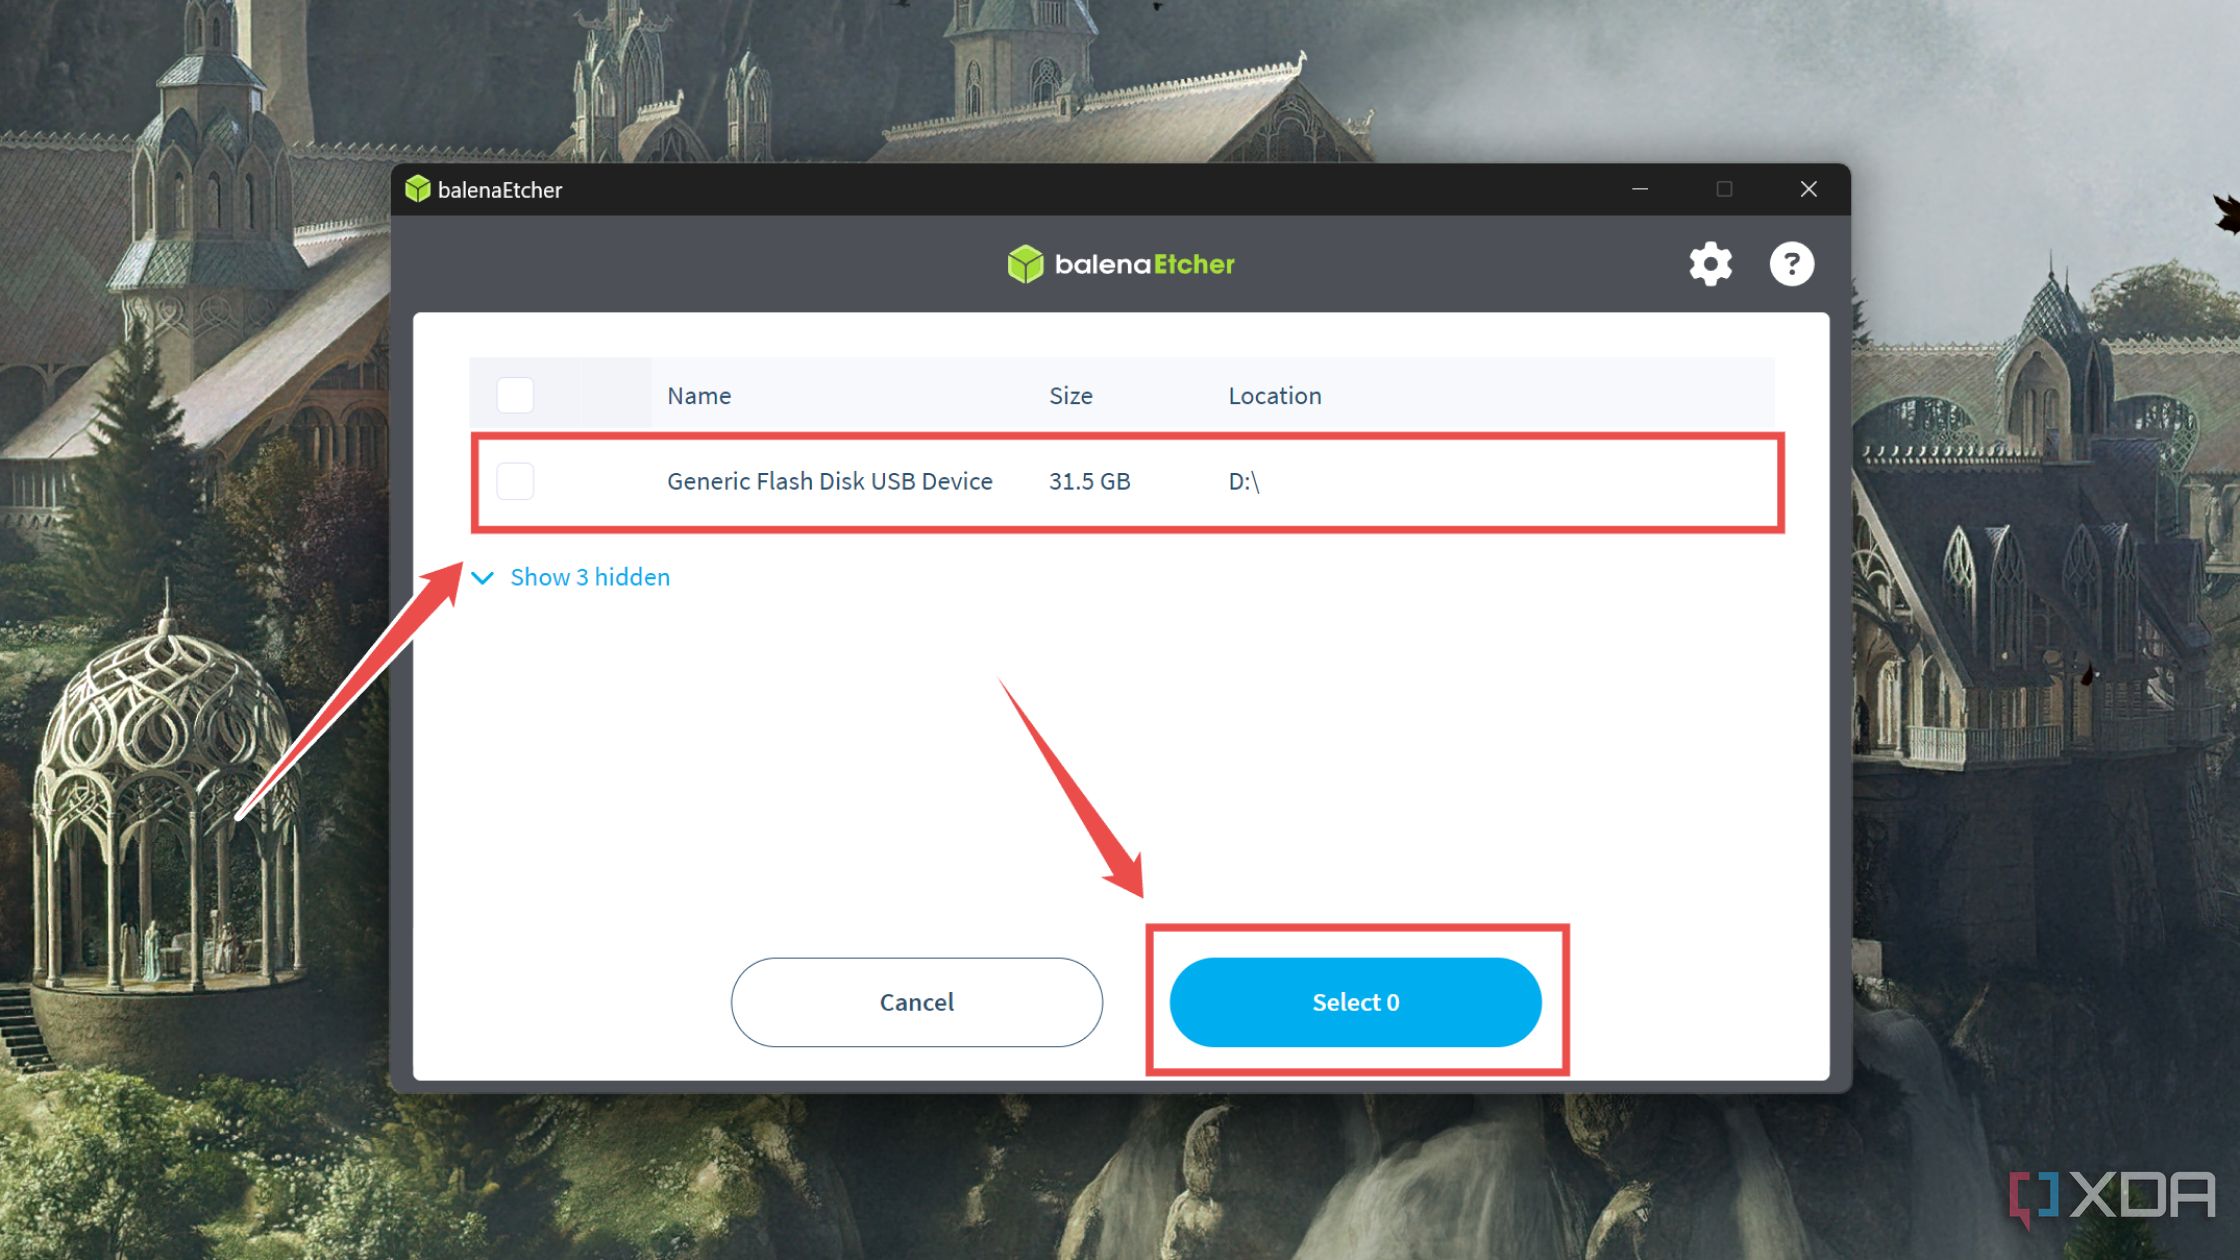
Caption: The Balena Etcher interface for selecting the target USB drive. The user must confirm the correct device before proceeding.
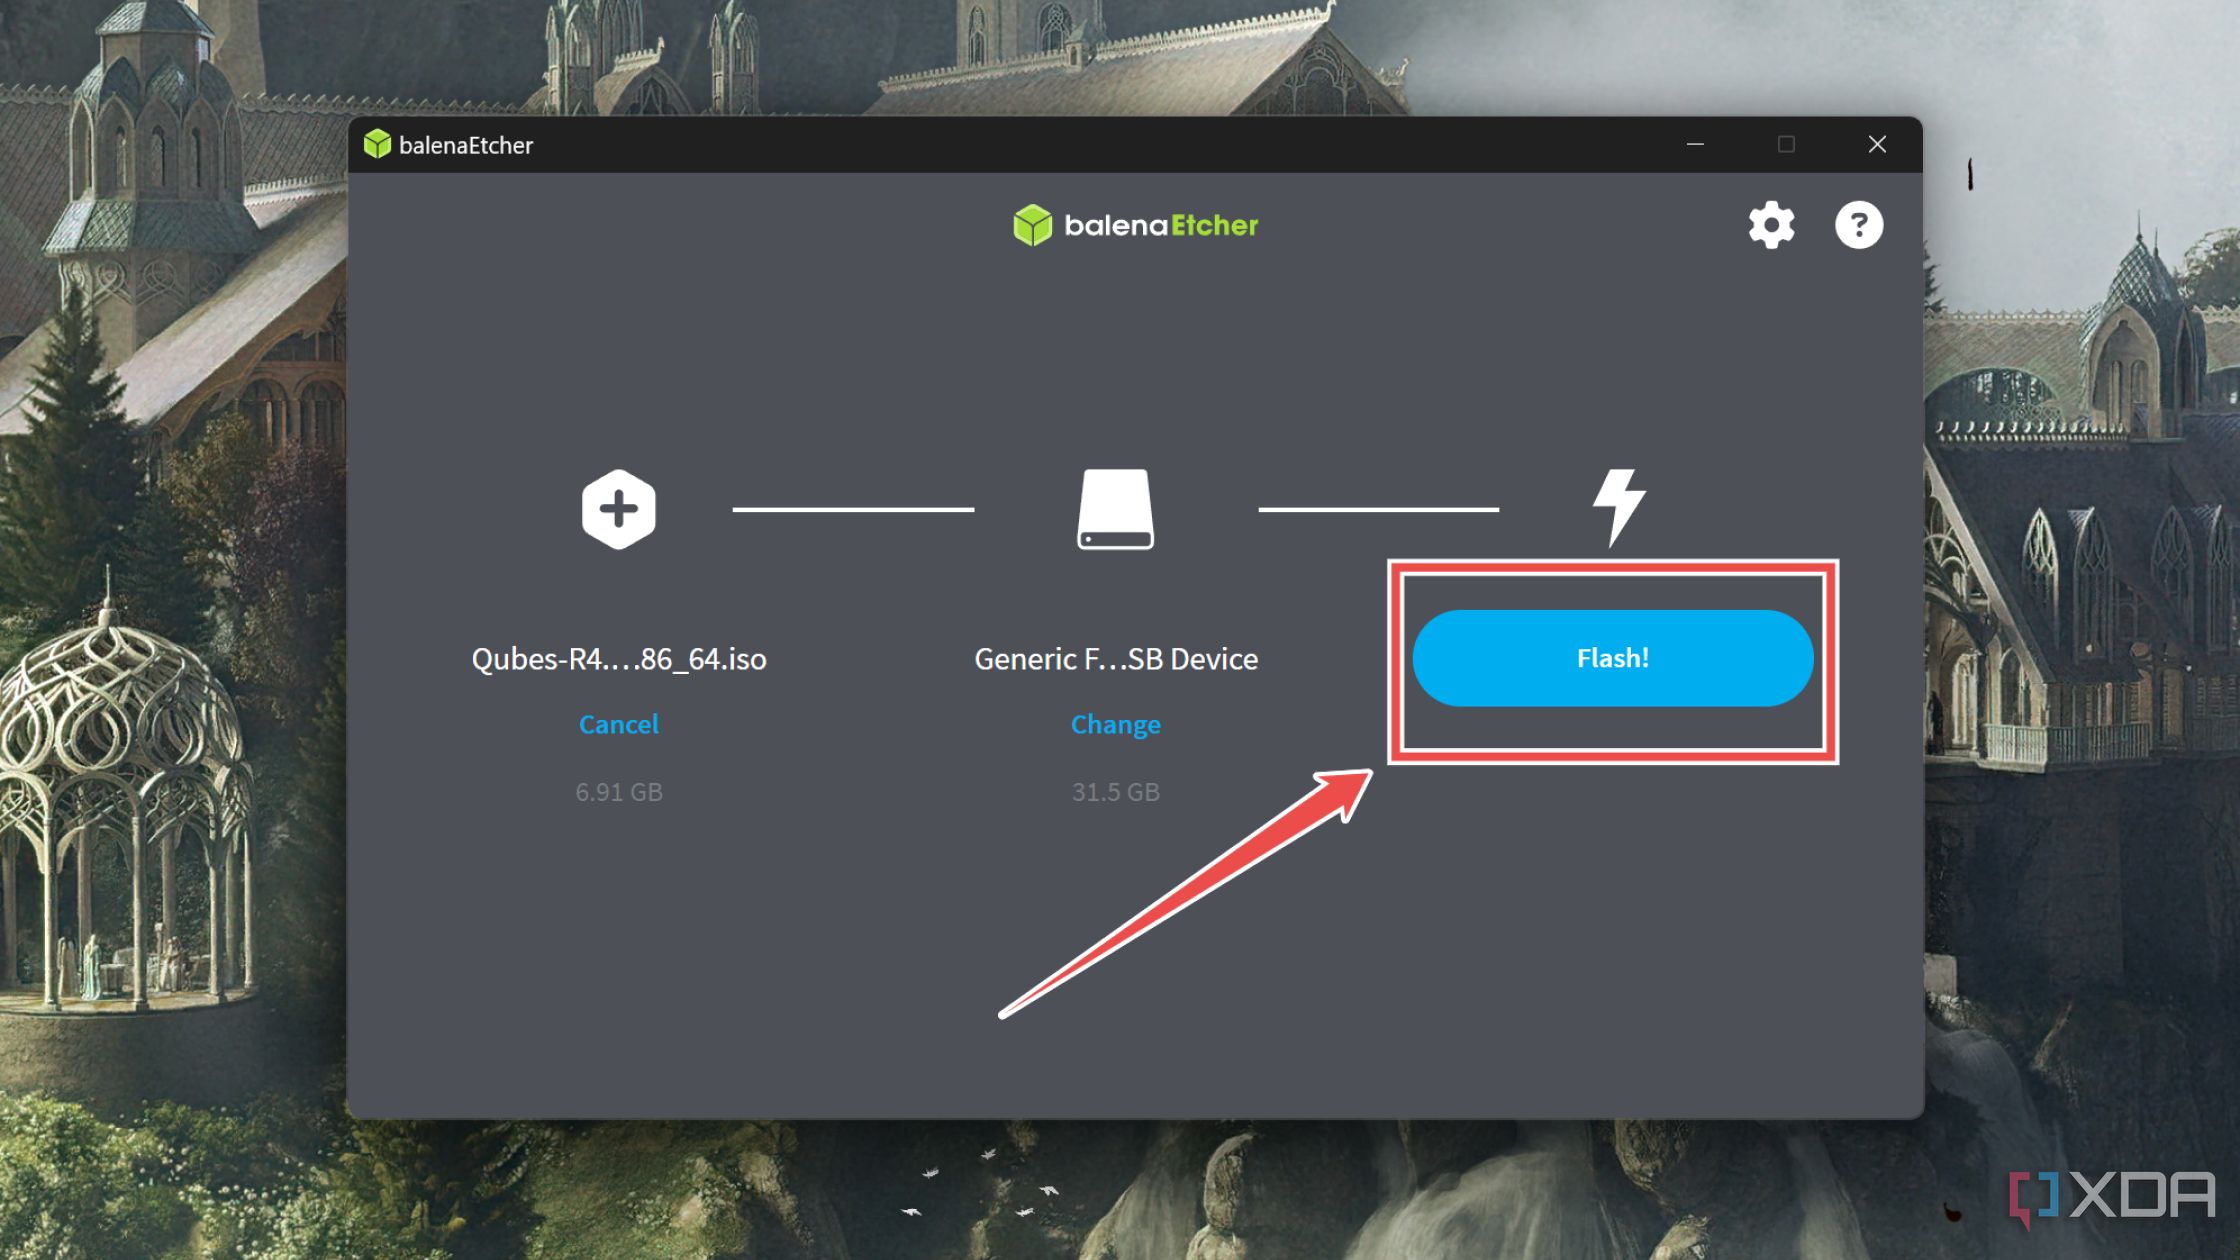
Caption: The final step in Balena Etcher. After selecting the ISO image and the target drive, the user clicks "Flash!" to begin writing the bootable media.
For Windows users, the official Qubes documentation recommends Rufus, but with a critical instruction: you must select "Write in DD Image mode". This tells Rufus to perform a raw, block-level copy, just like the dd command.
Installation guide (Windows ISO to USB)
These tools are effective, but by learning to use dd, you've mastered a more fundamental and universally available skill.
Conclusion
Congratulations, you have successfully created your Qubes OS installation media. This is a significant milestone in our project. You've moved from the theoretical to the practical, preparing the key that will unlock the next stage of building your secure machine.
Key Takeaways:
- To prepare for installation, you need three files: the ISO image, the signature file (
.asc), and the digest file. - Creating a bootable USB drive requires a block-level copy, not a simple file transfer.
- The
ddcommand is a powerful, standard utility for this task on Linux/macOS. Its use aligns with the security principle of minimizing your reliance on third-party tools. - Extreme caution is required when using
ddto ensure you specify the correct output device, as it will irreversibly overwrite all data.
Preview of the Next Lesson
Your bootable USB drive is now ready, but we are not yet ready to trust it. In our next lesson, "Use GPG to verify the cryptographic signature of the downloaded Qubes OS ISO image," we will perform the crucial verification step we've been building towards. You will use the signature and digest files you downloaded today to prove, with cryptographic certainty, that your installation media is authentic and has not been tampered with.