Recommended resources
The freely available resources this lesson will direct you to.
Welcome back! In our last lesson, we dove into .env files and the crucial role they play in keeping your application's secrets, like API keys, safe and separate from your main codebase. This was our first look at how a project isn't just one big pile of code, but a structured collection of different kinds of files, each with a specific job.
Today, we're going to zoom out and create a mental map of a typical project folder. The goal is to learn how to distinguish between the code you'll actively edit, and the other files that are either automatically generated or used for configuration. Understanding this distinction is one of the most important steps to feeling comfortable in a codebase. It tells you where to focus your creative energy and, just as importantly, which areas to leave alone to avoid breaking things.
Think of it like a project in your world of design and fabrication. You have your original design files (like a CAD model or an Adobe Illustrator file), which are your "source of truth" that you constantly refine. Then, you have the machine-readable files (like G-code for a 3D printer or a cut file for a laser cutter) that are automatically generated from your design. You wouldn't manually edit the G-code, right? Finally, you have the settings for your machine—the temperature, speed, and materials. This lesson will help you apply that same mental model—Source, Generated, and Config—to your coding projects.
The Three Categories of Project Files
When an LLM generates a project for you, or when you look at an existing one, it can feel like an overwhelming jungle of files and folders. But nearly every file falls into one of three categories:
- Source Code: The creative heart of your project. These are the files you and your LLM assistant will write and edit.
- Generated Files: The automated output. These are created by tools based on your source code and configurations. You should almost never touch these.
- Configuration Files: The instruction manuals. These files tell your tools and your project how to behave. You'll edit these occasionally to change settings.
Let's break down each one.
1. Source Code: Your Creative Workspace (The src Folder)
The source code is where your application's logic, design, and user interface are born. This is your canvas. In most modern web projects, the majority of your source code lives in a folder named src (for "source").
This folder is your primary workspace. When Claude asks you to "create a new component" or "add a function," it's almost always talking about creating or editing a file inside src.
The video below gives an excellent tour of what a well-organized src folder looks like in a React project, which is a common foundation for apps you'll be building.
Folder structure in React - Complete Guide
This guide by Cosden Solutions breaks down the purpose of each common sub-folder within the src directory. It's a perfect visual map of your main creative workspace.
As you watch, notice how each folder has a clear purpose. Don't worry about memorizing every folder name; the key is to absorb the concept that the src folder is highly organized and contains all the custom logic you write. Focus on the src folder: The speaker identifies this as the heart of the application. Pages: These are the main screens of your app (e.g., Home, About, Login). Components: These are the reusable building blocks of your UI, like buttons, forms, and cards. As a designer, this folder is where your UI vision turns into code. Utils: This folder is for small, reusable helper functions, a concept we'll explore more later.
The core idea is that everything inside src is human-written (or AI-assisted, human-directed) code that defines what your application is and does.
2. Generated Files: The Untouchables
Generated files are created by your tools for your tools. They are the "manufactured parts" of your project. Messing with them directly is like trying to fix a manufactured chip by hand—you're more likely to break it. You simply trust that the machine (your tooling) did its job correctly.
The node_modules Folder
If the src folder is your workshop, the node_modules folder is a massive, sprawling warehouse next door containing every possible tool, screw, and pre-built part you could ever need. When you run npm install, npm looks at your configuration, fetches all the required third-party code packages (libraries), and stores them here.
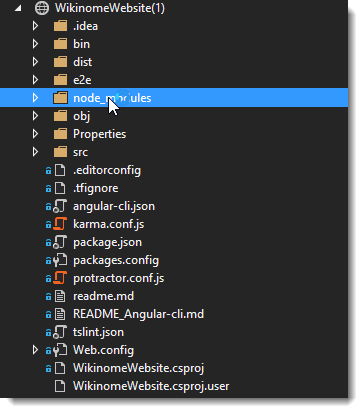
The node_modules folder is famously enormous and complex. There's a running joke in the developer community about its size.

Rule #1: Never, ever manually edit anything inside node_modules. These files are downloaded from the internet and will be overwritten the next time you or anyone else runs npm install.
The dist or build Folder
Remember our 3D printing analogy? If src is your CAD file, the dist (for "distribution") or build folder is the resulting G-code. When you're ready to deploy your app, you run a command like npm run build. This command takes all your beautiful, human-readable source code from src, optimizes it, minifies it (makes it smaller), and bundles it into a handful of files inside the dist folder. These optimized files are what you actually upload to a server for the world to see.
Rule #2: Never edit files in dist or build. They are the final output, not the source. Any changes will be wiped out the next time you build the project.
Understanding Web Project Folder Structure | by Mohit khubchandani
This article provides a concise overview of the key folders. We'll use it to solidify the difference between your workspace and the generated output.
Read the descriptions for these three crucial folders: src/ - Source Code: Notice the emphasis on this being where "most of the work happens." dist/ or build/: This reinforces that it's an automatically generated, production-ready version. node_modules/ - Dependencies: This confirms it's auto-generated and you don't need to manually edit it.
3. Configuration Files: The Instruction Manuals
Configuration files are the bridge between your source code and your tools. You don't write app logic here, but you do edit them to tell your tools how to behave. We saw this with .env files in the last lesson. Another critical example is the relationship between package.json and package-lock.json.
package.json: This is a config file you do interact with. It's your project's manifest. You (ornpm) edit it to list the dependencies your project needs. Think of it as your shopping list.package-lock.json: This is a generated file you do not touch. Afternpmgoes shopping with yourpackage.jsonlist, it generates this file as a hyper-detailed receipt, locking down the exact version of every single item it installed innode_modules. This ensures that every developer working on the project gets the exact same set of dependencies, preventing "it works on my machine" issues.
Understanding the Difference Between package.json and ...
This article perfectly illustrates the difference between a file you manage and a file the computer manages for you.
Focus on these key parts: Read <tf start="What is package.json?" end="license": "MIT" }`">"What is package.json?" to see that it's a high-level description of your project and its needs. Then, read "What is package-lock.json?" to understand that it's a detailed, locked-down record. Finally, study the comparison table. Pay close attention to the rows "Created By" and "Human Interaction"—they are the essence of today's lesson.
The package.json / package-lock.json relationship is the perfect summary of our topic. One is a high-level configuration you control; the other is a low-level generated file that your tools control.
A Typical Workflow in Practice
Let's see how these file types interact in a real-world "vibe coding" scenario.
- The Idea: You ask Claude, "Add a cool animated checkmark icon when a task is completed."
- The Tool: Claude suggests using a popular animation library called Framer Motion. It tells you to run:
npm install framer-motion. - The Action & Result:
- You run the command in your terminal.
- Config (
package.json):npmautomatically adds"framer-motion": "^10.12.0"to yourpackage.jsonfile. You've just edited a config file! - Generated (
node_modules):npmdownloads all the code for Framer Motion and puts it into yournode_modulesfolder. - Generated (
package-lock.json):npmupdatespackage-lock.jsonwith the exact version of Framer Motion (and any of its sub-dependencies) it just installed. - Source (
src): Now, you open a file likesrc/components/TodoItem.jsand add the code Claude provided to import and use the animation components from the library you just installed.
In this one simple action, you've interacted with all three file types, each according to its purpose.
Conclusion
You now have a powerful mental model for navigating any project folder. Instead of seeing a chaotic mess, you can start to see the structure and purpose.
Key Takeaways:
- Source Code (e.g.,
srcfolder): This is your creative workspace. Spend your time here. This is your design file. - Generated Files (e.g.,
node_modules,dist,package-lock.json): These are the machine's output. Leave them alone. This is your G-code. - Configuration Files (e.g.,
package.json,.env): These are the settings. You'll edit them to change how your project or tools behave. These are your machine's settings.
Knowing what to touch and what to leave alone is a huge step toward becoming a more confident and effective coder. It demystifies the process and helps you understand the "why" behind the commands your LLM assistant gives you.
In our next lesson, we'll take a closer look at the world of packages and libraries. Now that you know where they live (node_modules), we'll explore what they are and how you can find and choose the right ones to bring your design ideas to life.