Recommended resources
The freely available resources this lesson will direct you to.
Hello! This course begins with drawing, then moves into painting and art appreciation before turning to golf and practical life skills. For now, the aim is simple: make a place where you can look closely at an object and draw without your materials or setup getting in the way.
By the end of this lesson, you should be able to choose a small set of pencils, paper, and erasers, arrange a comfortable workspace, and place one household object ready for a study. Allow about 40 minutes, including time to try the setup yourself. You do not need to buy anything before you begin.
A small kit that does the job
Graphite pencils are graded by how they mark the page. H pencils are harder and generally make lighter marks; B pencils are softer and generally make darker ones. HB sits near the middle. For the first few drawing lessons, an HB pencil is enough to start. If you have a 2B as well, it will let you make darker marks without pressing hard. A 2H is optional, not a requirement.
Pressure matters, but it is not a substitute for the right pencil. Pressing very hard to darken an HB mark can leave a groove in the paper that remains after erasing. Begin with a light touch; you will have room to revise what you see.
Essential Beginner Drawing Tools | What Pencils, Paper & Erasers Do You REALLY Need?
Watch Essential Beginner Drawing Tools | What Pencils, Paper & Erasers Do You REALLY Need? by Mike Sibley for a practical look at how a small kit behaves on paper. His preferences are useful examples, not a shopping list.
Watch pencil grades for the difference between H, HB, and B marks. Then watch paper tooth and paper choices, noticing how texture affects graphite. At eraser options, focus on the different ways to remove a mark; sharpeners covers the remaining basic tool. Finish with the minimal kit, especially the point that inexpensive paper is suitable for practice.
For paper, start with a few sheets of ordinary printer paper or a basic sketchpad. White paper with a relatively smooth or modestly textured surface makes faint graphite lines easy to see. Very rough paper creates a visible grain through your marks; that can be expressive, but it is less convenient when you are first trying to judge an object’s edges. Expensive or archival paper can wait. Choose a page large enough that your hand can move freely, without feeling that every mark must be precious.
Erasers have two useful jobs. A vinyl eraser removes an unwanted line fairly cleanly; use a clean corner and rub gently rather than scrubbing the paper. A kneaded eraser, if available, can be shaped and pressed lightly against a mark to lift some graphite without removing it completely. That makes it useful when a line is too dark but still helps you locate the object. You can begin with just one eraser—preferably a vinyl one—and add a kneaded eraser later. A simple handheld sharpener completes the kit.
The practical selection, then, is HB pencil, paper, eraser, and sharpener. A 2B pencil and kneaded eraser are helpful additions. The important question is not how many tools you own, but whether you can make a light mark, see it clearly, and change it without damaging the page.
Arrange the page so you can judge it accurately
A drawing can look well proportioned while it lies at a steep angle to your eyes, then look stretched when you hold it up. The issue is not your pencil technique: you have been judging the shape from an oblique view. Where possible, arrange the page so that your line of sight meets its surface approximately at a right angle while you work.
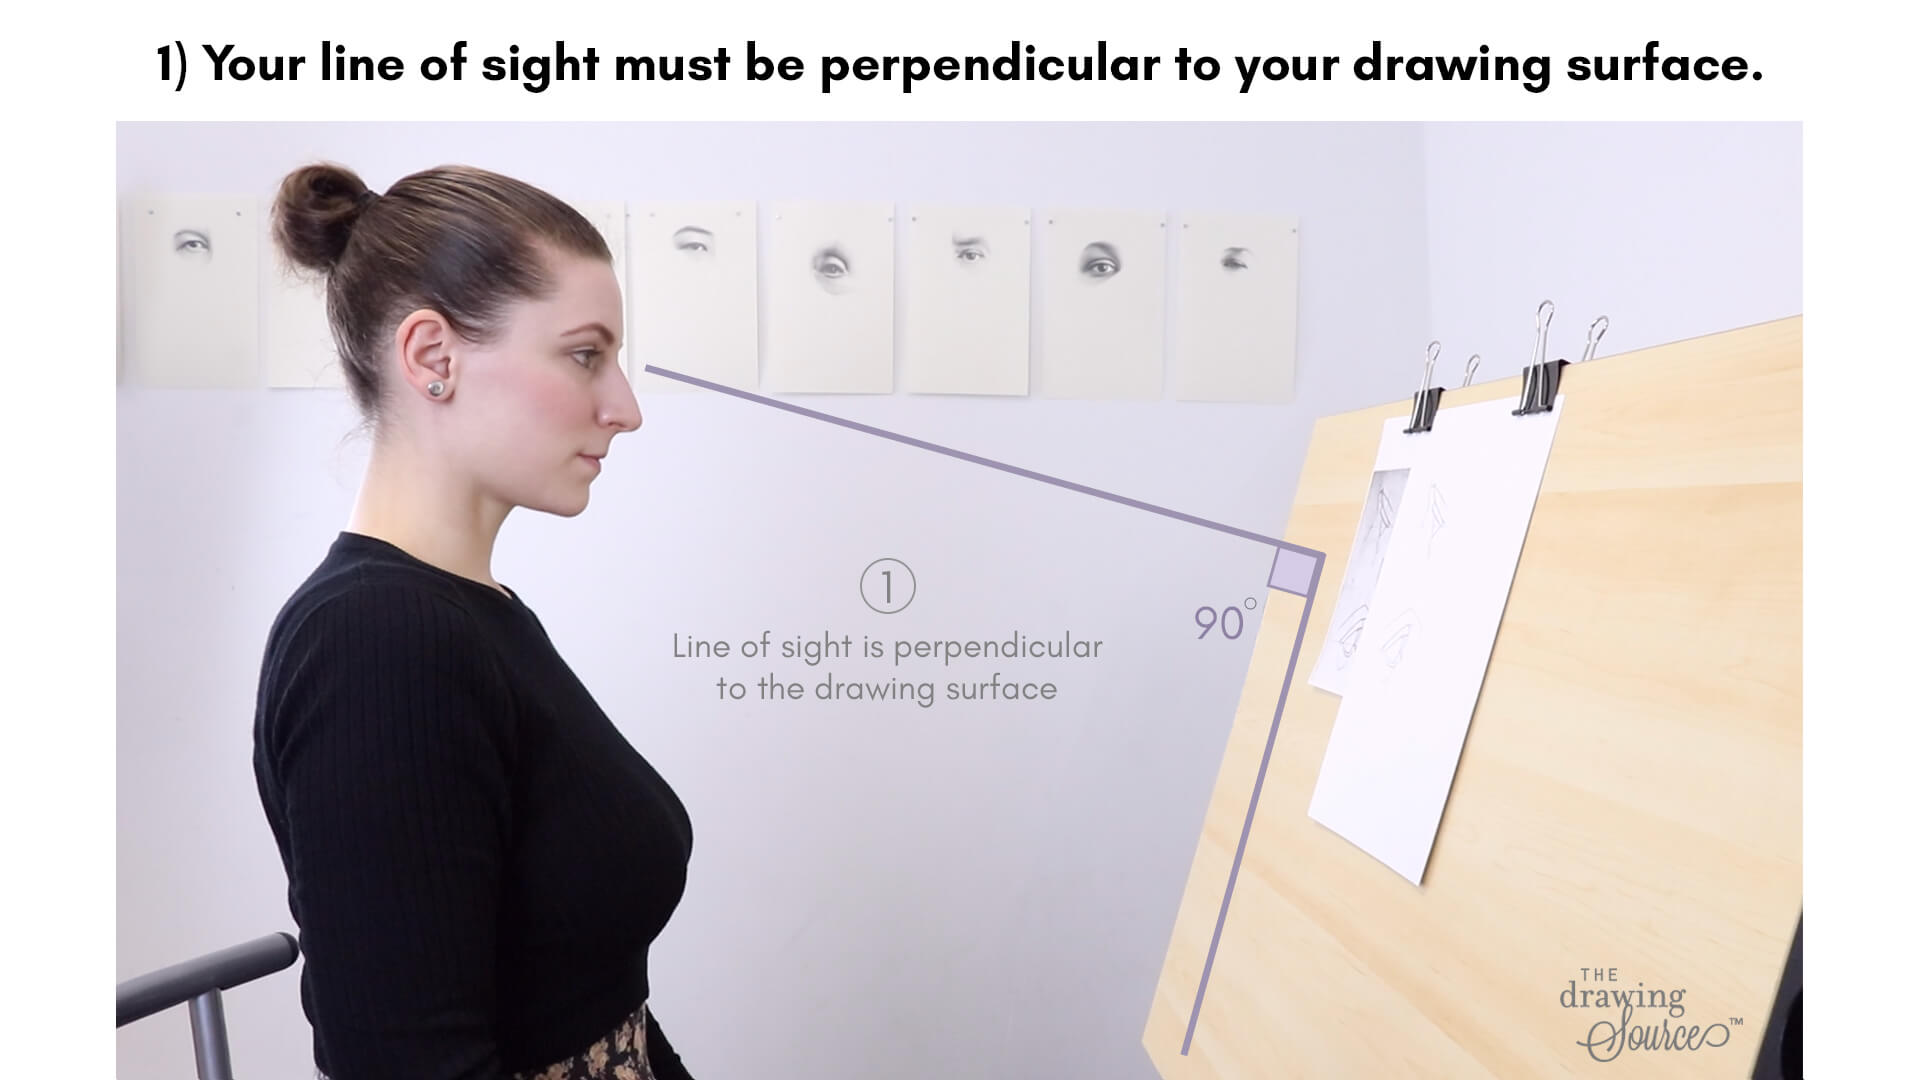
This does not mean everyone needs an easel or that the page must always stand upright. You can incline a firm board against a stable support, or work on a table while looking more directly down at the page. Choose an arrangement that lets you see comfortably without holding your neck in a strained position. If a propped board slips or wobbles, use the stable table instead. Recheck the page from a straight-on view from time to time.
3 Keys to a Successful Drawing Studio Setup
Read 3 Keys to a Successful Drawing Studio Setup from The Drawing Source for the geometry of viewing a page and several ways to make a workable space without specialized furniture.
Under “3 Elements of an Effective Drawing Studio Setup,” read the distortion example; it begins just after the demonstration of tilting a drawn shape and ends before the discussion of measurement methods. Under “Ways to Create an Ideal Drawing Studio Setup,” find “Setup 2” and read the inexpensive arrangement, ending before “Setup 3.” Near the end of the same section, read the alignment and posture advice. Under “The 2nd Essential Element of a Good Drawing Setup,” read the lighting advice. Under “The 3rd Essential Element of a Good Drawing Setup,” read the padding tip. Stop before “Example of an Effective Drawing Studio Setup.”
Give the page a firm, smooth backing: a tabletop, a sketchbook with a rigid backing, or a smooth board large enough to support the whole sheet. If the surface beneath is textured, a few spare sheets under the drawing paper can prevent that texture from showing in your marks. Secure loose paper so it does not slide—a clip is useful, but a stable pad may need nothing extra.
Light the page well enough to see pale pencil marks without leaning forward. Window light or a lamp can work; avoid a strong shadow from your hand across the area you are drawing. Leave space for your drawing hand, pencil, and eraser, and place eraser crumbs away from the clean page rather than rubbing them across it. You should be able to glance between your subject and your paper without repeatedly twisting your body.
Put one object in view
A simple study needs a subject as well as a drawing surface. Choose one ordinary object with a clear outline, such as a plain mug, an apple, or a small box. A transparent glass, with its reflections and see-through edges, is a more complicated first choice. Set the object where it will stay still and where you can see its whole outline from your chosen seat.
The subject’s lighting has a different purpose from the page’s lighting. You want the page bright enough to work on; for the object, one main light from a window or lamp makes its visible form easier to read. You do not need a dramatic spotlight or a darkened room. Simply avoid moving the lamp or the object halfway through a study, since that changes what you are trying to observe.
How to Set up a Basic/Simple Still Life
Watch How to Set up a Basic/Simple Still Life by BlueLavaArt – Jessica Russo Scherr for ideas about choosing a manageable subject and placing a light. The video develops a multi-object arrangement; use just one object for this first study.
Watch simple forms for household subject choices, noting the caution about glass. Then watch subject lighting for how the position of a main light changes the visible light and shadow. You only need a clear, steady view today; rendering those shadows comes later.
Take a few minutes now to assemble the setup. Put your page on its backing, sit or stand where you can view it comfortably, and position the object so your eyes can travel easily between the two. Check that the paper stays put, its surface is evenly visible, and you can make and erase a light mark without it buckling or sliding. If something feels awkward, adjust the arrangement before drawing. A reliable setup is one you can return to, not one that looks like a studio photograph.
You now have a workable starting point: a minimal graphite kit, paper that is comfortable to practice on, a stable and clearly visible page, and one simple object in steady light. Good drawing begins with looking, and this setup gives you a fair chance to judge what you see.
In the next lesson, you will use that view to draw the object’s visible edges with contour lines. Keep the same object and workspace if they work well; there is no need to change your tools to take the next step.