Recommended resources
The freely available resources this lesson will direct you to.
Hello! Let's get started.
In our last lesson, we meticulously configured our fine-tuning job. We defined the LoRA adapters with LoraConfig and set the rules for the training process with TrainingArguments. We then bundled everything into an SFTTrainer object, leaving us with a trainer variable that encapsulates the entire task, ready and waiting for a command.
Today, we'll give that command. This lesson focuses on the final, practical step: launching the fine-tuning job and monitoring its progress. You'll learn how to start the training, interpret the output logs you see in your console, and use a professional tool, Weights & Biases, to get a much richer, visual understanding of how your model is learning.
This is where the theoretical setup becomes a tangible process, and learning to monitor it effectively is a critical skill for any practitioner.
1. Launching the Fine-Tuning Job
With all the configuration done, launching the training process is surprisingly simple. It requires just one line of code: trainer.train().
When this method is called, the Trainer executes the entire training loop we've defined: it feeds batches of data to the model, calculates the loss, performs the backward pass to compute gradients, and updates the LoRA adapter weights using the optimizer.
The following video shows this exact moment, providing a real-time view of the SFTTrainer kicking into gear.
End-to-End (small) LLM Fine-tuning Tutorial (from data to model to live demo) | On DGX Spark
In the video 'End-to-End (small) LLM Fine-tuning Tutorial' by Daniel Bourke, you can see the SFTTrainer being initiated. This will give you a feel for what to expect when you run the code.
Watch from 00:34:10 to 00:36:09. The presenter calls trainer.train() and you'll see the Hugging Face progress bar appear in the console, showing the steps, the rate of training, and an estimated time to completion.
Here is our script from the previous lesson, now with the final trainer.train() command added at the end. Executing this script will start the fine-tuning process.
import torch
from datasets import load_dataset
from transformers import AutoModelForCausalLM, AutoTokenizer, BitsAndBytesConfig, TrainingArguments
from peft import LoraConfig
from trl import SFTTrainer


# --- 1. Load Model, Tokenizer, and Dataset ---
MODEL_ID = "microsoft/Phi-3-mini-4k-instruct"
DATASET_ID = "mrdbourke/FoodExtract-1k"

tokenizer = AutoTokenizer.from_pretrained(MODEL_ID)
if tokenizer.pad_token is None:
    tokenizer.pad_token = tokenizer.eos_token

quantization_config = BitsAndBytesConfig(load_in_4bit=True, bnb_4bit_compute_dtype=torch.float16)
model = AutoModelForCausalLM.from_pretrained(MODEL_ID, quantization_config=quantization_config, device_map="auto")

dataset = load_dataset(DATASET_ID, split="train").train_test_split(test_size=0.1, seed=42)
train_dataset = dataset['train']
eval_dataset = dataset['test']


# --- 2. Configure LoRA ---
lora_config = LoraConfig(
    r=16,
    lora_alpha=32,
    target_modules=["q_proj", "v_proj", "k_proj", "o_proj"],
    lora_dropout=0.1,
    bias="none",
    task_type="CAUSAL_LM"
)


# --- 3. Configure Training Arguments ---
training_args = TrainingArguments(
    output_dir="./food-extract-finetuned",
    per_device_train_batch_size=4,
    gradient_accumulation_steps=4,
    learning_rate=2e-4,
    num_train_epochs=1,
    logging_steps=10,
    save_steps=50,
    fp16=True,
    save_total_limit=2,
    report_to="none",
)


# --- 4. Initialize the SFTTrainer ---
def formatting_prompts_func(example):
    output_texts = []
    for i in range(len(example['text'])):
        messages = [
            {"role": "user", "content": f"Extract the food entities from the following text:\n\nText: {example['text'][i]}"},
            {"role": "assistant", "content": f"Entities: {example['instance'][i]}"}
        ]
        output_texts.append(tokenizer.apply_chat_template(messages, tokenize=False))
    return output_texts

trainer = SFTTrainer(
    model=model,
    tokenizer=tokenizer,
    train_dataset=train_dataset,
    eval_dataset=eval_dataset,
    peft_config=lora_config,
    formatting_func=formatting_prompts_func,
    args=training_args,
    max_seq_length=512,
)


# --- 5. Launch Training ---
print("Starting fine-tuning...")
trainer.train()
print("Fine-tuning complete!")
2. Reading the Tea Leaves: Monitoring from the Console
As the training runs, the Trainer will print logs to your console at the frequency you specified in logging_steps. This output is your first window into the model's learning process.
The most important metric to watch is the loss.
- Training Loss: This value measures how well the model's predictions match the target outputs on the training dataset. A decreasing training loss means the model is successfully learning the patterns in the data you're providing.
- Validation Loss: Periodically, the trainer will pause training to evaluate the model on the validation dataset (which it has not been trained on). This loss value indicates how well the model is generalizing its learning to new, unseen examples.
Let's watch the next segment of the video to see how to interpret this console output.
End-to-End (small) LLM Fine-tuning Tutorial (from data to model to live demo) | On DGX Spark
The same video provides a good walkthrough of the logs that appear after training is complete.
Watch from 00:36:09 to 00:39:00. The presenter examines the final logged metrics, discussing the training loss, validation loss, and what they might imply about overfitting.
The core challenge of monitoring is balancing the training loss and validation loss. You want the training loss to go down, but you need the validation loss to go down with it.
3. Professional-Grade Monitoring with Weights & Biases (W&B)
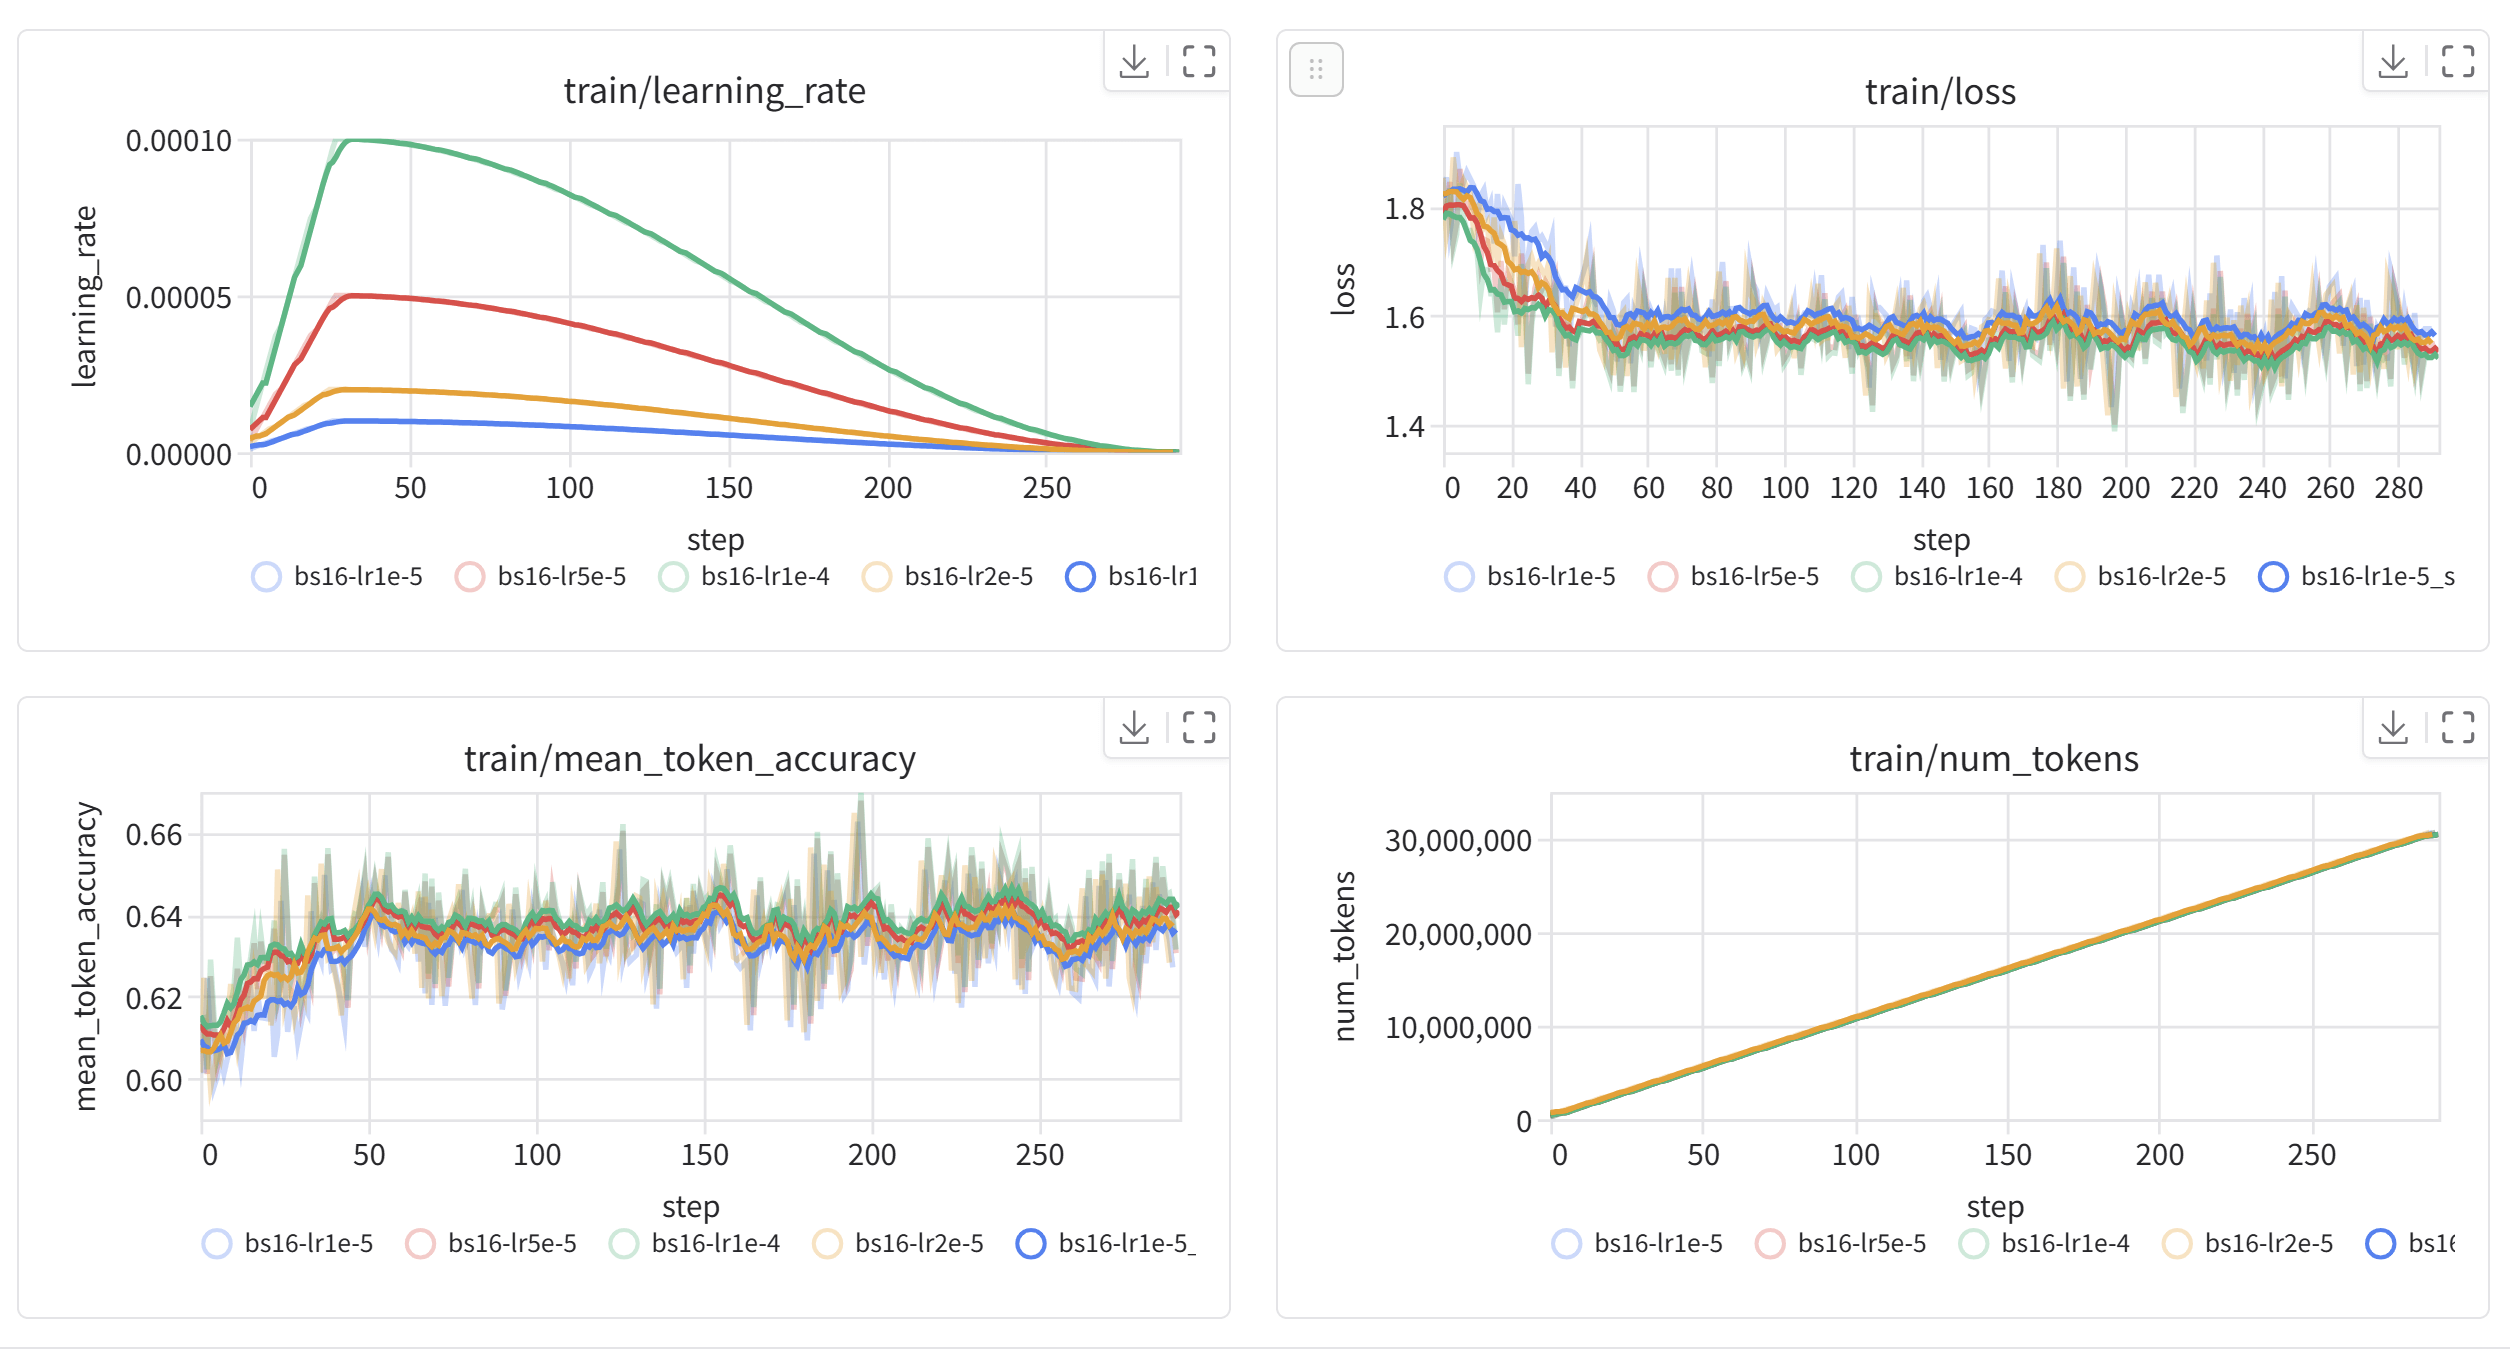
While the console output is useful, it's static and can be hard to parse. For a much more effective and visual monitoring experience, we can integrate a tool like Weights & Biases (W&B). W&B is an experiment tracking platform that automatically logs your metrics, creates interactive plots, and saves your model versions.
For a software engineer, think of W&B as a dedicated CI/CD and monitoring dashboard for your ML models.
Integrating it with the Hugging Face Trainer is incredibly simple.
Hugging Face Transformers - Weights & Biases Documentation
The Weights & Biases documentation for Hugging Face integration shows just how seamless the setup is. We'll walk through the key steps.
Skim through these sections to get an overview of the setup process. Don't worry about memorizing the code; focus on the four main steps: Sign up and install: The initial setup. Name the project: How to organize your runs. Log your training runs: The single most important argument change (report_to). Turn on model checkpointing: How to automatically save your models to the cloud.
Here's the practical summary of how to enable W&B:
-
Install and Login:
- Sign up for a free account at wandb.ai.
- Install the library:
pip install wandb - Log in from your terminal or notebook:
wandb login(you'll be prompted to paste an API key from your W&B settings).
-
Modify
TrainingArguments:- Change
report_to="none"toreport_to="wandb". That's it! TheTrainerwill now automatically stream all logs to your W&B dashboard. - (Recommended) Add a
run_nameargument (e.g.,run_name="phi3-food-extract-v1") to easily identify your experiment.
- Change
-
(Optional) Set Environment Variables:
- Before running your script, you can set environment variables to organize your work and save model checkpoints automatically.
export WANDB_PROJECT="llm-finetuning-course"(This creates a project folder in W&B for all related runs).export WANDB_LOG_MODEL="checkpoint"(This tells W&B to save a version of your model adapter every time theTrainersaves a checkpoint, as defined bysave_steps).
Here is the updated TrainingArguments block:
# Updated Training Arguments with W&B
training_args = TrainingArguments(
    output_dir="./food-extract-finetuned",
    per_device_train_batch_size=4,
    gradient_accumulation_steps=4,
    learning_rate=2e-4,
    num_train_epochs=1,
    logging_steps=10,
    save_steps=50,
    fp16=True,
    save_total_limit=2,


    # --- W&B Integration ---
    report_to="wandb",
    run_name="phi3-food-extract-v1",
)
With this change, when you run trainer.train(), you'll get a link to a live dashboard that looks something like this:
4. Identifying Patterns and Problems in Your Training Run
Whether you're looking at console logs or a W&B dashboard, the goal is the same: to understand how the training is progressing and spot any potential issues.
The following guide is an excellent resource for interpreting these patterns.
Supervised Fine-Tuning - Hugging Face LLM Course
The Hugging Face LLM Course provides a fantastic section on interpreting the signals from your training run. It clearly explains what to look for.
Read the section 'Monitoring Training Progress'. Pay close attention to the descriptions and graphs for 'Warning Signs to Watch For'. This will teach you how to diagnose the most common training problems.
Here are the key patterns to watch for in your loss curves:
-
Healthy Training: Both the training loss and validation loss decrease steadily and then plateau. The gap between the final training and validation loss is small. This is the ideal scenario, indicating the model is learning and generalizing well.
-
Overfitting: The training loss continues to decrease, but the validation loss starts to flatten out or even increase. This means the model is memorizing the training data, including its noise, and is losing its ability to generalize to new examples.
- Solution: Stop training earlier, use a larger dataset, or increase regularization (like
lora_dropout).
- Solution: Stop training earlier, use a larger dataset, or increase regularization (like
-
Underfitting: Both the training and validation loss decrease very slowly and plateau at a high value. The model is not complex enough or isn't being trained for long enough to capture the underlying patterns in the data.
- Solution: Train for more epochs, increase the learning rate, or use a more powerful base model.
-
Instability: The loss values are erratic, jumping up and down. This often suggests that the learning rate is too high, causing the optimizer to overshoot the optimal solution.
- Solution: Decrease the learning rate.
Conclusion
You have now completed the entire fine-tuning loop, from setup to execution and monitoring. This is a significant milestone in your practical journey with LLMs.
Key Takeaways:
- Launching a configured fine-tuning job is as simple as calling
trainer.train(). - Monitoring involves tracking the training loss (how well the model fits the data) and validation loss (how well it generalizes).
- Overfitting is the primary problem to watch for, identified when validation loss stops improving or gets worse as training loss continues to drop.
- Tools like Weights & Biases are invaluable for professional-grade monitoring, providing live, interactive visualizations with minimal setup (
report_to="wandb").
In our next lesson, we will address what happens after the training is complete: saving the resulting LoRA adapter and merging it with the base model for inference.