Recommended resources
The freely available resources this lesson will direct you to.
Hello! In our last lesson, we explored the powerful cross-platform frameworks, React Native and Flutter, which let you build beautiful, functional apps for both iOS and Android from a single codebase. Once your AI assistant has helped you "vibe code" your app, the next exciting step is sharing it with the world.
Today, we begin the journey of publishing. We'll focus on the iOS ecosystem, which is famous for its curated and secure App Store. To get your app onto iPhones and iPads, every developer must first go through Apple's official gateway: the Apple Developer Program. This lesson will demystify exactly what that program is, what it costs, and what you'll need to prepare before you can even think about submitting your app.
The Price of Admission
Let's start with the most common question: what does it cost? The Apple Developer Program membership has a straightforward annual fee. While this might seem like a barrier, it's Apple's way of ensuring a certain level of commitment and seriousness from developers who wish to distribute software on their platform.
What the $99 Apple Developer License Gets You | When to Buy it
This short video by Dave Jacobsen gets straight to the point about the cost and, more importantly, what you can accomplish before you need to pay.
First, watch the opening seconds for the price reveal right here. Then, continue watching the segment Who doesn't need it, which explains that you can learn, build, and even test on your own phone completely for free using just Xcode and a standard Apple Account.
As the video highlights, you don't need to pay the $99 annual fee just to learn or experiment. This is a crucial point for anyone starting out. You can build entire apps and run them on your personal iPhone without paying a cent. The fee only becomes necessary when you're ready to move from personal development to public (or private) distribution.
What the $99 Unlocks: Free vs. Paid
So, what exactly do you get for your $99 per year that you don't get with a free Apple Account? The single most important benefit is distribution. The paid membership is your ticket to the App Store.
Apple's official documentation provides a clear breakdown of the features included with a free account versus the paid program.
Choosing a Membership - Support - Apple Developer
This official page from Apple is the definitive source for comparing the different membership tiers.
First, read the section About the Apple Developer Program to understand the fundamental distinction Apple makes. Then, carefully study the comparison table. Pay close attention to the column for the "Apple Developer Program" and note all the checkmarks related to "distribution," "App Store Connect," and "advanced app capabilities."
As you saw in the table, the paid program unlocks a host of critical features, but the most significant is access to App Store Connect. This is the web portal where you will:
- Upload your app builds.
- Add your app's description, screenshots, and pricing.
- Submit your app for review by Apple's team.
- View sales and analytics data.
- Manage beta testing (which we'll cover in the next lesson).
Essentially, while a free account lets you create, a paid account lets you publish and manage.
Choosing Your Identity: Individual vs. Organization
When you decide to pay the fee and enroll, you'll face your first major decision: enrolling as an Individual or as an Organization.
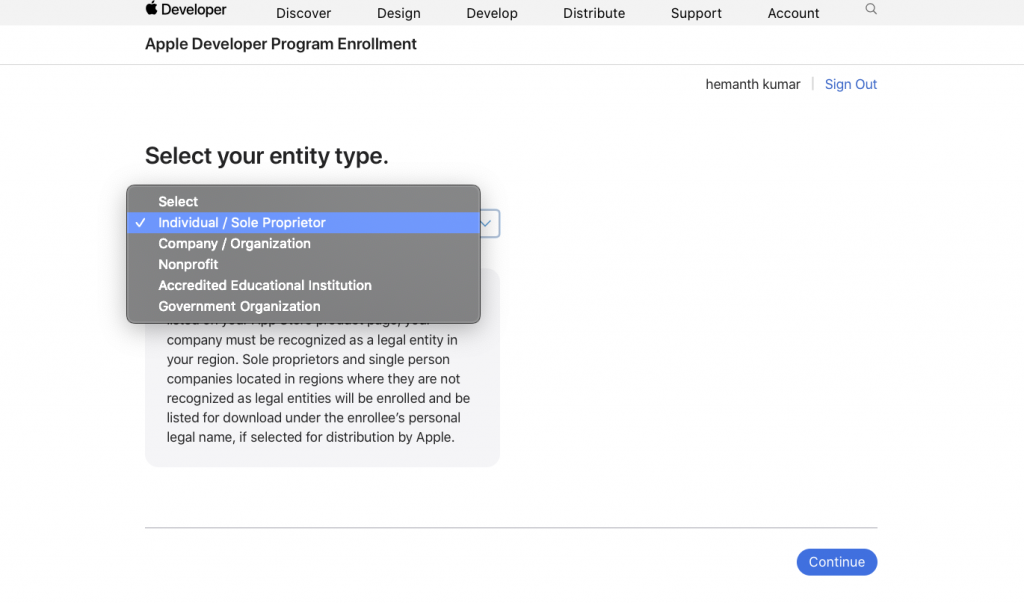
This isn't just a minor detail; it changes the requirements for enrollment and, most visibly, how your app is presented to users.
- Individual Account: Simple, fast, and perfect for solo creators, freelancers, or hobbyists. Your app will be listed under your personal legal name in the App Store (e.g., "By John Doe").
- Organization Account: More complex to set up, but essential for companies, startups, or any team that wants to publish apps under a brand name (e.g., "By VibeCode Studios Inc.").
The following resource breaks down the requirements and considerations for each type brilliantly.
Best iOS Developer Accounts: Individual vs Company – Which One Should You Choose? - developeracs.com
This article from developeracs.com provides a practical, head-to-head comparison of the two main account types.
First, read the requirements for an Individual account. Note how it's based on your personal identity. Next, read the requirements for a Company account. Pay special attention to the need for a D-U-N-S Number, a unique nine-digit identifier for businesses. This is a common hurdle, and the article notes it can take 1-2 weeks to process. Finally, study the comparison table. This is an excellent summary of the key differences, from seller name to team management capabilities.
For most designers starting with a "vibe coded" project, the Individual account is the quickest and easiest path to the App Store. However, if you're building an app for an existing company or have ambitions to build a team around your product, taking the extra steps to set up an Organization account is the professional choice. It allows you to list the app under your brand and add other team members (like developers or marketers) to your account later.
The Enrollment Process at a Glance
Now that you understand the costs and the core decisions you need to make, the actual enrollment process becomes much clearer. This infographic shows the general steps you'll follow.
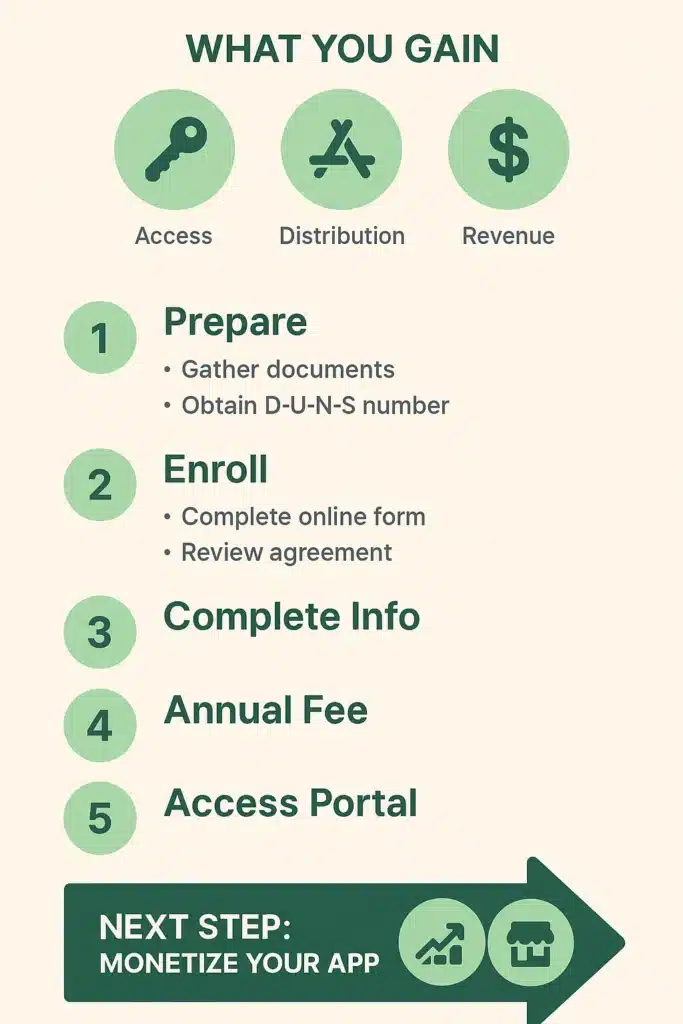
- Prepare: This is where you decide between Individual and Organization and gather the necessary documents. For an organization, this includes obtaining your D-U-N-S number.
- Enroll: You'll fill out an online form on the Apple Developer website.
- Complete Info & Review: You'll provide your legal information and agree to Apple's terms.
- Annual Fee: You'll pay the $99 fee.
- Access Portal: Once approved, you gain access to App Store Connect and all the other developer resources.
Conclusion
You now have a clear map of the first major checkpoint on your journey to publishing an iOS app. Let's recap the key takeaways:
- Cost: The Apple Developer Program costs $99 per year, but it's only required when you're ready to distribute your app. You can learn and develop for free.
- Core Benefit: The main reason to pay the fee is to gain access to App Store Connect, which is the control panel for publishing and managing your app on the App Store.
- Key Decision: You must choose to enroll as an Individual or an Organization. This impacts your app's seller name, the setup requirements (like the D-U-N-S number for organizations), and your ability to collaborate with a team.
- Preparation is Key: The process is straightforward, but gathering the correct legal information ahead of time—especially for an organization—is essential.
With your developer account secured, you've unlocked the door to the App Store. But before you submit your app for public review, it's wise to get feedback from real users. In our next lesson, we'll explore TestFlight, Apple's powerful platform for distributing beta versions of your app to testers.