Recommended resources
The freely available resources this lesson will direct you to.
Welcome back! In our previous lessons, you meticulously drafted the individual front and back pieces of your bodice block, incorporating the darts necessary for a three-dimensional fit. You now have two separate, detailed blueprints—one for the front and one for the back.
This lesson marks the final, crucial step in creating your foundational bodice sloper. Think of this as the quality assurance phase in a design process. Before a product is finalized, its individual components must be checked to ensure they assemble perfectly. Similarly, we must verify that your front and back pattern pieces will join together seamlessly. We will "walk" the seams to check their lengths, "true" the lines for smooth transitions, and then add the final seam allowances and markings. By the end of this session, you will have a complete, reusable bodice sloper—the essential tool for drafting your V-neck top.
Verifying the Seams: Walking and Truing
Before we can add seam allowances and cut fabric, we must ensure that the seams that will be sewn together are the exact same length and that they meet at angles that create a smooth, continuous line. This two-part process is known as "walking" and "truing" the pattern.
Walking the pattern is the physical act of pivoting one pattern piece against another along the stitching line to compare their lengths. Truing is the process of correcting any jagged lines or awkward angles where seams meet to ensure a fluid silhouette.
The video below from Digital Pattern Library provides an excellent overview of these professional techniques. Pay close attention to the way the pattern pieces are pivoted against each other without seam allowance.
PATTERN CUTTING 101 | Truing, Walking, Squaring Off, Dart Closure, Seams and more, Explained!
This video demonstrates the core techniques of walking, truing, and checking pattern accuracy. It will give you a dynamic visual for the steps we're about to take.
Walking the Seams: Watch the section explaining how to walk the side seams of a bodice. Notice the careful pivoting motion. Then, see how a shoulder seam with a dart is handled by first closing the dart at this timestamp. Truing the Seams: Next, watch the explanation of truing the pattern. The presenter shows how to smooth out lines after an alteration to create a more organic and correct shape.
Now, let's apply this to your pattern.
1. Walk and True the Side Seams
Place your front and back bodice patterns next to each other. You will be checking the side seams.
- Temporarily close the darts: On your front pattern, fold the side-bust dart closed, with the dart's excess fabric pointing downwards. Secure it with tape. Do the same for the waist darts on both front and back patterns.
- Walk the seam: Align the bottom corners of the side seams. Using your pencil or an awl as a pivot point, "walk" the front pattern piece up along the back pattern piece, keeping the seam lines perfectly matched.
- Check for discrepancies: Do the seam lengths match at the underarm? If not, we'll need to correct them.
The following resource from In the Folds provides clear, illustrated instructions for how to check your seams and what to do if they don't match.
How to : Check and true sewing patterns — In the Folds
This article is your guide to diagnosing and fixing any issues with your seams. The diagrams clearly illustrate the concepts of walking, truing, and squaring off.
Checking Seams: Read the first two sections on checking patterns, Method one and two, to understand the core principle. Correcting Lengths: Study the section "If seams are different lengths". It explains the standard method: find the total difference, halve it, then add that amount to the shorter seam and subtract it from the longer one. This "splits the difference" and preserves the overall balance. Truing the Lines: Now, focus on the section "True the side seams". Even if your seam lengths match, you may need to redraw the lines at the underarm and waist to ensure they form a single, smooth curve when joined.
2. Walk and True the Shoulder Seams
Now repeat the process for the shoulder seams. The goal here is to ensure the neckline and armhole curves flow smoothly from front to back.
- Close the back shoulder dart: On your back pattern, fold the shoulder dart closed and tape it.
- Align and check: Place the two pattern pieces together at the shoulder seam, as if they were sewn and pressed open.
- True the curves: Check the transition at both the neckline and the armhole edge. Do they form a continuous, graceful line? If you see a point or a dip, you'll need to true it.
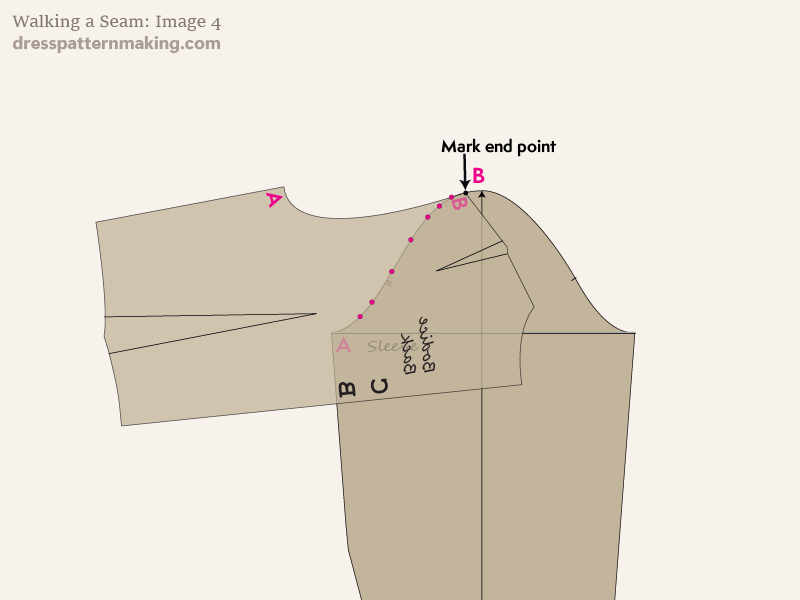
Refer back to the In the Folds article, this time focusing on the section
Finally, check that your Center Front and Center Back lines are "square" (i.e., at a 90-degree angle) to the neckline and hemline. The article explains why this is important in the section
Adding Final Markings and Seam Allowance
Your sloper's stitching lines are now verified and perfected. The final step is to add the information that transforms it from a net pattern (a "block" or "sloper") into a usable sewing pattern. This involves adding seam allowances and essential markings.
First, you'll want to trace your corrected front and back blocks onto new sheets of paper, creating your final, clean pattern pieces. Now, let's add the seam allowance. This is the extra fabric around the edge of the pattern piece that will be contained within the seam when you sew.
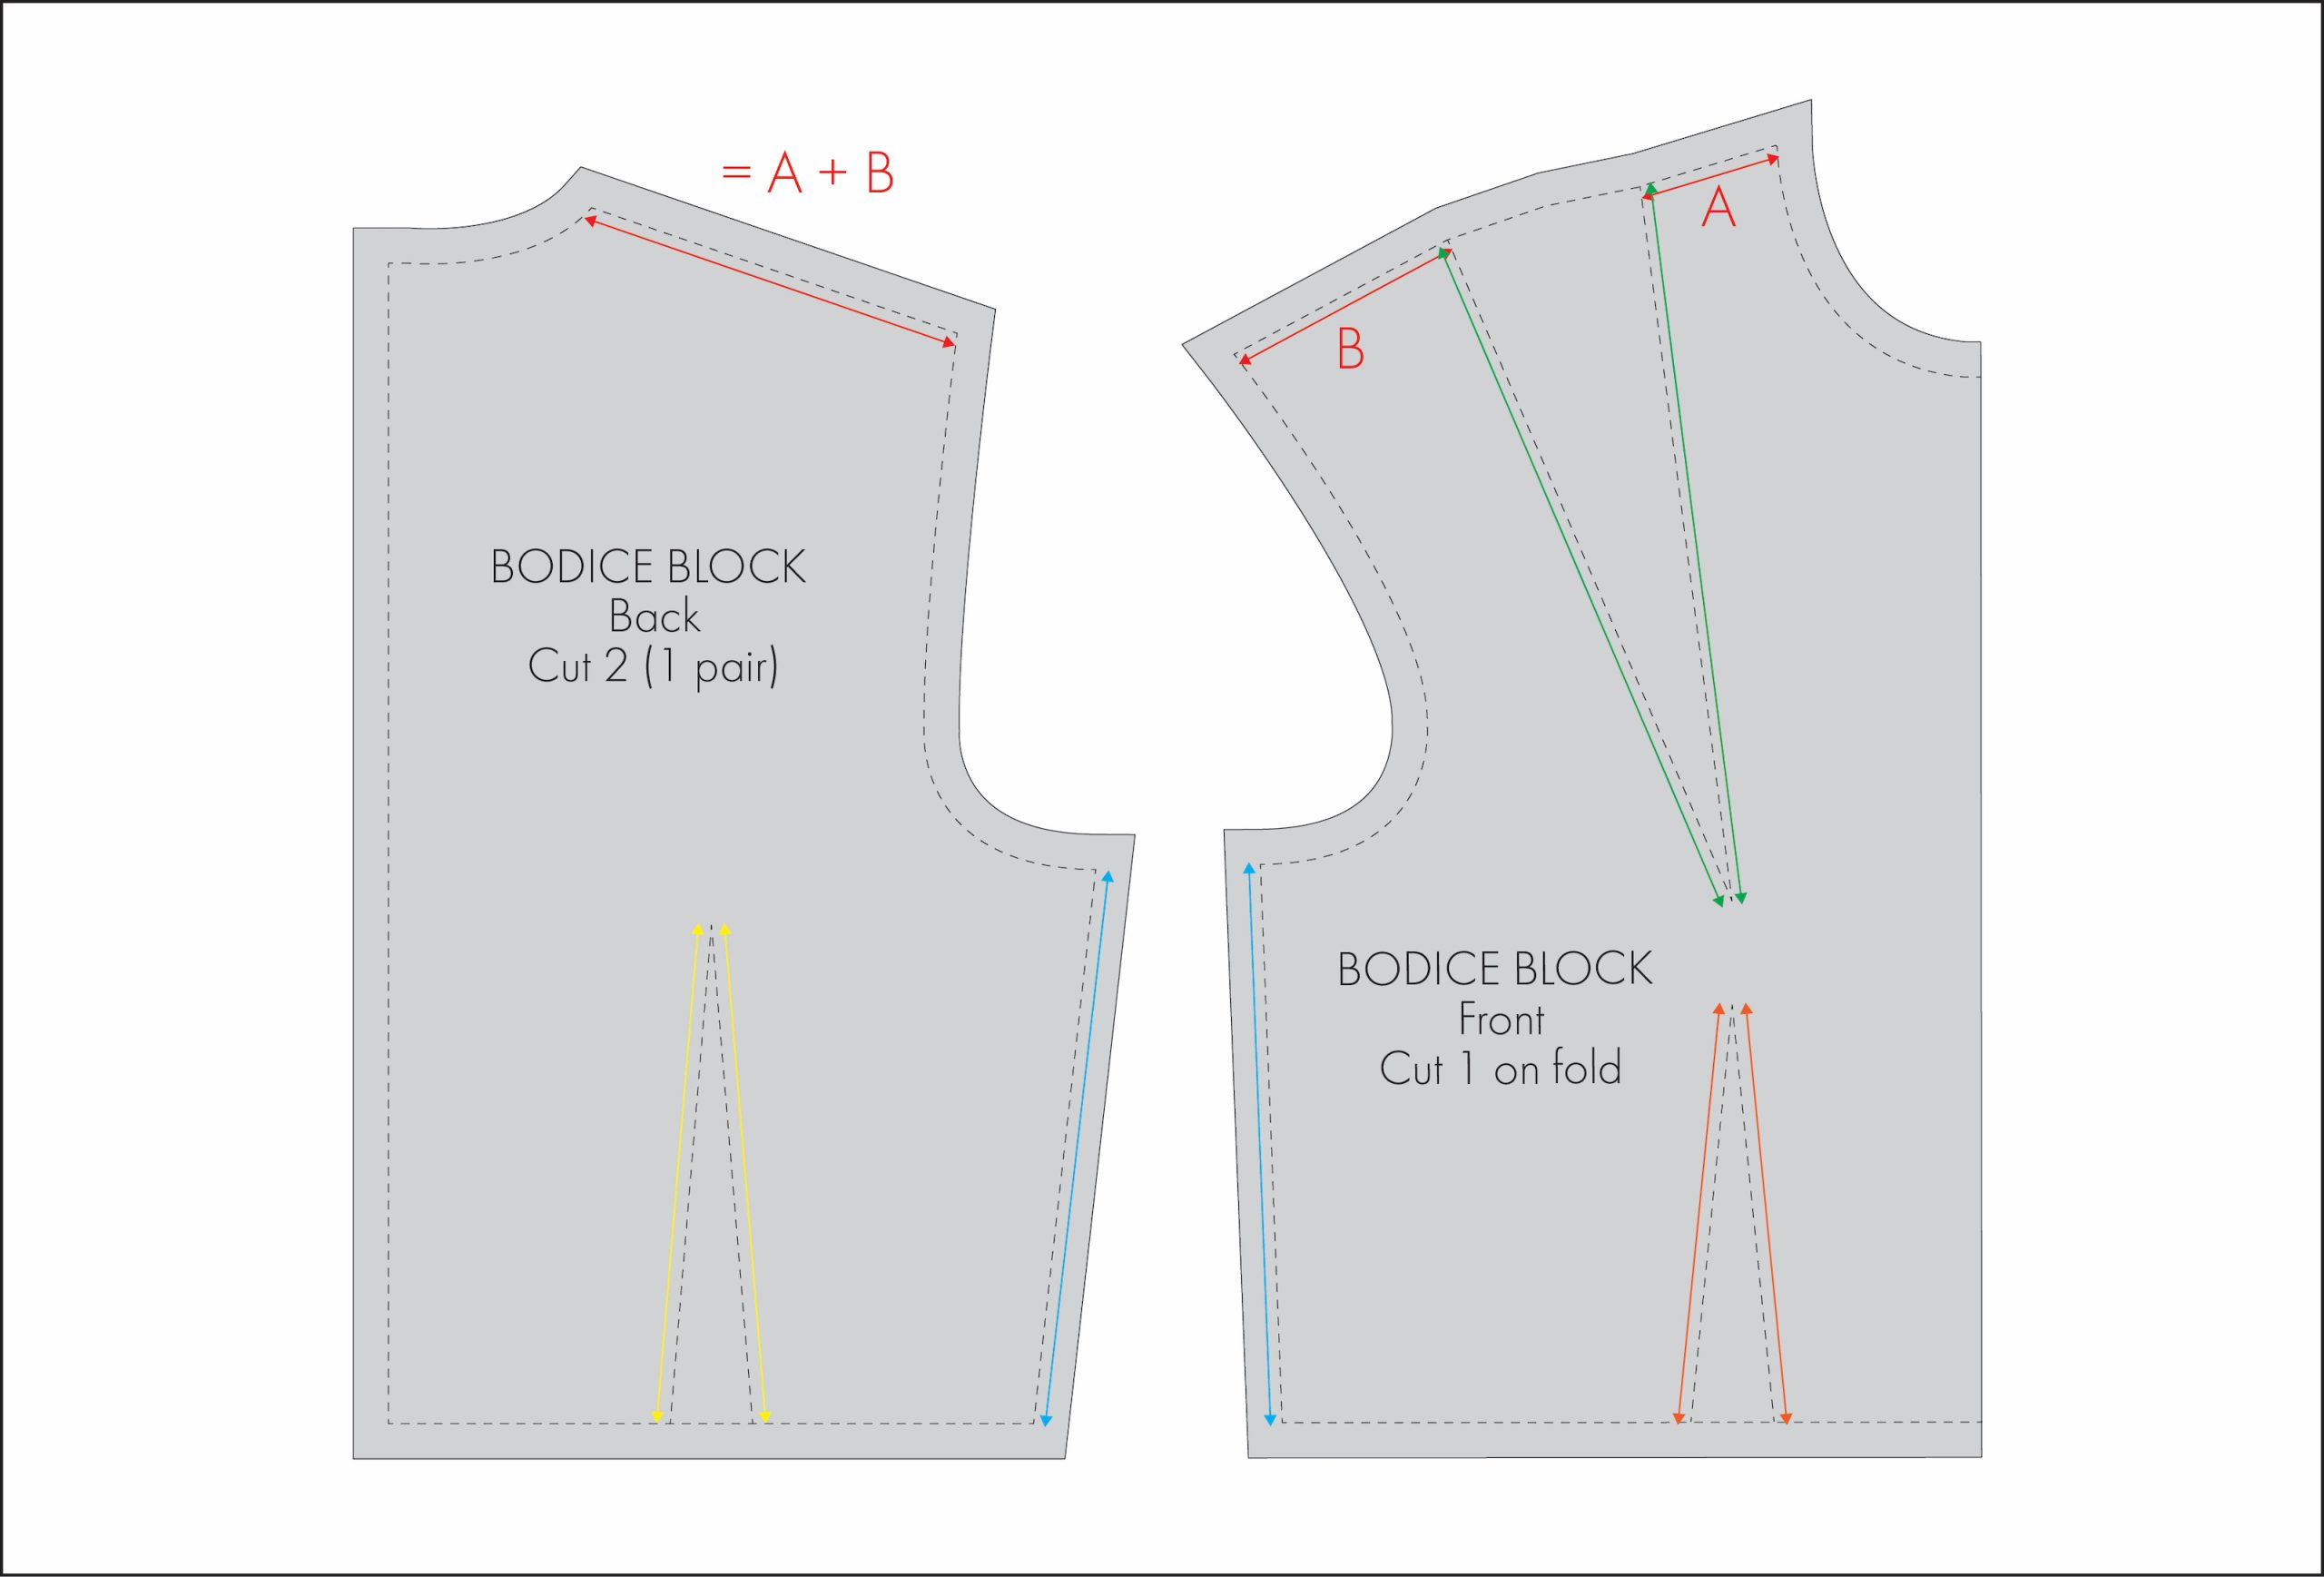
A standard seam allowance for woven fabrics is 1.5 cm (or 5/8 inch), but this can vary. It's often helpful to use a wider allowance on side seams for fitting adjustments and a narrower one on curved necklines to reduce bulk. The video you watched earlier has a great segment on this.
PATTERN CUTTING 101 | Truing, Walking, Squaring Off, Dart Closure, Seams and more, Explained!
This part of the video explains the logic behind adding different seam allowance widths for a more professional finish.
Watch the segment on adding seam allowance. The presenter demonstrates how to use a pattern master to add various widths and explains why you might choose one over another.
Using a ruler or pattern master, add your chosen seam allowance around all edges of your front and back pattern pieces, except for the edge that will be placed on the fold (the Center Front).
Finally, add the essential pattern markings. These are the "user instructions" for your pattern, critical for cutting and sewing accurately.
This section of the bodice drafting tutorial details the final markings needed to complete your pattern.
Read the section "Add pattern markings". Ensure your pattern pieces include all of the following: Grainline: A long line with arrows at each end, drawn parallel to the Center Front/Center Back. This MUST be on every piece. Labels: Piece Name (e.g., "Front Bodice Sloper," "Back Bodice Sloper") Your Name/Identifier Size Cutting Instructions: Front: "Cut 1 on Fold" along the center front edge. Back: "Cut 1 Pair" or "Cut 2". Notches: Small perpendicular marks on the cutting line to help align pieces. Add notches at the waistline on the side seams and to mark your dart legs. Drill Holes / Awl Marks: Circles or points to mark the end of your darts (the point that is backed off from the apex).
Key Takeaways
Congratulations! You have successfully completed your personal bodice sloper. This is a significant achievement and a powerful tool in your design arsenal. In this lesson, you have:
- Mastered the professional techniques of walking and truing to ensure your pattern pieces fit together perfectly.
- Learned how to correct discrepancies and smooth the transitions between adjoining seams.
- Added seam allowances and all the essential pattern markings to create a complete, ready-to-use sewing pattern.
Next Steps
Your bodice sloper is the foundational blueprint. Now the creative work begins. In the next module, we will start manipulating this sloper to create the specific design features of your top. We'll begin by drafting the V-neckline, determining the correct depth for a pull-over style, and reshaping the shoulders to create the 2cm straps you envisioned.