Recommended resources
The freely available resources this lesson will direct you to.
Hello! Welcome back to the second module of your course, "The Art of Beatmatching."
In our last lesson, we established the "why" and "when" of mixing by exploring track structure and the importance of phrasing. You learned how to identify 32-beat phrases using the CDJ's waveform display, giving you the knowledge to start your transitions at musically appropriate times.
Today, we'll dive into the first fundamental mechanical skill of beatmatching. Once you've started two tracks together on the phrase, how do you keep their beats locked together? This lesson will teach you how to use the jog wheel to manually nudge a track's phase to align its beats with another track. This is a core technique that you will use constantly, forming the bedrock of manual mixing.
1. Understanding Phase vs. Tempo
Before we touch the hardware, it's crucial to understand the difference between two concepts: tempo and phase.
- Tempo is the speed of a track, measured in Beats Per Minute (BPM). It's a rate of change.
- Phase is the timing alignment of the beats between two tracks at a specific moment. It's a relative position.
Imagine two identical digital clocks. If both are set to tick once per second (same tempo), but you start the second clock half a second after the first, their ticks will be out of phase. They are ticking at the same rate, but not at the same time.
In DJing, even if two tracks are at the exact same BPM, if you press play on the second track a fraction of a second too early or too late, their beats will be out of phase. You'll hear a "flamming" or "galloping" sound as the kick drums and snares hit at slightly different times. Our goal today is to learn how to correct this misalignment.
2. The Jog Wheel: Your Phase Correction Tool
The primary tool for correcting phase is the jog wheel. On a Pioneer CDJ-3000, it's designed to mimic the behavior of a vinyl turntable, giving you tactile control over the track's playback.
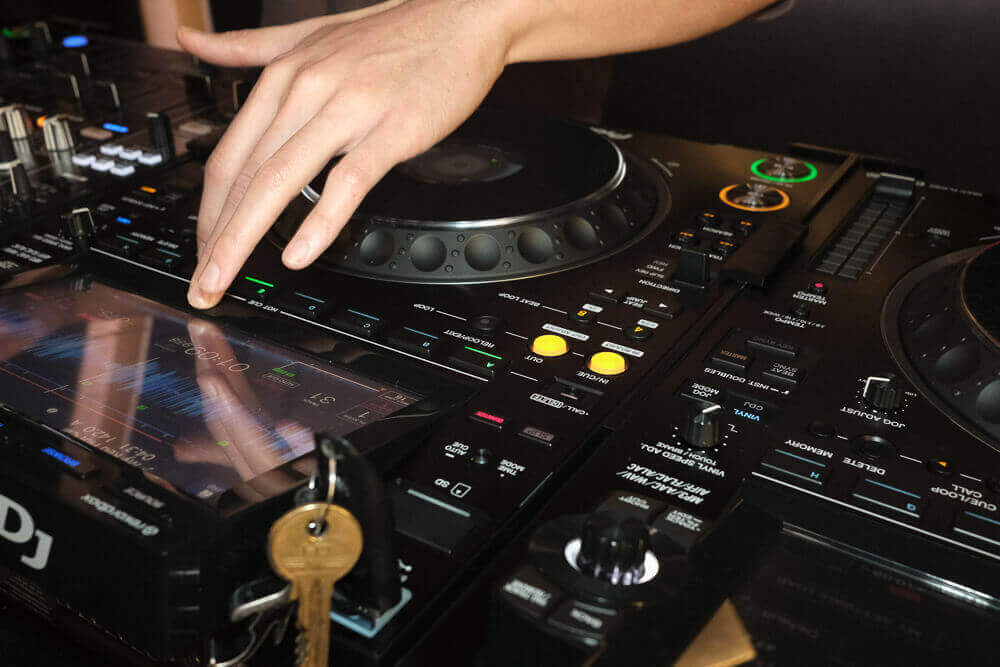
It's important to know that interacting with different parts of the jog wheel produces different results:
- Top Surface: The touch-sensitive top platter is for making significant changes. When "Vinyl Mode" is active, touching the top will stop the track, just like putting your hand on a spinning record. This is used for scratching or cueing, but not for the subtle adjustments we're learning today.
- Outer Ring: This is the part you'll be using. Pushing the outer ring forward (clockwise) or pulling it back (counter-clockwise) temporarily speeds up or slows down the track. This action is often called pitch bending. When you let go, the track returns to its original tempo. This is perfect for making the small, temporary corrections needed to fix phase alignment.
The following reading explains this concept of temporarily adjusting the track's speed.
Understand fine-tuning pitch with jog wheels
This article from 'Comprehensive Guide to DJing Hypnotic Techno' clearly distinguishes between temporary and permanent speed changes. Although the context is techno, the jog wheel mechanics are identical for DnB.
Please read the sections titled 'Understanding Jog Wheel Functionality', 'Pitch Bending vs. Fine Pitch Adjustment', and the subsection 'Pitch Bending'. Focus on how 'Pitch Bending' is described as a temporary speed change ideal for short-term beat alignment.
3. The Technique: Nudging and Dragging
Now let's get practical. The actions of speeding up and slowing down a track with the jog wheel's outer ring have specific names.
- Nudging: Gently pushing the jog wheel's outer ring clockwise to temporarily speed up the track and move its beats forward in time.
- Dragging: Gently pulling the jog wheel's outer ring counter-clockwise to temporarily slow the track down and move its beats backward in time.
Your goal is to listen to both tracks in your headphones and use these two techniques to make their beats hit at the exact same time.
The following resource provides a clear definition of these techniques and offers a crucial tip for when you're learning.
This blog post from Pirate.com, 'How to Beatmatch', offers straightforward definitions for nudging and dragging and provides a practical method for figuring out which direction to go.
First, read the 'Beatmatching techniques' section to solidify your understanding of 'Nudging' and 'Dragging'. Then, read point #2 under the 'How To Beatmatch By Ear' section. Pay close attention to the tip about what to do if you can't tell which track is ahead: nudge it one way and listen to see if it sounds better or worse.
This "trial and error" method is incredibly effective. If you nudge the jog wheel and the beats sound even more jumbled, you went the wrong way. Simply drag it back past the original point until it locks in. With practice, you'll begin to instantly recognize whether the incoming track is ahead or behind.
4. Practical Exercise: The Single Beat Correction (25 minutes)
It's time to put this into practice. For this exercise, we will use two copies of the same track. This is a classic training technique that removes tempo differences from the equation, allowing you to focus purely on phase correction.
Setup:
- Load the same DnB track onto both Deck 1 and Deck 2.
- On both decks, find the very first beat of the track (the first kick drum) and set a main Cue point there.
- Make sure the pitch faders on both decks are at 0% (the default speed).
- Use your mixer's headphone cueing system to listen to both Deck 1 and Deck 2 simultaneously.
The Drill:
- Press Play on Deck 1. Let it play.
- Now, try to press Play on Deck 2 so that its first beat lands exactly on top of one of the beats from Deck 1. Don't worry about phrasing for now, just try to hit a beat.
- You will almost certainly be slightly off. Now, listen carefully. Are the drums from Deck 2 hitting slightly after the drums from Deck 1? If so, the track is behind. Nudge the jog wheel on Deck 2 clockwise until you hear the beats lock into a single, solid sound.
- Are the drums from Deck 2 hitting slightly before the drums from Deck 1? If so, the track is ahead. Drag the jog wheel on Deck 2 counter-clockwise until the beats align.
- If you're unsure, use the tip from the reading: nudge it a little. If it sounds worse, you went the wrong way. Drag it back.
- Once the beats are perfectly aligned, stop Deck 2, re-cue it, and repeat the process. Practice this for at least 15-20 minutes.
The goal is to develop muscle memory and train your ear. Focus on making small, precise movements. You'll quickly find that a tiny touch is often all that's needed.
Conclusion
Congratulations on completing this essential lesson. You've now learned the fundamental hands-on skill of phase correction, which is half of the beatmatching equation.
Key Takeaways:
- Phase vs. Tempo: Phase is about beat alignment at a moment in time, while tempo is the overall speed.
- The Right Tool for the Job: The outer ring of the jog wheel is used for temporary pitch bending (nudging and dragging) to correct phase.
- Nudge and Drag: Nudging (clockwise) speeds a track up to catch up; dragging (counter-clockwise) slows it down to fall back into line.
- Listen and Correct: If you're unsure which way to go, nudge the wheel. If the sound gets worse, you went the wrong way.
Preview of the Next Lesson:
Now that you can correct phase, what happens when the tracks are at different speeds and constantly drift apart? In the next lesson, we will address the other half of the equation: using the CDJ-3000's BPM counter and pitch fader to match the tempo of two tracks. Once you can manage both tempo and phase, you'll be well on your way to performing a full manual beatmatch.