Recommended resources
The freely available resources this lesson will direct you to.
Congratulations on reaching the final lesson of this course!
Over the past eleven modules, you have gone from being a blockchain beginner to a capable smart contract developer. You've learned the fundamentals of Ethereum, mastered Solidity, built a full-featured ERC-20 token with staking and a token sale, and, in our last lesson, secured your project by transferring ownership to a multi-signature wallet. Your project is now technically complete and live on the blockchain.
The final step is to prepare for the world to see it. This lesson bridges the gap between your on-chain product and a successful public launch. Our goal is to outline a basic launch plan, including documentation, a simple project website, and community communication. A well-executed launch builds the trust and momentum necessary to achieve your goal of creating a token that others want to invest in and grow.
Why a Launch Plan Matters
In your experience as a backend developer, you know that deploying code is just one part of a release. A successful product launch requires documentation, a user interface, and a communication strategy. This is even more critical in Web3, where the environment is defined by high risk and user skepticism. A thoughtful launch plan is not about marketing hype; it's about building trust, demonstrating professionalism, and creating a sustainable foundation for your project.
A solid launch plan consists of three core pillars:
- Documentation: The source of truth for your project.
- Website: The central hub for your users and investors.
- Community & Communication: The engine of growth and engagement.
Let's break down how to plan for each.
1. Documentation: The Foundation of Trust
Clear documentation proves you have thought through your project's technical, economic, and strategic details. For your token project, you should prepare two key types of documents.
The Whitepaper and Litepaper
A whitepaper is the definitive blueprint of your project. It's where you articulate your vision and prove your credibility. For a non-technical audience, a shorter, more accessible "litepaper" is also highly effective.
To craft these, start by reading the following article, which outlines the essential components.
Checklist: What to Prepare Before Marketing Your Web3 Project
The article 'What to Prepare Before Marketing Your Web3 Project' by Quecko provides a fantastic checklist for launch preparations. We'll focus on the sections covering the core project narrative and documentation.
Please read sections 1 and 4 of the article: Start with Section 1: Define Your Core Vision and Value Proposition. This is the absolute foundation. Before writing anything else, you must be able to state clearly what problem your project solves and why it matters. Then, read Section 4: Craft a Detailed Whitepaper or Litepaper. Pay close attention to the list under 'Contents to include,' as this will be your guide for structuring your own whitepaper.
Based on the reading, your whitepaper should cover:
- Introduction: The problem you are solving.
- Solution: How your token, staking, or sale mechanism addresses this problem.
- Technical Architecture: A high-level overview of your smart contracts. You don't need to include the full code, but explaining the logic is important.
- Tokenomics: This is crucial for investors. Detail the total supply, token distribution (e.g., team, community, liquidity), and the token's utility (e.g., staking rewards, governance).
- Roadmap: Outline your future plans for the project to show long-term vision.
- Team: Introduce the team behind the project to build trust (if you are not anonymous).
Create a shorter litepaper that summarizes these points with more visuals and less technical jargon. This will be a key asset for your website and community channels.
2. The Project Website: Your Digital Storefront
Your website is the single most important destination for anyone interested in your project. It should be professional, clear, and provide all essential information in one place. Your background as a developer gives you an edge in creating or overseeing the creation of a functional and effective site.
Checklist: What to Prepare Before Marketing Your Web3 Project
Let's return to the Quecko article to understand what makes a good Web3 project website.
Please read Section 3: Build a Conversion-Ready Website. Focus on the 'Must-have Web3 website elements' list. Think about how each element contributes to building user trust and providing clarity.
Your website should include:
- A Clear Value Proposition: At the very top of the homepage, state what your project is and why it's valuable.
- Call-to-Action (CTA): Buttons that link directly to your dApp (e.g., "Buy Tokens," "Stake Now").
- Key Information Sections:
- Tokenomics: Use charts to visualize token allocation.
- Roadmap: An infographic showing past achievements and future goals.
- Documentation: Prominent links to your Whitepaper and Litepaper.
- Trust Signals:
- Contract Addresses: Clearly list the addresses of your token, sale, and staking contracts. Link them to their verified Etherscan pages.
- Security Audit Report: If you get one, feature it prominently.
- Community Links: Icons linking to your Twitter, Discord, and Telegram.
- A Functional dApp Interface: Your website should host the frontend you built, allowing users to connect their wallets and interact with your contracts. This could include a dashboard for users to check their token balances.
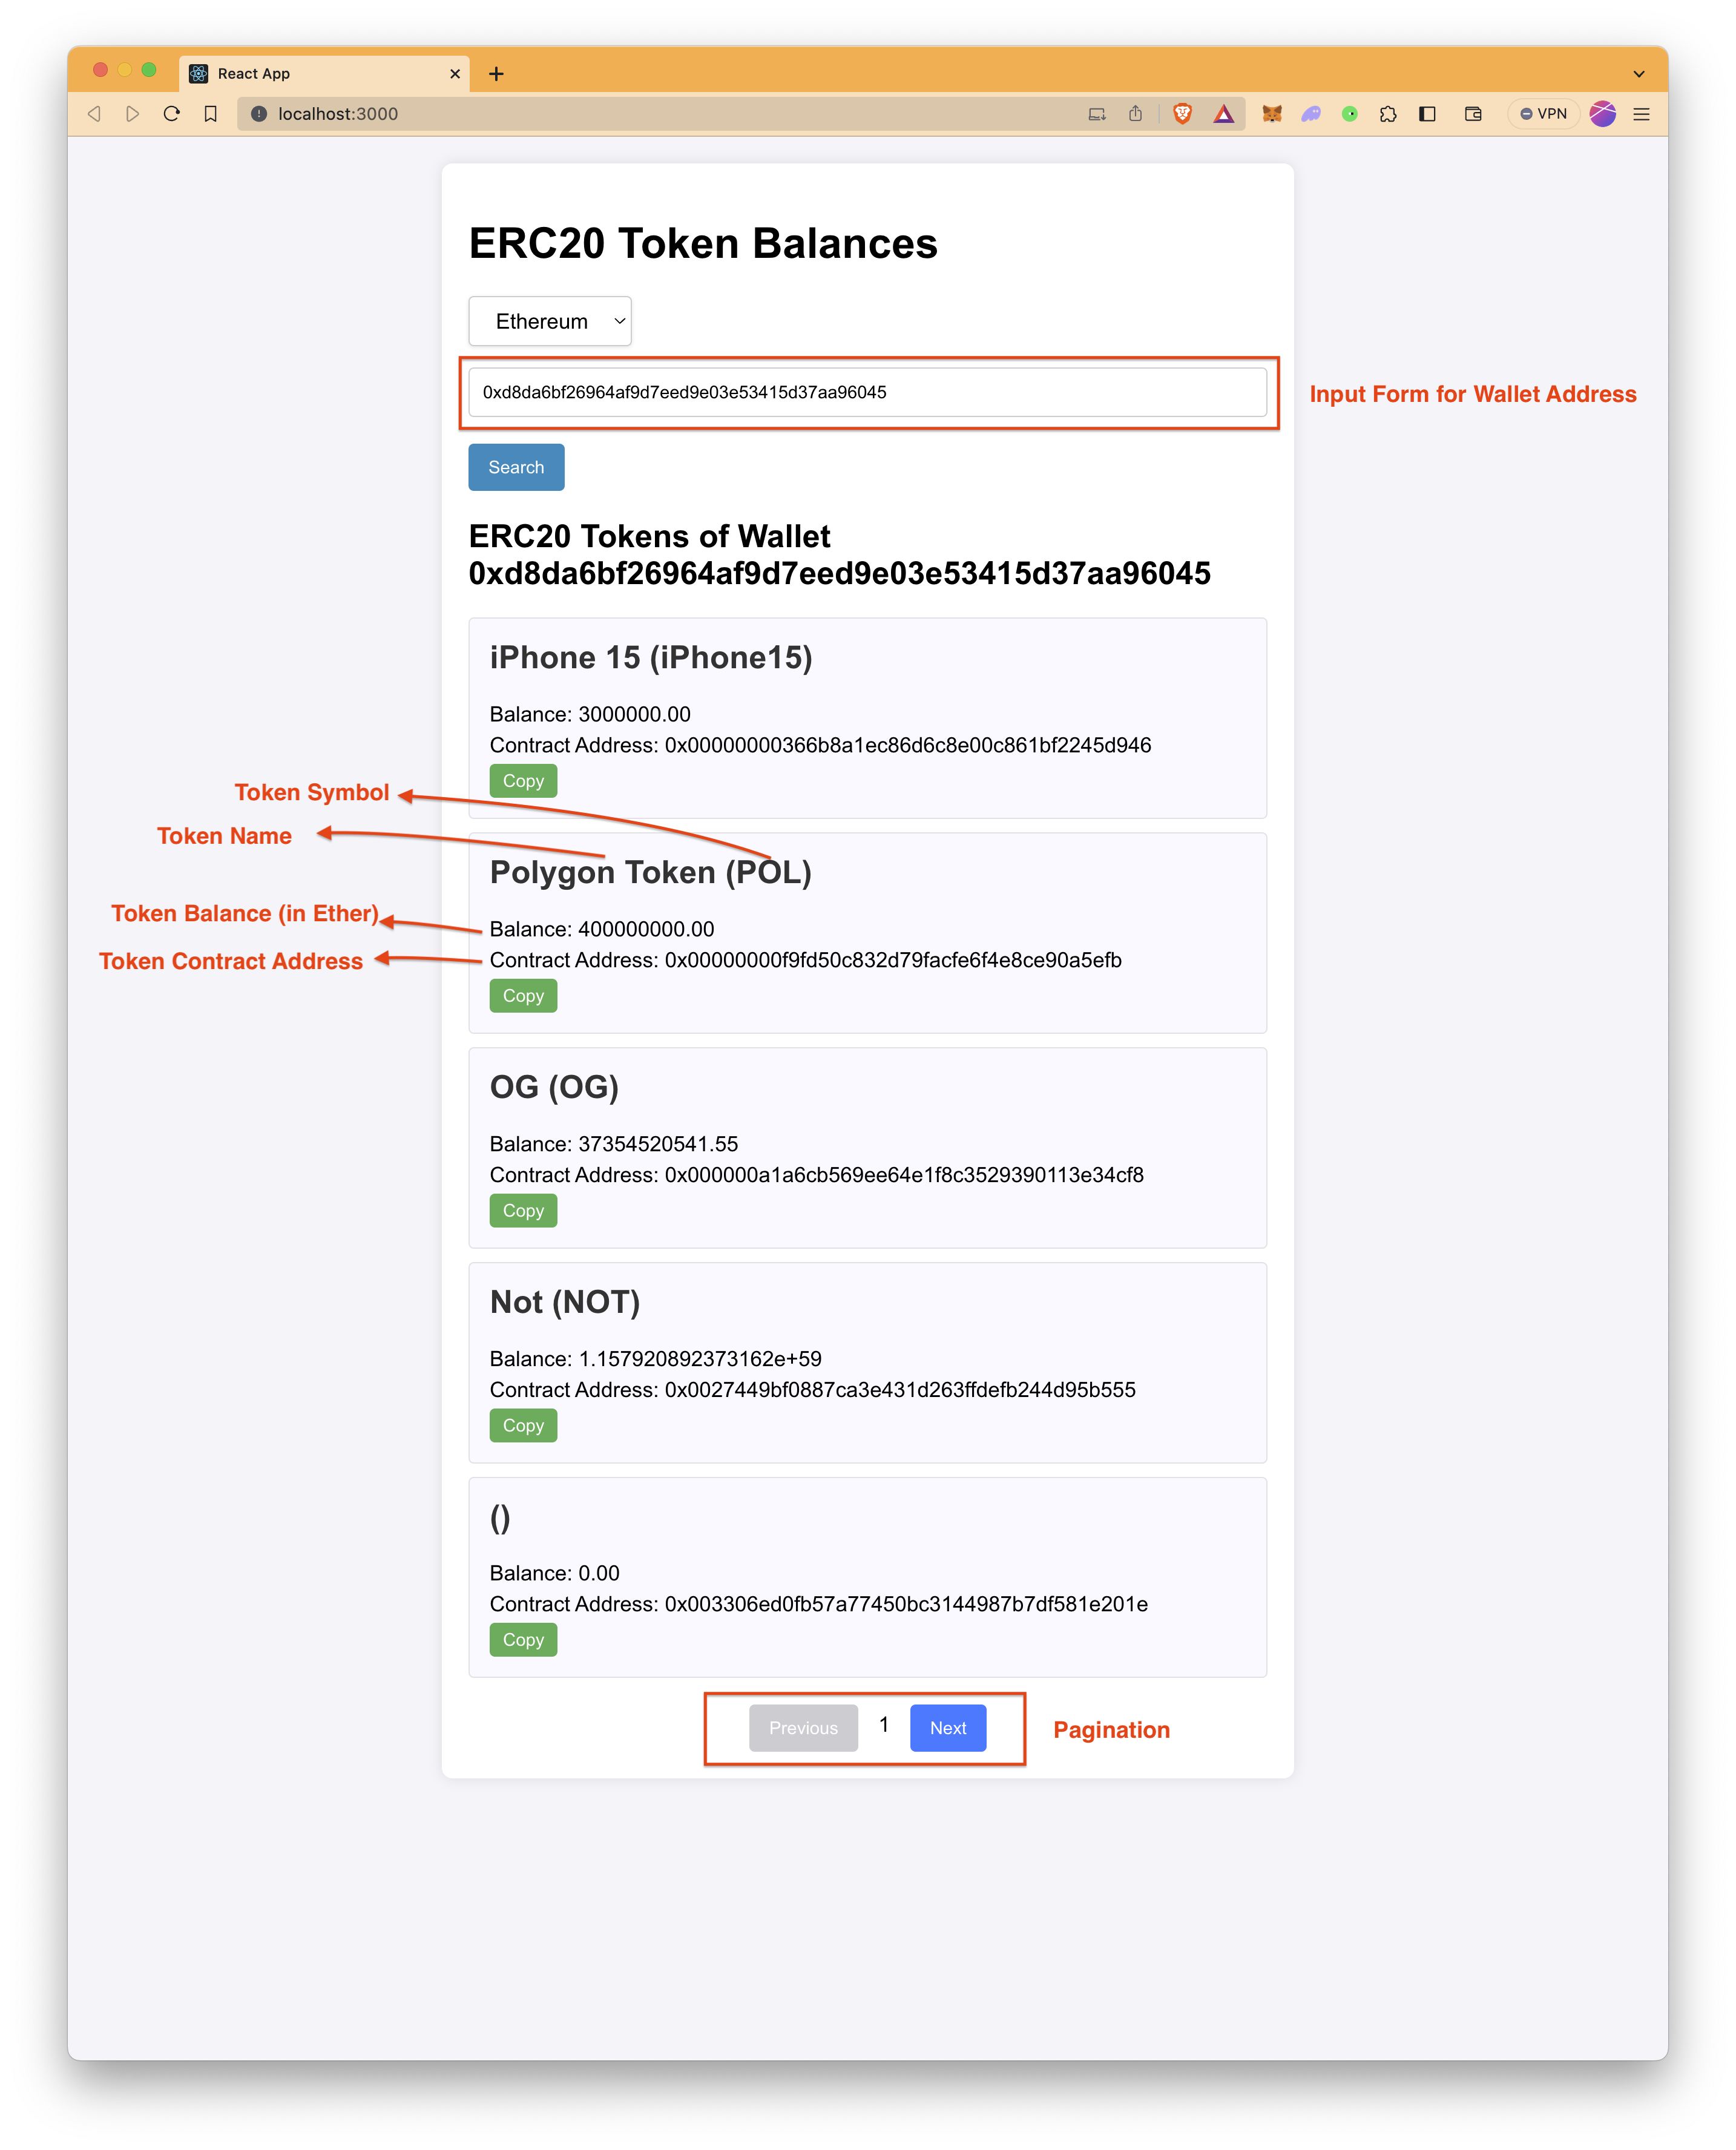
3. Community and Communication
In Web3, your community is your biggest asset. They are your first users, your evangelists, and your long-term supporters. Building and communicating with this community is not something that starts on launch day; it begins weeks in advance.
The following article offers a strategic overview of the primary communication channels and a phased approach to launching.
How to Market a Crypto Project: 2026 Launch Guide
The article 'How to Market a Crypto Project' from ICODA provides a professional-grade framework. We'll extract the most relevant parts for a solo developer launching their first project.
Please read the following parts: Skim the table under The Channel Blueprint. Pay attention to the 'Core Function' of Twitter/X, Discord, and Telegram. These are your primary channels. Read the section Community Building: Where Authenticity Beats Everything. The key insight here is that founder engagement is crucial. Finally, study the four-phase timeline under The Launch Timeline That Actually Works. This provides a concrete, step-by-step plan.
Outlining Your Launch Plan: A 4-Week Timeline
Based on these resources, here is a basic, actionable timeline for your launch.
Phase 1: Foundation (4 Weeks Before Launch)
- Documentation: Finalize your whitepaper and litepaper.
- Website: Launch a simple landing page that introduces the project, captures email signups for updates, and links to your social channels.
- Community: Create your official Twitter and Discord/Telegram channels.
- Content: Begin posting on Twitter. Share your vision, explain the problem you're solving, and talk about your project's mission. Start conversations and be authentic.
Phase 2: Preparation (1-2 Weeks Before Launch)
- Announcements: Announce the official launch date and time across all channels.
- Content:
- Publish your litepaper.
- Share detailed threads on Twitter explaining your tokenomics and roadmap.
- Post "how-to" guides (e.g., "How to Participate in the Token Sale").
- Website: Update the website with the full details: tokenomics, roadmap, and a link to the full whitepaper.
- Community: Be highly active in Discord/Telegram, answering every question from early community members. Their feedback is invaluable.
Phase 3: Execution (Launch Week)
- Go-Live: Push the final dApp interface to your website.
- Coordinated Announcement: Announce that the launch is live across all channels simultaneously.
- Engagement: Host a launch day AMA ("Ask Me Anything") on Twitter Spaces or Discord to answer questions live.
- Support: Monitor all channels for user issues or questions. Quick, helpful responses are critical for building trust during this period.
Phase 4: Post-Launch (Ongoing)
The launch is a beginning, not an end.
- Communication: Maintain a consistent flow of updates (at least 2-3 times a week). Share on-chain metrics (e.g., number of token holders, total amount staked).
- Execution: Begin working on the next item in your public roadmap.
- Community: Continue engaging with your community, listen to their feedback, and start exploring governance proposals to further decentralize the project.
Test your understanding!
Imagine you are preparing for your launch. Based on what you've learned, what are the three most critical pieces of information you should feature "above the fold" (i.e., visible without scrolling) on your project's homepage?
Show answer
While there can be some variation, the three most critical elements are:
- A Clear Value Proposition: A concise, compelling headline that explains what your project is and why it's useful (e.g., "The First Decentralized Rewards Token for Python Developers").
- A Primary Call-to-Action (CTA): A prominent button that directs users to the most important action, such as "Launch App," "Join the Token Sale," or "Stake Your Tokens."
- Links to Community & Documentation: Easily accessible links to your Twitter, Discord, and Whitepaper. This immediately shows transparency and gives interested users a clear next step to learn more or engage.
Conclusion and Course Wrap-up
This lesson has equipped you with a foundational framework to plan your project's launch. By focusing on clear documentation, a professional website, and authentic community communication, you can build the trust and momentum needed for success.
Key Takeaways:
- A successful launch is built on trust, which comes from professionalism, clarity, and transparency.
- Your documentation (whitepaper/litepaper) is your project's blueprint and proves you've done your homework.
- Your website is the central hub for your community and must clearly present your value proposition, key information, and links to your dApp.
- Community communication should start weeks before launch, focus on education and authentic engagement, and continue long after the initial launch.
- A phased launch plan (Foundation, Preparation, Execution, Post-Launch) helps organize your efforts and ensures a smooth rollout.
You have now reached the end of our course. From the core principles of blockchain to deploying a secure, full-stack decentralized application, you have acquired a comprehensive and highly valuable skill set. The journey of a developer is one of continuous learning, and the Web3 space evolves rapidly, but you now have a solid foundation to build upon.
Congratulations on your dedication and hard work. I wish you the very best of luck with your project launch and your future endeavors in the world of decentralized technology.