Recommended resources
The freely available resources this lesson will direct you to.
Hello! In our last lesson, you used the browser's built-in Animations Panel to visually debug and refine the timing of your animation sequence. You now have a polished, multi-part animation running perfectly in your browser. The final step is to get it out of the browser and into a shareable format.
This lesson focuses on the first of two key export methods. You will learn how to record your browser-based CSS animation as a high-quality MP4 video file using screen capture tools. This is an essential skill for creating content for social media, presentations, or video portfolios.
We will explore two distinct paths to achieve this: a straightforward, designer-friendly tool and a more powerful, professional-grade free application. By the end of this lesson, you'll be able to confidently capture your web animations and save them as crisp, smooth video files.
1. The Principles of High-Quality Screen Recording
Before we jump into the tools, let's clarify what we're doing. We aren't "exporting" the animation in a traditional sense, like saving a file from a design application. Instead, we are performing a high-fidelity digital recording of what your browser is rendering on screen.
For a motion designer, "high-quality" isn't just a vague term. It comes down to three key technical factors:
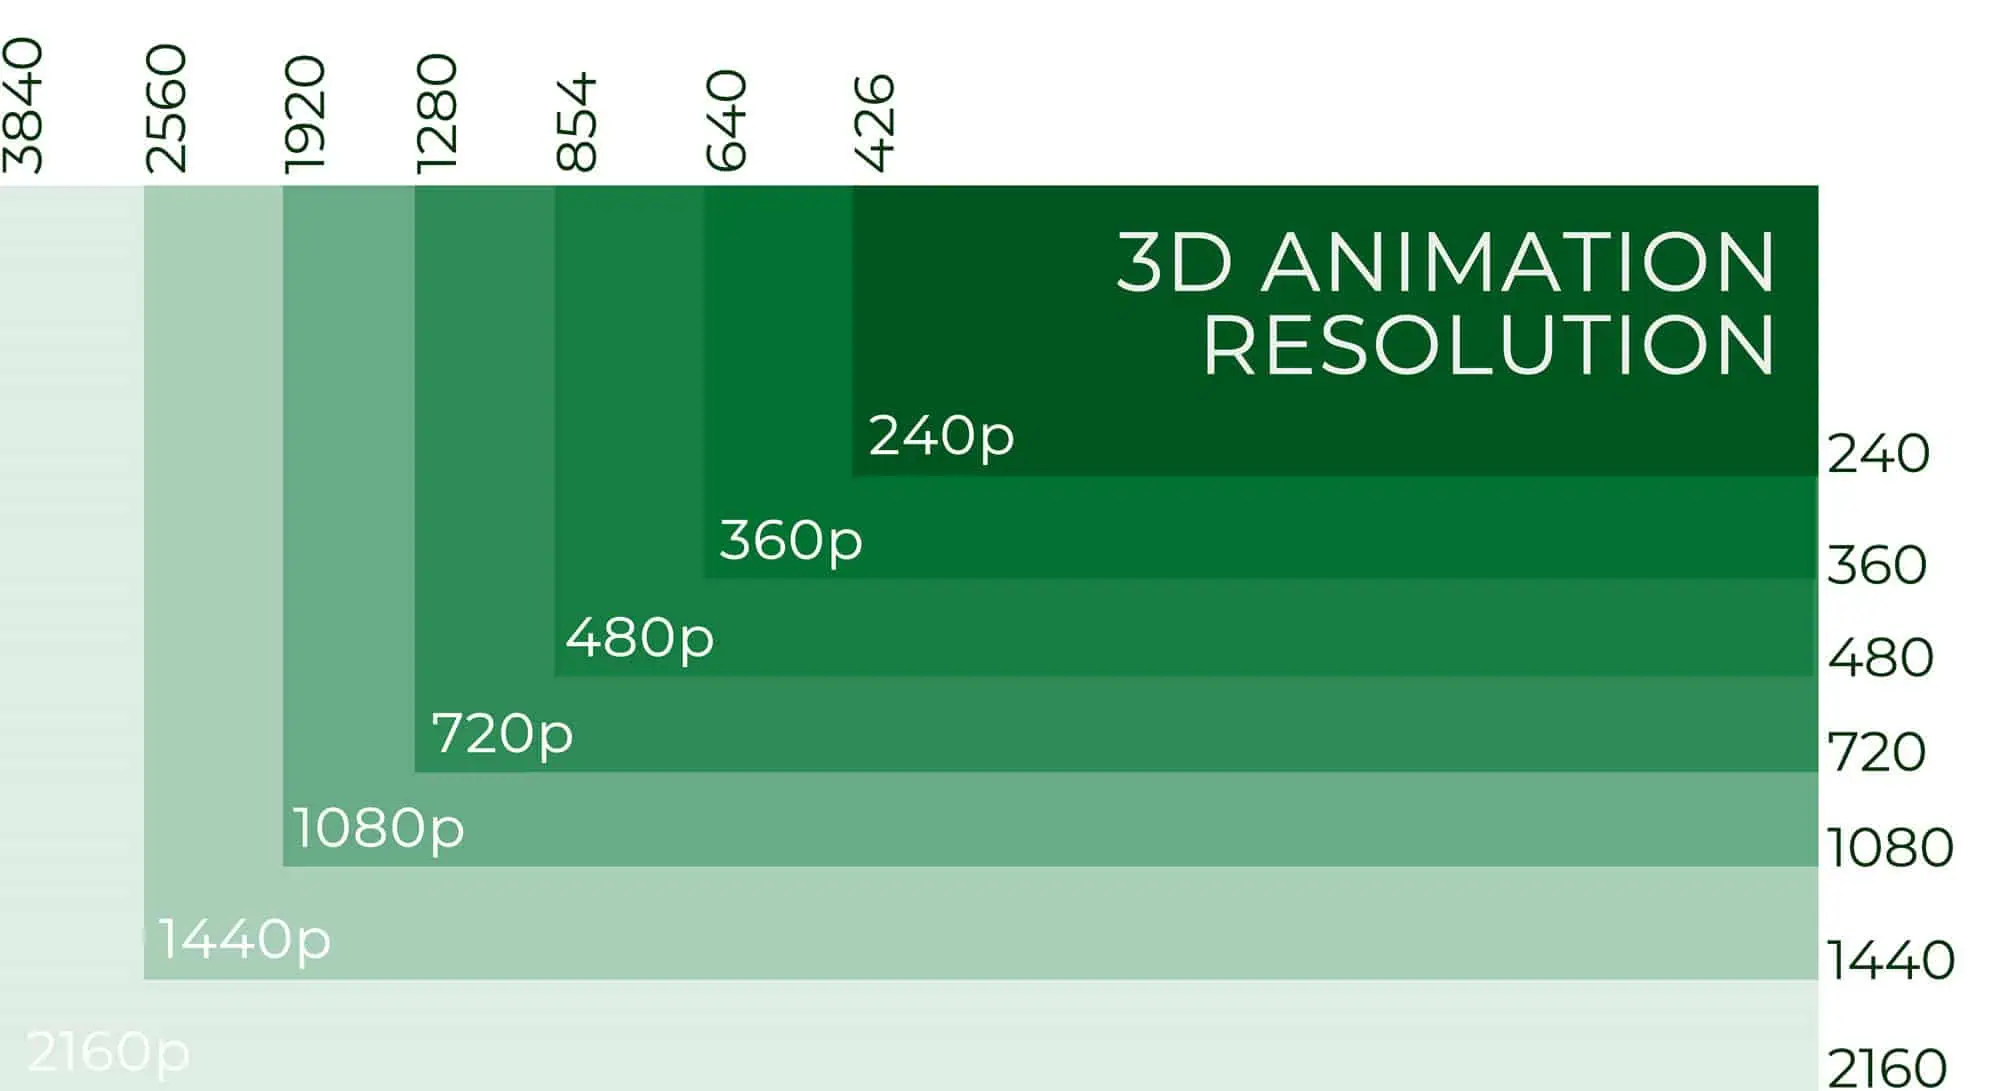
- Resolution: The number of pixels in the video, determining its clarity and sharpness. Higher resolutions mean more detail. A standard for "Full HD" is 1920x1080 pixels.
- Frame Rate (FPS): The number of individual images shown per second. For smooth motion, 60 FPS is the gold standard, especially for digital animations.
- Encoding & Compression: The process of saving the video data into a file. Good settings preserve detail and color without creating enormous files.
This visual shows how different resolutions relate to each other. Our goal is to capture at a high resolution like 1080p (HD) or even 2160p (4K) to ensure a crisp final product.
Now, let's look at the tools that will help us control these factors.
2. Path A: The Simple & Swift Method (Screen Studio)
If you are a Mac user and prefer a tool with a minimal, intuitive interface that feels designed for creatives, Screen Studio is an excellent option. It's a paid application, but its ease of use can make it worth the investment for quick, polished recordings.
The core workflow for our task is very simple: you tell Screen Studio to record just the browser window where your animation is playing.
How to Use Screen Studio on Mac (2024)
This video, 'How to Use Screen Studio on Mac', provides a great overview of the recording process. We'll focus on the part that's most relevant to our goal: capturing a specific area of your screen.
Watch from 01:00 to 02:54. Pay close attention to the 'window' and 'area' recording options. This is exactly how you would isolate your browser to capture only the animation, without recording your entire desktop.
As you saw, Screen Studio also has powerful post-production features like automatic zooming and background styling. While these are fantastic for creating product demos, for capturing a pure animation you would typically ignore them and export the clean, unedited recording.
The workflow would be:
- Open your animation project in the browser via VS Code's Live Server.
- Launch Screen Studio.
- Select the Window option and choose your browser, or use the Area option to draw a precise box around your animation canvas.
- Click Start Recording.
- Once the animation is complete, stop the recording.
- Save or export the resulting video file.
This path is perfect for speed and simplicity.
3. Path B: The Powerful & Free Method (OBS Studio)
For maximum control and cross-platform compatibility (Windows, Mac, Linux), the industry standard is Open Broadcaster Software (OBS Studio). It's free, open-source, and incredibly powerful, but requires a bit more initial setup to get pristine results.
Step 1: Installation and Basic Setup
First, you'll need to install OBS and run its initial setup wizard.
OBS Screen Recording Step-by-Step Guide
This 'OBS Screen Recording Step-by-Step Guide' from TechSmith covers the basics of getting started. We'll use it to get the software installed and running.
Read 'Step 1: Install OBS' and 'Step 2: Initial setup'. When the Auto-Configuration Wizard runs, choose 'Optimize just for recording'.
Step 2: Setting up the Capture Source
With OBS open, you need to tell it what to record. The most precise way to capture your web animation is not by recording a window, but by using the built-in Browser Source. This tells OBS to render your local web page directly inside the scene, giving you a perfect, pixel-perfect capture every time.
- In VS Code, make sure your Live Server is running and copy the local address (it usually looks like
http://127.0.0.1:5500). - In OBS, in the 'Sources' panel, click the
+button and select 'Browser'. - In the properties window that appears, paste your local server address into the 'URL' field.
- Set the 'Width' and 'Height' to your desired final resolution, for example
1920and1080. - Click 'OK'.
You should now see your animation scene inside the OBS preview window.

Step 3: Configuring for High Quality
This is the most important step. We will configure OBS to record at high resolution, a smooth frame rate, and with an efficient, high-quality encoder.
We'll use a video tutorial to walk through these settings. The narrator speaks quickly, so feel free to pause as you follow along in OBS.
BEST OBS Studio Settings! (Recording Edition) 2025 Tutorial
The 'BEST OBS Studio Settings! (Recording Edition)' video is a fast-paced but extremely accurate guide to configuring OBS for top-tier quality. We will follow its recommendations precisely.
Watch the entire video (it's short!) and apply the settings as you go: Video Tab (0:00-0:45): Set 'Base (Canvas) Resolution' and 'Output (Scaled) Resolution' to 1920x1080. Set 'Common FPS Values' to 60. Output Tab (0:45-1:49): Change 'Output Mode' to Advanced. In the 'Recording' tab, set 'Recording Format' to MP4. For the encoder, choose NVIDIA NVENC or AMD VCE/VCN if you have a modern graphics card; otherwise, use x264. Set 'Rate Control' to CQP and the 'CQ Level' to 15. This is a fantastic setting for balancing quality and file size. Advanced Tab (2:14-2:41): Set 'Color Range' to Full to ensure your colors are vibrant and not washed out.
These settings might seem complex, but they are a "set it and forget it" configuration that will give you consistently professional results.
Step 4: Record!
With everything configured, the process is simple.
- Make sure your animation is visible and ready in the OBS preview. If you need to restart it, you can right-click the Browser source and select 'Refresh'.
- In the 'Controls' panel in the bottom-right of OBS, click Start Recording.
- Let your animation play through.
- Click Stop Recording.
Your high-quality MP4 file will be saved to the location specified in your Output settings.
Conclusion
You now have a complete workflow for taking a web-based animation from a browser context to a standard, high-quality MP4 video file. This opens up countless possibilities for sharing your work.
Key Takeaways:
- You can create MP4s of your CSS animations by using screen recording software.
- Screen Studio offers a simple, paid, Mac-only solution for quick captures.
- OBS Studio is a powerful, free, and cross-platform tool that offers professional-level control over quality.
- For the highest fidelity in OBS, use the Browser Source feature combined with specific settings for resolution (1080p), frame rate (60 FPS), and encoding (CQP).
In our next two lessons, we'll shift gears to the other major export target for motion designers: Lottie. You will learn about the workflow for creating Lottie animations directly from Figma and how to control them with JavaScript. This will equip you with the primary format used for scalable, interactive animations on the web and in mobile apps.