Recommended resources
The freely available resources this lesson will direct you to.
- Swift News - Swift 6, Strict Concurrency, Privacy, State of Subscription Apps, Indie Dev & Morewww.youtube.com
- WWDC24: What’s new in Swift | Applewww.youtube.com
- Adopting strict concurrency in Swift 6 apps | Apple Developer Documentationdeveloper.apple.com
- Updating an app to use strict concurrency | Apple Developer Documentationdeveloper.apple.com
Hello! This course begins with a practical Swift 6 migration, then moves into modern SwiftUI while keeping older-system fallbacks in view. In this first module, you’ll use the compiler’s feedback to identify concurrency problems before learning how to fix them.
Today’s goal is to take an iOS project previously built with Swift 5.10, select Swift 6 language mode, and find the resulting strict-concurrency diagnostics in Xcode. You do not need to resolve every diagnostic yet; the next two lessons address representative fixes.
What changes when you select Swift 6?
A data race can occur when concurrent work accesses the same mutable data without adequate coordination. Swift’s concurrency checks try to catch such risks while you build, rather than leaving them to appear unpredictably at runtime.
Watch two short passages from Apple Developer’s WWDC24: What’s new in Swift:
WWDC24: What’s new in Swift | Apple
Apple Developer introduces the purpose of Swift 6 language mode and explains why migration can happen incrementally.
Watch the introduction for the data-race-safety goal. Then watch the migration explanation, focusing on the change from Swift 5.10’s complete checking to Swift 6 language mode and on per-module adoption.
Three related settings are easy to confuse:
| Term | What it means here |
|---|---|
| Compiler version | The Swift compiler supplied by your selected Xcode installation. A project built using Swift 5.10 can later be opened with a Swift 6-capable compiler. |
| Swift Language Version | The language mode chosen in the target’s build settings. A newer compiler can still build code in Swift 5 mode. |
| Strict Concurrency Checking | In Swift 5 mode, setting this to Complete reveals more potential concurrency problems as warnings. Swift 6 language mode enables strict checking as part of that mode and makes relevant violations errors. |
That distinction gives you a useful migration path: inspect warnings in Swift 5 mode first, then switch the target to Swift 6 mode. Selecting a language mode is also separate from choosing an iOS deployment target. Before relying on an iOS 13 fallback, check what deployment targets your installed Xcode version supports.
Make a Swift 5 warning pass
Apple’s Adopting strict concurrency in Swift 6 apps gives the build-setting sequence and explains why a large initial set of diagnostics is manageable.
Adopting strict concurrency in Swift 6 apps | Apple Developer Documentation
Read Apple Developer Documentation’s configuration steps before changing your project. The note afterward explains how to treat an initially long diagnostics list.
In “Upgrade a project to Swift 6,” read the configuration guidance, from its opening paragraph through the explanation of Swift 6 language mode. Immediately below it, read the “Note,” from its paragraph about upcoming features through the incremental-migration advice. Focus on which setting you change before selecting Swift 6.
Work in a copy or version-control branch so you can compare builds. In Xcode, select the project in the navigator, select an iOS app target, and open Build Settings. Search for Strict Concurrency Checking; if a filter hides it, show all build settings. While the target remains in Swift 5 language mode, change checking from Minimal to Complete, then build.
The curated screenshot shows where this setting appeared in one Xcode version. Your layout may differ, but notice that the selected target’s setting is still Minimal in the image.
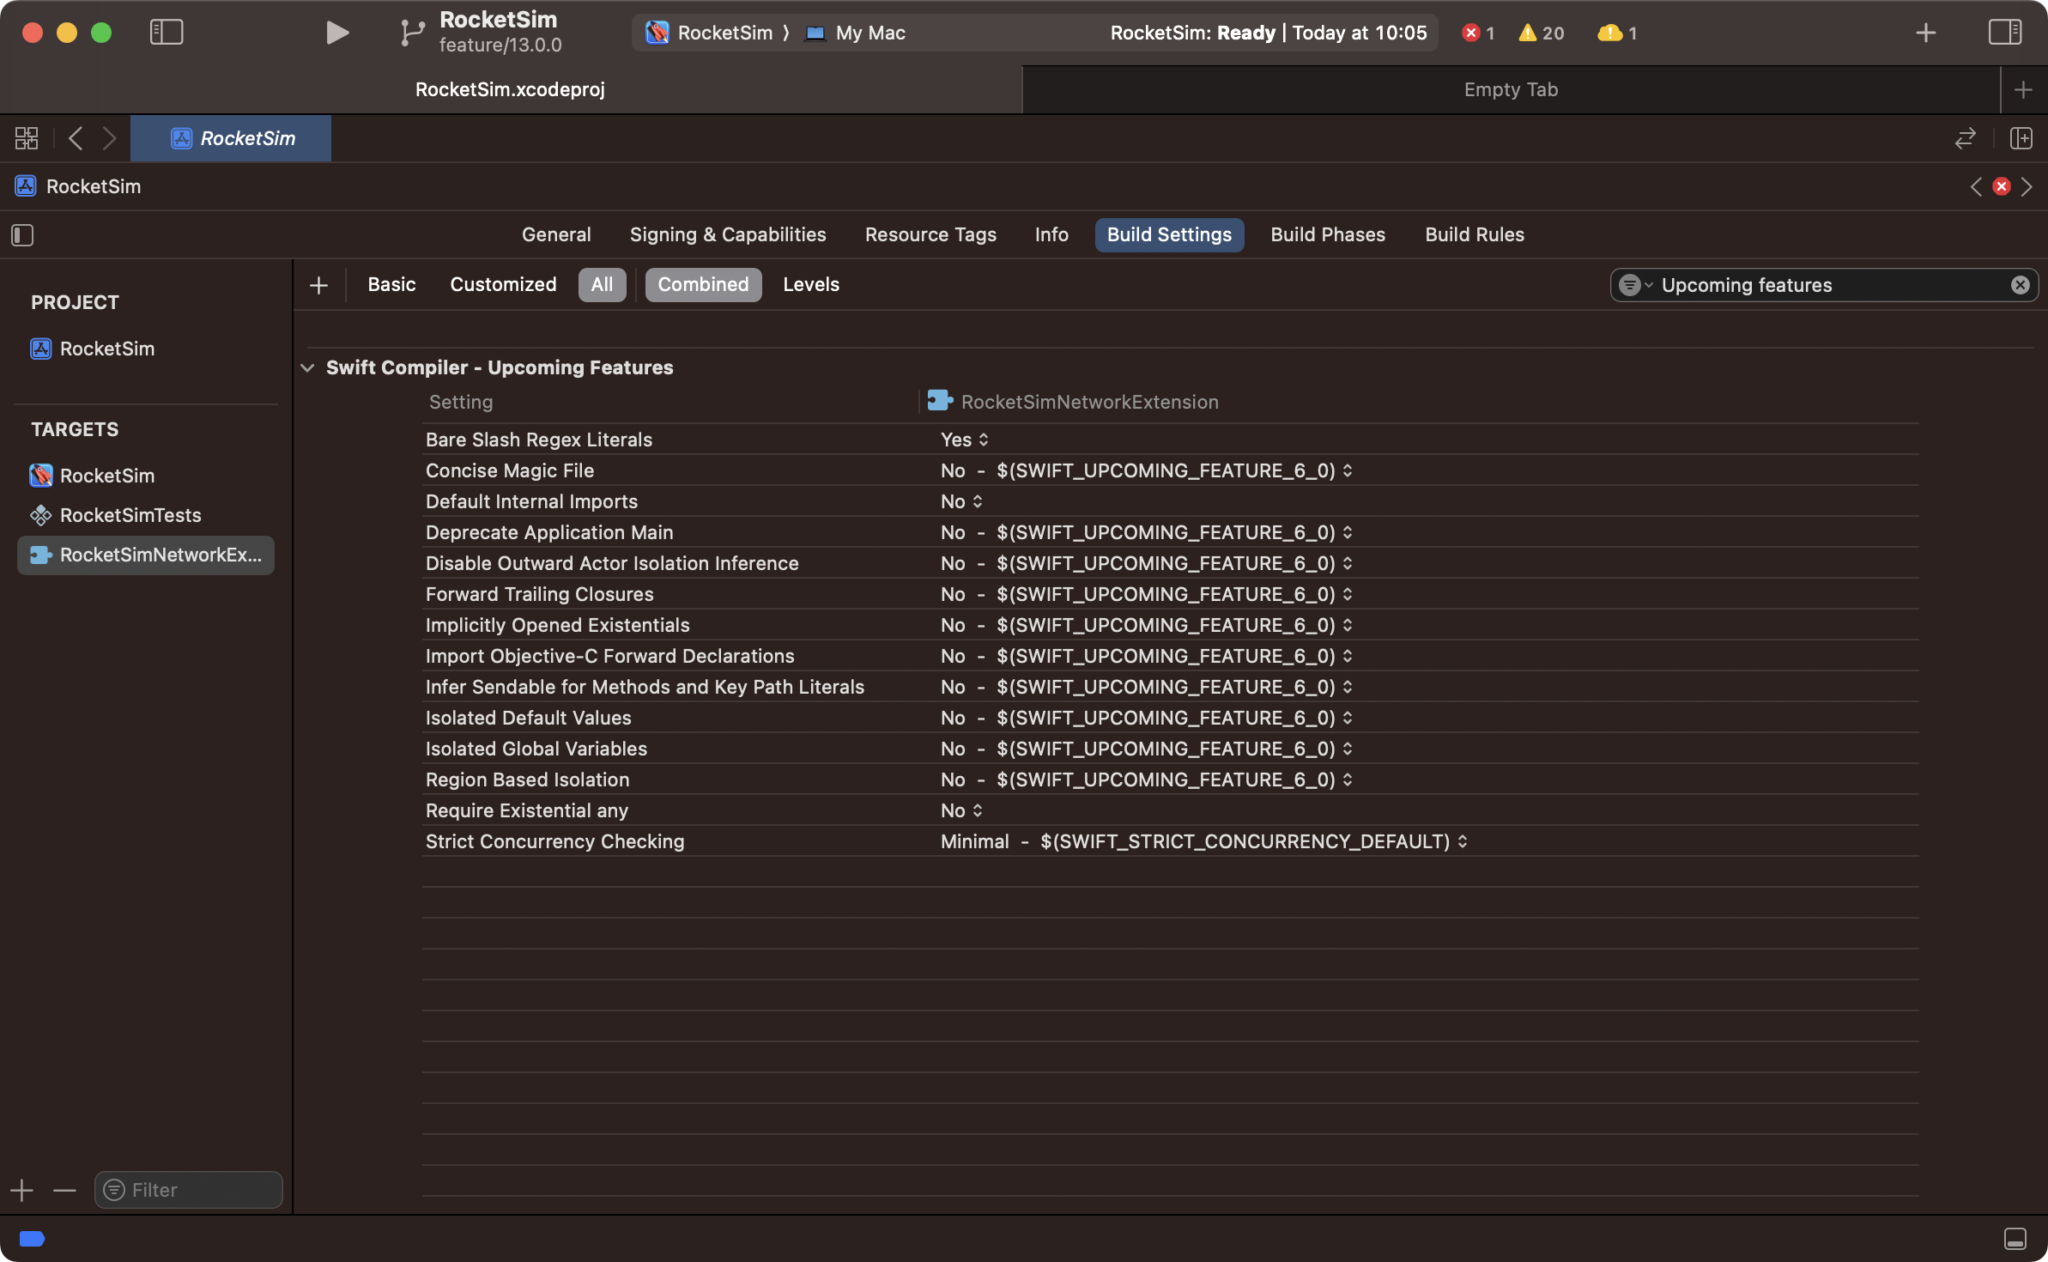
Open Xcode’s Issue Navigator after the build. Select a warning to see its message and source location. Note which target and file produced it: app, extension, and test targets have separate build settings and may report different issues. Not every warning is a concurrency warning, so read the message rather than assuming that every new entry has the same cause.
Allow roughly 10–12 minutes for this pass in a small project. In a larger app, the useful result today is a baseline of where warnings appear, not a cleared list.
Select Swift 6 language mode
To make this switch, you need an Xcode installation with a Swift 6-capable toolchain. Xcode 15.3’s Swift 5.10 compiler can perform the Complete warning pass, but it cannot offer Swift 6 language mode. If Swift 6 is absent from the language-version choices, check the Xcode version you are using rather than looking for another upcoming-feature toggle.
For the app target, return to Build Settings, search for Swift Language Version under Swift Compiler – Language, and select Swift 6. Build again. Make the same deliberate choice for other Swift targets you intend to migrate; one target’s language setting does not automatically switch every target in the project.
Compare the two builds. A potential concurrency violation that appeared as a Swift 5 Complete-checking warning may now prevent a Swift 6-mode build. That is a diagnostic you need to locate, not a sign that the setting failed to take effect. If the project has no such violations, it may build successfully immediately.
If an existing app reports too many issues to investigate at once, retain your record of the diagnostics and continue migration incrementally. You can return a target to Swift 5 mode while preparing fixes.
Locate a diagnostic in source code
The Issue Navigator is your starting point: choose an error or warning, read its full message, and jump to the highlighted source line. Then inspect the surrounding declaration or closure. Concurrency diagnostics often identify an access that is risky; understanding why it is risky may require looking at the value’s type or where the work can run.
If a small project produces no concurrency diagnostics, you can temporarily add this probe to an app-target Swift file:
final class Counter {
    var value = 0
}

func demonstrateDiagnostic() {
    let counter = Counter()
    let work: @Sendable () -> Void = {
        counter.value += 1
    }
    work()
}
Here, @Sendable marks a closure that must satisfy rules for work that could be used across concurrency boundaries. It captures a mutable Counter instance, so strict checking should flag the capture or access; the precise message can vary with compiler and project settings. Build once with Swift 5 + Complete, then with Swift 6, and find the diagnostic in the Issue Navigator each time. Remove the probe afterward and rebuild. This is only a way to practise finding compiler feedback—not a recommended counter implementation.
For any diagnostic you keep in your notes, record three things: the target, the highlighted location, and the compiler’s stated concern. That is enough context to begin a fix without guessing from an error count alone.
Takeaways
A Swift 5.10-era project can first expose concurrency warnings using Complete checking in Swift 5 mode. With a Swift 6-capable Xcode, you can then set Swift Language Version to Swift 6 for a target, build, and locate stricter diagnostics through the Issue Navigator. Switching modes and successfully building are distinct milestones: existing code may need repairs before it compiles.
Next, you’ll take a representative UI-isolation diagnostic and place UI-owned state on the main actor.