Recommended resources
The freely available resources this lesson will direct you to.
- Master Ethers.js for Blockchain Step-by-Step [Full Course]www.youtube.com
- React / Ethereum Tutorial - Create your own ERC-20 crypto token with a simple front end.www.youtube.com
- Web3 Tutorial: build DApp with Hardhat, React and Ethers.jsdev.to
- How do I transfer ERC20 tokens using Ether.js?stackoverflow.com
Hello! Welcome back.
In our last lesson, we successfully built a component to read data from our ERC-20 smart contract, displaying the token's name, supply, and the user's balance. This was a fantastic step into making our dApp aware of the blockchain's state.
Today, we're moving from reading to writing. You'll build a component that allows users to transfer tokens to another address. This is a fundamental feature for any token-based application and will introduce you to the process of sending transactions that change the state of the blockchain. This is the equivalent of moving from GET requests in a traditional backend to state-changing POST or PUT requests, which require authorization and have consequences.
By the end of this lesson, you will have built a functional transfer form that initiates a real transaction on the testnet, moving your custom tokens from one wallet to another.
1. From Provider to Signer: The Key to Writing
In the last lesson, we used an ethers.js Provider to read data. A Provider offers a read-only connection to the blockchain, allowing anyone to query balances, read contract data, or look up transaction histories. It cannot, however, approve transactions that change state or spend funds.
To perform a "write" operation, like transferring tokens, we need a Signer.
A Signer in ethers.js is an object that represents an Ethereum account. It has access to the account's private key (securely managed by MetaMask, never exposed to our dApp) and can therefore "sign" and approve transactions on the user's behalf.
Here's the workflow:
- We get a
Providerfrom the user's wallet (window.ethereum). - We ask the
Providerto give us aSignerassociated with the connected account. - We connect our
Contractobject to thisSigner. - We can now call the contract's "write" functions, which will prompt the user in MetaMask to approve the transaction.
This video from Dapp University, although discussing Ether transfers, provides a great explanation of the conceptual role of a wallet (signer) in authorizing transactions.
Master Ethers.js for Blockchain Step-by-Step [Full Course]
Watch this segment from 'Master Ethers.js for Blockchain' to understand how a wallet instance is created with a private key to sign transactions. In our case, MetaMask handles the private key, but the principle of needing a signer to authorize the action is the same.
Watch from 44:55 to 47:33. Focus on the explanation of what a 'wallet' object is in ethers.js and why it's needed to 'sign' transactions before they can be sent to the blockchain.
2. Building the Transfer Component
Let's start by creating the user interface for our transfer functionality. We need a simple form with inputs for the recipient's address and the amount of tokens to send, along with a submit button.
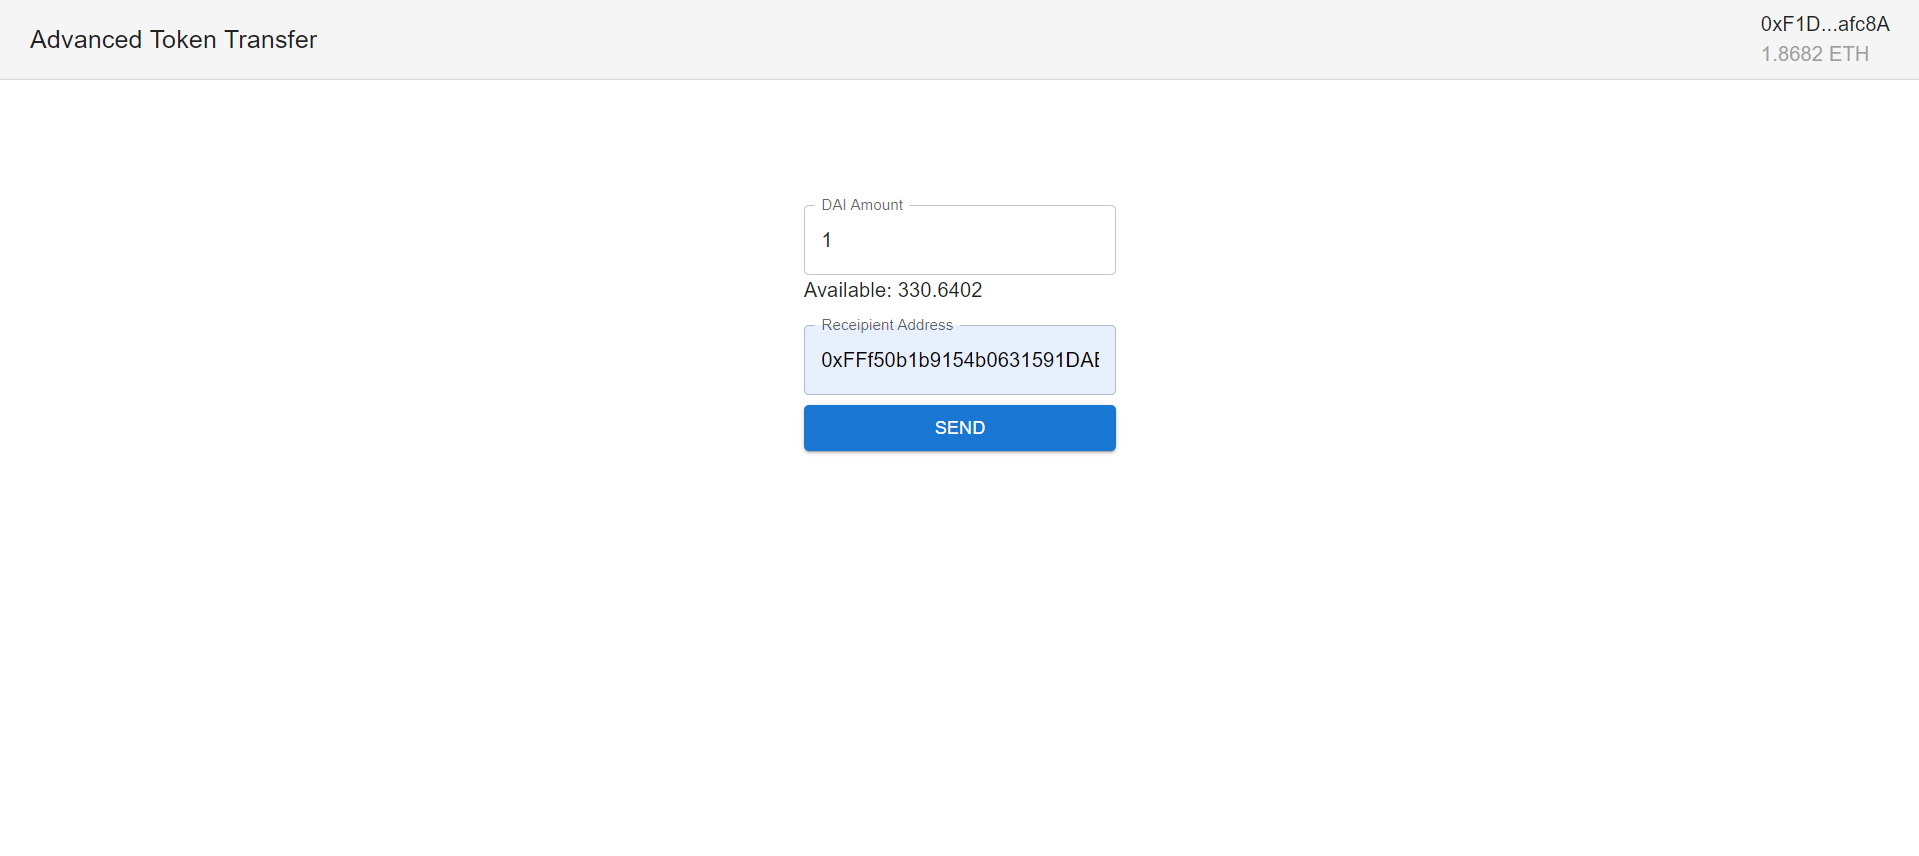
Create a new file in your src directory called TransferToken.tsx.
Here's the basic structure of the React component with the necessary form inputs.
// src/TransferToken.tsx

import { useState } from 'react';
import { ethers } from 'ethers';

// Assume YourTokenABI and contractAddress are available
// import YourTokenABI from '../artifacts/contracts/YourToken.sol/YourToken.json';
// const contractAddress = 'YOUR_CONTRACT_ADDRESS';

const TransferToken = () => {
    const [toAddress, setToAddress] = useState('');
    const [amount, setAmount] = useState('');
    const [txHash, setTxHash] = useState<string | null>(null);
    const [error, setError] = useState<string | null>(null);
    const [isProcessing, setIsProcessing] = useState(false);

    const handleTransfer = async (e: React.FormEvent) => {
        e.preventDefault();
        // We will implement the transfer logic here
    };

    return (
        <div className='transfer-card' style={{ border: '1px solid #ccc', borderRadius: '8px', padding: '20px', width: '400px', marginTop: '20px', backgroundColor: '#f9f9f9'}}>
            <h3 style={{marginTop: 0}}>Transfer Tokens</h3>
            <form onSubmit={handleTransfer}>
                <div style={{ marginBottom: '10px' }}>
                    <label>Recipient Address:</label>
                    <input
                        type="text"
                        value={toAddress}
                        onChange={(e) => setToAddress(e.target.value)}
                        required
                        style={{ width: '100%', padding: '8px' }}
                    />
                </div>
                <div style={{ marginBottom: '10px' }}>
                    <label>Amount:</label>
                    <input
                        type="text"
                        value={amount}
                        onChange={(e) => setAmount(e.target.value)}
                        required
                        style={{ width: '100%', padding: '8px' }}
                    />
                </div>
                <button type="submit" disabled={isProcessing} style={{ padding: '10px 20px' }}>
                    {isProcessing ? 'Processing...' : 'Transfer'}
                </button>
            </form>
            {txHash && <p>Success! Transaction Hash: {txHash}</p>}
            {error && <p style={{ color: 'red' }}>Error: {error}</p>}
        </div>
    );
};

export default TransferToken;
3. Implementing the Transfer Logic
Now for the core of the lesson: implementing the handleTransfer function. This involves getting a signer, creating a contract instance, and calling the transfer method.
The following tutorial provides an excellent textual guide for this process. We will adapt its logic using the modern ethers v6 syntax.
Web3 Tutorial: build DApp with Hardhat, React and Ethers.js
The article 'Web3 Tutorial: build DApp with Hardhat, React and Ethers.js' provides a clear code example for a transfer component. We'll follow its logic to implement our handleTransfer function.
Please read 'Task 5: Write/Transfer: Interact with smart contract in web App', specifically focusing on 'Task 5.2: Implement transfer() function'. Pay attention to how it creates a provider, gets a signer, instantiates the contract with the signer, and then calls erc20.transfer(). Note that we will use the updated ethers v6 syntax in our implementation.
Here is the step-by-step implementation of the handleTransfer function using ethers v6:
- Get Provider and Signer: Create a
BrowserProviderand asynchronously get thesigner. - Create Contract Instance: Instantiate
ethers.Contract, but this time pass thesigneras the third argument. This creates a contract object that is "connected" to the user's account and can initiate transactions. - Parse the Amount: The
transferfunction on the contract expects the amount in its smallest unit (like wei for Ether). We must useethers.parseUnits()along with our token's decimals to convert the user's input. - Call
transfer(): Call thetransfermethod on the contract object. This will trigger the MetaMask pop-up asking the user to confirm. - Wait for Confirmation: The
transfercall immediately returns aTransactionResponse. We must then call.wait()on this response to wait for the transaction to be mined and confirmed on the blockchain.
For a visual demonstration of this flow, the following video shows the creation of a similar "Interactions" component.
React / Ethereum Tutorial - Create your own ERC-20 crypto token with a simple front end.
This video, 'React / Ethereum Tutorial', demonstrates building a form and calling the transfer function. It's a great visual reinforcement of the code we are about to write.
Watch from 42:42 to 48:20. Observe how the form is created and how the transferHandler function takes the input values and uses props.contract.transfer to initiate the transaction. This is the exact same pattern we are implementing.
4. Handling the Transaction Lifecycle
When you submit a transaction, it doesn't happen instantly. Your backend development experience gives you a great mental model for this: it's like an asynchronous job.
- Submission (
contract.transfer): You send the job to the queue (the Ethereum mempool). You immediately get back aTransactionResponseobject, which contains ahash(like a Job ID). This confirms your request was received, not that it's complete. - Confirmation (
await tx.wait()): You wait for a worker (a miner/validator) to pick up your job and process it. This returns aTransactionReceiptwhen successful. The receipt is proof that the job is done and the state has been changed permanently.
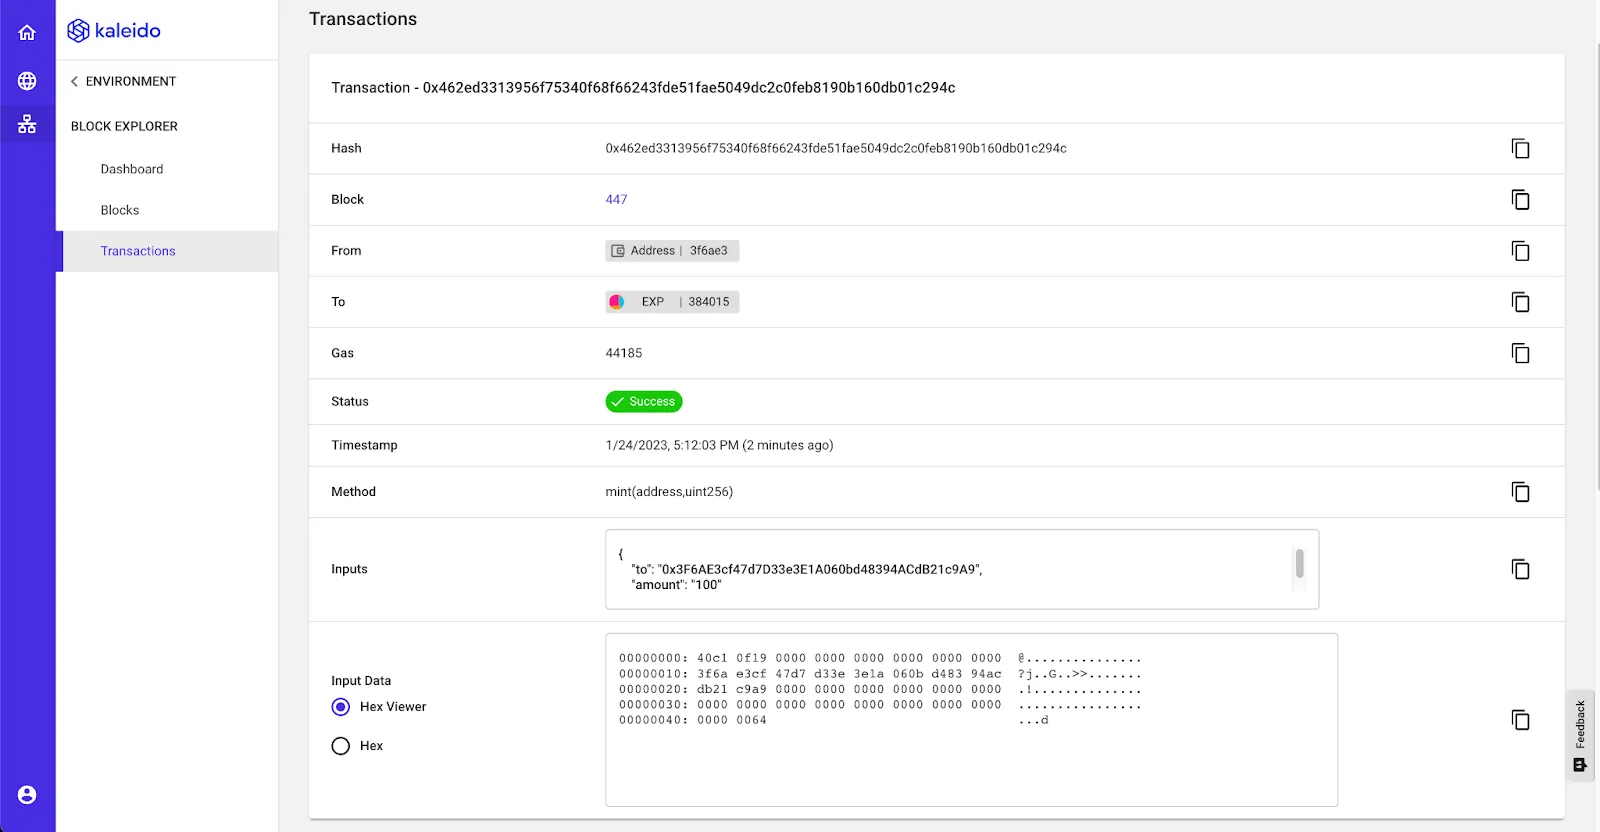
Let's now fill in the handleTransfer function in our TransferToken.tsx component with the complete logic, including error handling and state updates.
// Inside TransferToken.tsx

// ... (imports and state variables)

const handleTransfer = async (e: React.FormEvent) => {
    e.preventDefault();
    setError(null);
    setTxHash(null);
    setIsProcessing(true);

    if (!window.ethereum) {
        setError("MetaMask is not installed.");
        setIsProcessing(false);
        return;
    }

    try {
        const provider = new ethers.BrowserProvider(window.ethereum);
        const signer = await provider.getSigner();

        // You'll need to pass the contract address and ABI from props or define them here
        const contract = new ethers.Contract(contractAddress, YourTokenABI.abi, signer);

        // We need the token's decimals to correctly parse the amount
        const decimals = await contract.decimals();
        const amountInUnits = ethers.parseUnits(amount, decimals);

        const txResponse = await contract.transfer(toAddress, amountInUnits);

        console.log("Transaction sent! Hash:", txResponse.hash);

        const txReceipt = await txResponse.wait();

        console.log("Transaction confirmed! Receipt:", txReceipt);
        setTxHash(txReceipt.hash);

    } catch (err: any) {
        console.error("Transfer failed:", err);
        setError(err.reason || err.message || "An unknown error occurred.");
    } finally {
        setIsProcessing(false);
    }
};

// ... (rest of the component)
Test your understanding!
A teammate suggests removing the await txResponse.wait() line to make the UI feel faster, since contract.transfer() already returns a hash. Why is this a bad idea for providing accurate user feedback?
Show answer
Removing await txResponse.wait() means you tell the user the transfer was a "success" the moment it's submitted, not when it's confirmed. The transaction could still fail on the blockchain (e.g., run out of gas, or be reverted by the contract's logic). It could also get stuck or dropped. By waiting for the receipt, you can definitively confirm that the transfer was successfully included in a block and the state change is permanent, providing much more reliable feedback to the user.
5. Putting It All Together
Finally, let's integrate our new TransferToken.tsx component into App.tsx so it appears when a user connects their wallet. You will need to pass the contractAddress and ABI to it as props.
-
Import the component in
App.tsx:import TransferToken from './TransferToken'; -
Add it to your render logic, right below the
TokenInfocomponent:// In App.tsx's return statement {account && <TokenInfo account={account} contractAddress={contractAddress} />} {account && <TransferToken contractAddress={contractAddress} />}You'll also need to define
contractAddressat theApplevel and pass it down. -
Update
TransferToken.tsxto accept props.
Now, run your dApp. Connect your wallet, and you should see the transfer form. Try sending some of your testnet tokens to another account you own in MetaMask! You should see the transaction pop-up, and after confirming, the transaction hash should appear below the form. You can then look up this hash on the Sepolia Etherscan to see your on-chain activity.
Conclusion
Fantastic work! You have now implemented the "write" functionality, which is a massive leap forward. Your dApp can now not only read blockchain data but also initiate state changes through user-signed transactions.
Key Takeaways:
- Provider vs. Signer: A
Provideris for reading data, while aSigneris required for writing data (i.e., sending transactions). - Connecting a Contract: To perform write operations, a contract instance must be connected to a
Signer, e.g.,new ethers.Contract(address, abi, signer). - Transaction Lifecycle: Calling a write function returns a
TransactionResponseimmediately. You must use.wait()to await the on-chain confirmation, which provides aTransactionReceipt. - Unit Conversion: User input must be converted to the token's base unit using
ethers.parseUnits()and the token'sdecimals.
Preview of the Next Lesson:
Our dApp can now display token info and transfer tokens. Next, we will expand its capabilities by building a user interface for the token sale contract we created in a previous module. This will involve interacting with a second smart contract and handling functions that accept Ether in exchange for our token, bringing us one step closer to your goal of a fully-featured cryptocurrency application.