Recommended resources
The freely available resources this lesson will direct you to.
- Python Virtual Environment and pip for Beginnerswww.youtube.com
- Python Tutorial: VENV (Windows) - How to Use Virtual Environments with the Built-In venv Modulewww.youtube.com
- Install packages in a virtual environment using pip and venv - Python Packaging User Guidepackaging.python.org
- 12. Virtual Environments and Packagesdocs.python.org
Hello! Last lesson, you verified Python and Git in VS Code’s PowerShell terminal. Now you’ll give the AI research-and-decision API its own Python environment, install its first external library, and save a record of what was installed. You can do all of this locally; no AWS account is needed. Allow about 35–40 minutes.
Why give the project its own environment?
Python includes some tools by default, but the project will also need packages installed with pip, Python’s package installer. If every project shares one set of installed packages, changing a package for one project can disrupt another. A virtual environment gives this project a separate place for its Python packages.
Python Virtual Environment and pip for Beginners
Watch the dependency-conflict explanation in Dave Gray’s “Python Virtual Environment and pip for Beginners” for a quick picture of the problem an environment solves.
Watch why isolate packages. Focus on why two projects might need different versions of the same library. We’ll use PowerShell-specific commands below rather than copying terminal commands from the video.
Install packages in a virtual environment using pip and venv - Python Packaging User Guide
Read the Python Packaging User Guide’s explanation of what venv creates and what activation changes.
Under “Create and Use Virtual Environments,” read the “Create a new virtual environment” and “Activate a virtual environment” subsections, from setup and activation. Focus on the distinction between creating the .venv folder and activating it in a terminal. The guide’s displayed commands may differ from the PowerShell commands below.
The .venv folder is the environment itself. We’ll keep it on your computer, but later exclude it from Git. A small text file will record the packages needed to rebuild it elsewhere.
Create and activate .venv
Open your research-decision-api folder in VS Code using File → Open Folder. If you did not make it last lesson, create it in File Explorer first. Open a new PowerShell terminal in VS Code and run:
Get-Location
Check that the displayed path ends in research-decision-api. The next command creates .venv inside the terminal’s current folder. If you see a different folder, open the project folder in VS Code before continuing.
Use whichever Python command worked in the previous lesson:
py -3 -m venv .venv
If py -3 was unavailable but python --version worked, use python -m venv .venv instead. The -m venv part runs Python’s built-in environment-creation tool; .venv names the folder it creates. This may take a moment and may finish without printing anything.
Activate it in PowerShell:
.\.venv\Scripts\Activate.ps1
The prompt will usually gain (.venv). That is a helpful sign, but verify which Python will run:
python -c "import sys; print(sys.executable)"
python -m pip --version
The first output should be a path inside your project’s .venv\Scripts folder. The pip output should likewise refer to .venv. For now, read the short -c command as “ask Python to print the executable it is using”; you’ll learn to write Python code in the next lessons. After activation, use python -m pip for this project so pip belongs to that Python environment.
If PowerShell reports that running scripts is disabled, you may allow locally created scripts for this terminal session only, if your machine’s policy permits it:
Set-ExecutionPolicy -Scope Process -ExecutionPolicy RemoteSigned
.\.venv\Scripts\Activate.ps1
Do not change a machine-wide policy to get through the lesson. On a managed machine where activation remains blocked, you can still safely use the environment by calling its Python directly, for example .\.venv\Scripts\python.exe -m pip --version. Use that full path in place of python in the pip commands below.
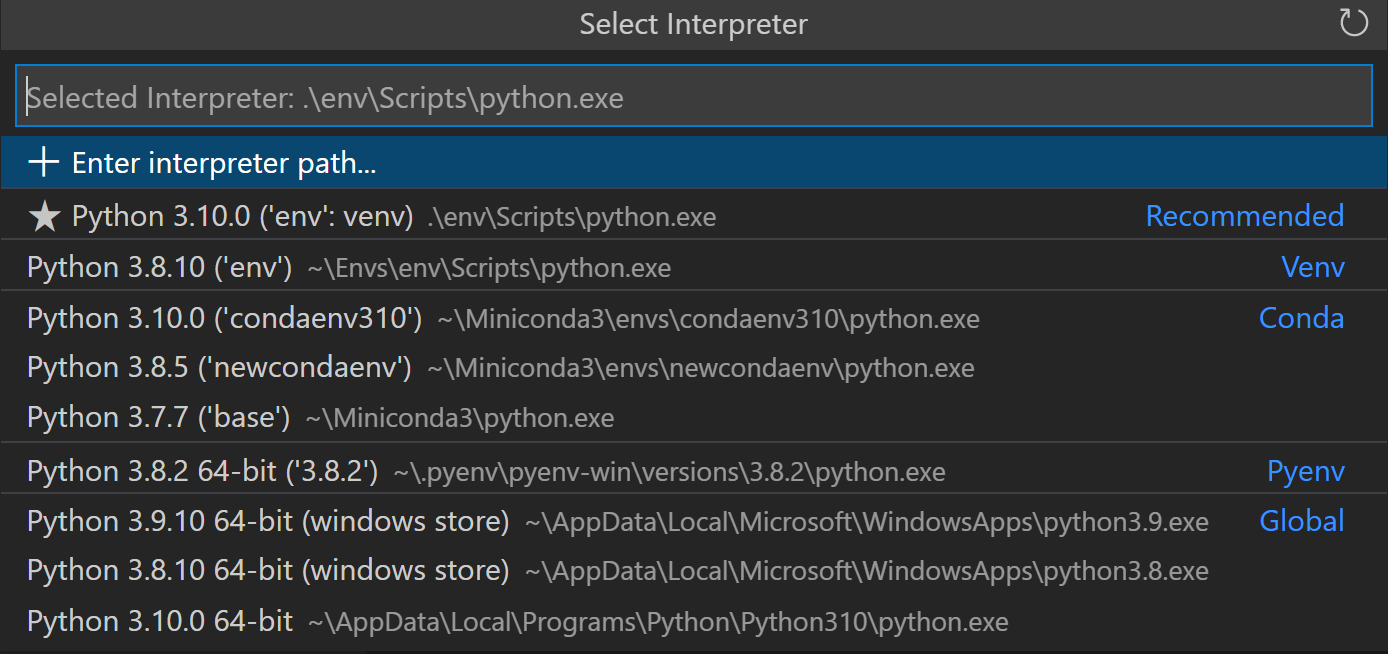
If you use VS Code’s Python extension, also select the project interpreter through Python: Select Interpreter in the Command Palette. Choose the entry whose path is inside research-decision-api\.venv. This keeps VS Code’s editor and run controls aligned with the terminal environment.
Install the project’s first dependency
We’ll start with Requests, a library for making HTTP requests. You’ll use it when you learn to call a REST API; there is no need to call an API yet.
With the environment active—and its path verified above—run:
python -m pip install requests
python -m pip show requests
Installation requires an internet connection to download packages. In the show output, look for Name, Version, and Location. The location should be inside .venv. If it is elsewhere, stop and check the interpreter path before installing anything else.
You may see several packages installed even though you asked for only requests. Those are dependencies of Requests: packages it needs in order to work. To see the environment’s package inventory, run:
python -m pip list
If activation was blocked, use .\.venv\Scripts\python.exe instead of python in each command in this section. Avoid py -3 -m pip here: specifying Python 3 through the launcher does not clearly identify this project’s environment.
Record what was installed
Installing a package changes your local .venv; it does not, by itself, tell a teammate or an interview sandbox which packages to install. A requirements.txt file is that record. pip freeze prints installed packages with version numbers in a format pip can install again.
Python Virtual Environment and pip for Beginners
Return to Dave Gray’s video to see the difference between viewing installed packages and recording them in requirements.txt.
Watch recording requirements. Notice that the resulting file includes supporting dependencies as well as the packages installed directly.
Install packages in a virtual environment using pip and venv - Python Packaging User Guide
Use the Python Packaging User Guide to connect the file you are about to make with the command that later installs from it.
In “Using a requirements file” and “Freezing dependencies,” read requirements and freeze. Focus on what -r tells pip to read and why the recorded versions matter.
Run this in your active environment:
python -m pip freeze
In VS Code, create a file named requirements.txt at the project’s top level. Copy the output of pip freeze into it, one line per package, and save it. You should see a line beginning requests== and lines for its dependencies. Your version numbers may differ from those shown in tutorials; keep the numbers your installation produced. If activation was blocked, get the output with .\.venv\Scripts\python.exe -m pip freeze.
Check that the file can be used to install packages:
python -m pip install -r requirements.txt
In this already-installed environment, pip will likely say the requirements are satisfied. That is expected. The important point is that pip can read the saved file; in a new environment, the same command would install its listed packages.
Finally, create a file named .gitignore at the project’s top level, or add this line if the file already exists:
.venv/
Keep requirements.txt; exclude .venv. The first is a portable package record, while the second is a machine-specific environment folder. You’ll use Git to track the project in a later lesson.
Returning to the project
Activation belongs to a terminal session, not permanently to the folder. When you open a fresh terminal later, activate the existing environment again; you do not need to recreate it:
.\.venv\Scripts\Activate.ps1
Some VS Code setups activate a selected environment automatically. Either way, check python -c "import sys; print(sys.executable)" before installing packages if you are unsure which Python is active. You can type deactivate to leave an active environment.
You now have three useful pieces: an isolated .venv, Requests installed inside it, and a requirements.txt that records the installed versions. Next, you’ll begin writing Python that processes a small set of records—the first step toward the project’s research-and-decision workflow.