Recommended resources
The freely available resources this lesson will direct you to.
Welcome back! In our last session, we mastered the art of using multiband compression (OTT) to give our leads that polished, powerful, and upfront character essential for modern DnB. We took a harmonically rich sound and controlled its dynamics to ensure it commands attention in a busy mix.
Now that our lead is clear and present, the next logical step is to place it in a compelling three-dimensional space. This lesson focuses on using Serum's internal delay and reverb effects to build that space. However, in a high-tempo, dense genre like DnB, this is a delicate balancing act. Our goal is to create a sense of depth and atmosphere without sacrificing the clarity and punch we've worked so hard to achieve. You'll learn the strategic techniques producers use to get the best of both worlds: a lead that feels both huge and perfectly intelligible.
1. The Challenge: Space vs. Clarity in a DnB Mix
At 174 BPM, notes fly by quickly. If you apply reverb and delay with default settings, you'll immediately run into problems. The long, reverberant tails and repeating echoes from one note will bleed into and obscure the next, creating a "wash" of sound that lacks definition. Furthermore, these effects can introduce low-mid frequency content, often called "mud," which competes with your bassline and drums, robbing the mix of its power.
The key isn't to avoid these effects, but to use them with intention and control. We need to shape our spatial effects so they fill the gaps between notes, enhancing the rhythm rather than fighting it.
2. The "Send Effect" Philosophy in Serum
In a Digital Audio Workstation (DAW), a common professional workflow is to use "send" or "return" tracks for effects like reverb and delay. This approach separates the "dry" (unaffected) signal from the "wet" (fully affected) signal, allowing you to process the effect independently, such as by applying an EQ only to the reverb. This gives you maximum control.
We can apply this same philosophy inside Serum's FX rack. By placing the Reverb and Delay modules at the end of your effect chain and using their Mix knobs, you are essentially creating a parallel signal path. The dry sound passes through, and you blend in the desired amount of the wet effect.
5 Reverb Mixing Tips For Deep Music
This article, "5 Reverb Mixing Tips For Deep Music" from Production Music Live, begins by explaining the fundamental importance of using sends.
Read the introductory section titled "Starting Tip: Use Reverb Sends." Focus on understanding the "why": using a separate wet signal preserves the punch and clarity of the original sound.
3. Crafting a Clean, Controlled Reverb
Serum's Reverb is a powerful tool, but its default settings can quickly create mud. Let's look at the key parameters for taming it.
- EQ (Low Cut & High Cut): This is the most critical step for clarity. By filtering the reverb signal, you remove problematic frequencies.
- Low Cut: Removes low-frequency rumble from the reverb tail, preventing it from clashing with your kick and sub-bass. A setting between 200-500 Hz is a great starting point.
- High Cut: Tames the high frequencies of the reverb. This makes the space sound darker and pushes it further into the background, allowing the bright, dry lead to remain upfront. It also prevents the reverb from adding excessive sizzle or harshness.
- Pre-Delay: This parameter creates a short delay before the reverb begins. This creates a clean separation between the initial transient of your dry sound and the onset of the reverb, dramatically improving intelligibility. Even a few milliseconds can make a huge difference.
- Decay: This determines how long the reverb tail lasts. In DnB, long decay times can be problematic. While you might be tempted by a huge, epic sound, start with shorter decay times (e.g., 1-2 seconds) and adjust to taste. A long decay will almost always require the "ducking" technique we'll discuss later.
The following video, though focused on Hardstyle, demonstrates these exact principles for creating a huge but controlled reverb sound on a lead. The techniques are universal.
Everything about REVERB to make HUGE LEADS
From the channel How to Harder Styles, this video "Everything about REVERB to make HUGE LEADS" provides a fantastic demonstration of processing reverb on a send track.
Watch the section from the main settings. Pay close attention to how the presenter discusses and applies Mix, Pre-Delay (and how to time it to your BPM), Decay, High Cut, and finally, using a separate EQ for a Low Cut before the reverb.
4. Designing a Rhythmic, Filtered Delay
Delay in DnB is often used as a rhythmic and textural element, not just for creating a sense of echo. The key to making it work without cluttering the mix is filtering.
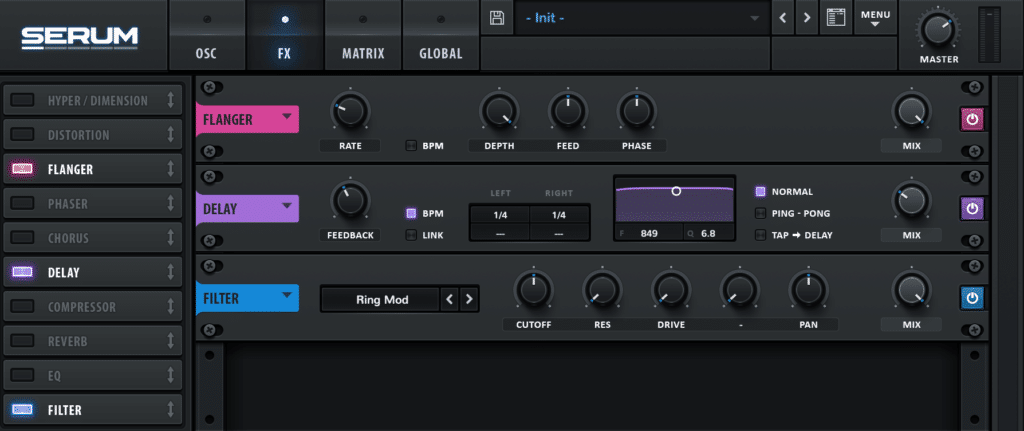
By filtering the delay, you ensure the echoes don't contain the same full frequency spectrum as the original lead. A common technique is to use a band-pass or high-pass filter. This creates echoes that are thinner and more focused, adding rhythmic complexity without competing with the main melody.
Key parameters for a clean delay:
- Mode:
Ping-Pongis excellent for creating stereo width and a sense of movement as the echoes bounce between the left and right channels. - BPM Sync: Keep this on to ensure your delays are rhythmically locked to your track. Dotted or triplet values (e.g.,
1/8d,1/4t) can create more complex, shuffling grooves. - Filter (F and Q): Activate the filter by clicking the display. Use the
F(Frequency) andQ(Resonance) controls to shape the tone of your echoes. - Feedback: This controls how many echoes are produced. For DnB, it's wise to keep this relatively low to prevent the delay tail from becoming a long, messy wash.
5. Advanced Technique: Dynamic Space with Envelope Modulation
Here is the ultimate technique for achieving both a huge sense of space and pristine clarity: making the spatial effects dynamic. The idea is to have the reverb and delay at full volume in the silent gaps between notes, but to automatically "duck" or lower their volume whenever a new note is played.
In a DAW, this is done with sidechain compression. In Serum, we can achieve a very similar and powerful result by modulating the Mix knob of our effects with an envelope.
Here's the process:
- Set up your Reverb and Delay in the FX rack as desired. Set their Mix knobs to the maximum level you'd want in the "spaces."
- Choose an unused envelope, for example, ENV 2.
- Set ENV 2's shape:
- Attack: Very short (near 0).
- Decay: This is the key control. It determines how quickly the reverb/delay fades back in after a note is played. A value between 200-500ms is a good starting point.
- Sustain: Set to 0.
- Release: Set this to match your decay or slightly longer.
- Assign ENV 2 to the Mix knobs of both the Reverb and Delay modules.
- Drag the ENV 2 source icon onto the Reverb's Mix knob.
- Click and drag down on the small blue modulation amount box that appears next to the knob to set a negative modulation amount (e.g., -50 to -100).
- Repeat this for the Delay's Mix knob.
Now, when a note is triggered, ENV 2 fires, its value shoots up, and because of the negative modulation, it forces the Mix knobs down, making the effects quiet. As the envelope decays back to zero, the Mix knobs return to their original position, and the space swells back in.
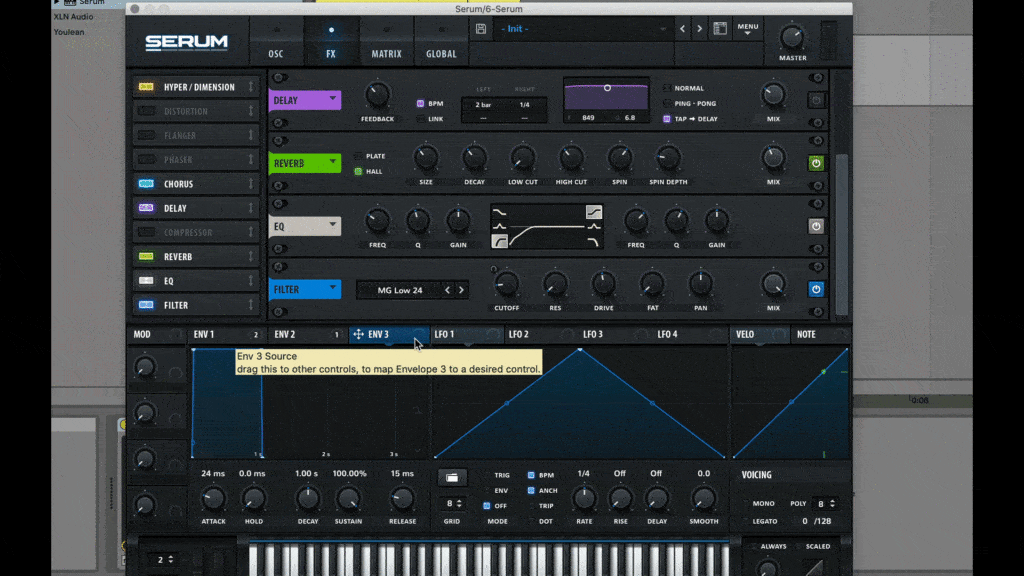
This technique is a game-changer. It gives you that massive, lush soundscape in the pauses, which makes the track feel huge, but it gets the effects out of the way the instant the lead needs to be clear and upfront.
Everything about REVERB to make HUGE LEADS
The same video from earlier demonstrates this exact concept using sidechain compression in a DAW.
Watch the sections on sidechaining reverb and sidechaining delay. The presenter explains how this makes the reverb "pop in between the notes" and ensures the delay is only audible when the melody fades out. The envelope technique we just discussed is how you achieve this same professional result directly inside Serum.
Conclusion
You now have a complete toolkit for creating professional-sounding spatial effects on your DnB leads. By treating reverb and delay not as afterthoughts but as integral parts of the sound design, you can add incredible depth and atmosphere while maintaining absolute control and clarity.
Key Takeaways:
- Always filter your reverb and delay signals using Low Cut and High Cut controls to prevent mud and harshness.
- Use Pre-Delay on your reverb to preserve the transient and initial punch of your lead sound.
- Keep Decay and Feedback times under control to suit the high tempo of DnB.
- Filtering your delay echoes (e.g., with a band-pass) allows them to add rhythm and texture without clashing with the lead.
- The most powerful technique is creating dynamic space: use an envelope with negative modulation on the effect Mix knobs to duck the effects out of the way of the dry signal.
This lesson concludes our module on internal effects. You've learned to add harmonics with distortion, control dynamics with OTT, and now, create space with reverb and delay. You're ready to put it all together. In the next module, we'll begin our first synthesis challenge: deconstructing and recreating a modern dancefloor DnB lead from scratch.