Recommended resources
The freely available resources this lesson will direct you to.
Hello! This course starts with the working habits you will need throughout machine learning and quantum computing: managing Python code, numerical libraries, data, and experiments so that another person can run what you built. This first module establishes those habits before moving into NumPy and data analysis.
Today you will create a project-specific Python environment, install a package into it, and record the installed dependencies. The result is a small but important piece of a reproducible project: someone reviewing your work should be able to set up the same packages without receiving a copy of your laptop’s Python installation.
Why give each project its own environment?
Suppose one experiment needs a particular NumPy release, while a later project needs another. Installing everything into one shared Python installation makes changes for one project capable of disrupting the other. A virtual environment gives each project its own Python executable and place for installed packages. It is not a separate computer, and it does not automatically make results reproducible; it solves the narrower problem of keeping package installations apart.
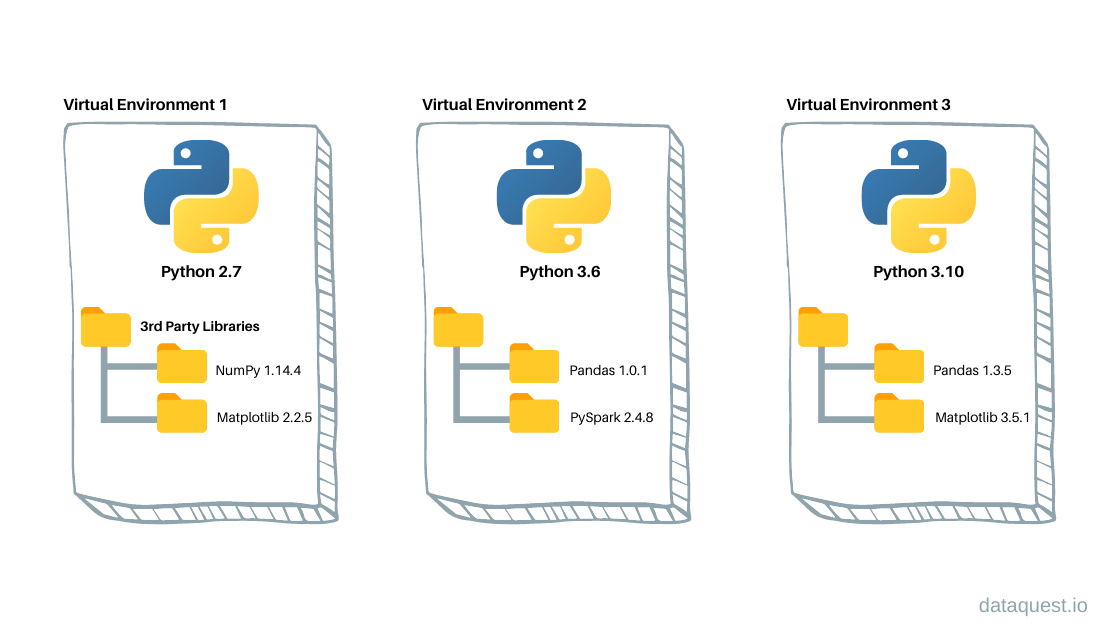
A virtual environment uses the Python version selected when you create it. Activating it does not turn an older interpreter into a newer one. For this lesson, use a currently supported Python 3 installation already available on your laptop.
Python Virtual Environments - Full Tutorial for Beginners
Watch “Python Virtual Environments - Full Tutorial for Beginners” by Tech With Tim for a visual walkthrough of isolation, activation, package installation, and sharing dependencies.
Watch isolation and setup to see why projects use separate environments and how activation changes the active shell. Then watch packages and requirements, focusing on the creation of requirements.txt and installation into a fresh environment. The video calls its environment env; we will call ours .venv, so use the commands below rather than copying its paths literally.
Create and identify your environment
Open a terminal—Command Prompt or PowerShell on Windows, or a terminal on macOS or Linux. Make a directory for this small project and enter it:
mkdir qml-sandbox
cd qml-sandbox
Now check Python and create the environment. Use one of these alternatives:
Windows:
py -3 --version
py -3 -m venv .venv
macOS or Linux:
python3 --version
python3 -m venv .venv
Here, -m venv runs Python’s built-in environment-creation module. .venv is the name of the directory it creates inside your project. If Python is not found, stop and resolve the Python installation or terminal path before continuing; package commands will not fix a missing interpreter.
Activate the environment using the command for your shell:
| Shell | Activation command |
|---|---|
| Windows Command Prompt | .venv\Scripts\activate.bat |
| Windows PowerShell | .\.venv\Scripts\Activate.ps1 |
| macOS or Linux, bash/zsh | source .venv/bin/activate |
Your prompt will usually display (.venv). Do not rely on the prompt alone, though. Run:
python -c "import sys; print(sys.executable)"
The printed path should include your project’s .venv directory. That check answers the question that matters before any installation: which Python will run my code? If PowerShell prevents its activation script from running, you can use Command Prompt and its activation command instead.
The Python Packaging User Guide provides a useful reference for the directory and activation steps:
Install packages in a virtual environment using pip and venv - Python Packaging User Guide
Read the Python Packaging User Guide’s explanation of creating, activating, and returning to a virtual environment. Its shell examples complement the commands above.
Under “Create and Use Virtual Environments,” read the subsections “Create a new virtual environment,” “Activate a virtual environment,” “Deactivate a virtual environment,” and “Reactivate a virtual environment.” Start where the guide says to go to the project directory and read through reactivation. Pay particular attention to its advice about excluding the environment directory from version control and checking the interpreter’s location.
Install a dependency and record what was installed
With .venv active, install NumPy. We will use it for numerical arrays in an upcoming lesson:
python -m pip install numpy
Using python -m pip ties pip to the python you just verified. It reduces the risk of invoking a different pip executable by mistake. Check both the installation and the import:
python -m pip show numpy
python -c "import numpy; print(numpy.__version__)"
The version you see is the one installed on your machine now; the lesson does not require a particular historical version. An installed package may also bring in packages it depends on. Rather than guessing which versions a future setup will receive, export the environment’s installed packages:
python -m pip freeze > requirements.txt
Open requirements.txt. You should see a line for NumPy in the form numpy== followed by its installed version. The > writes the command’s output to the file, replacing its previous contents. After changing installed packages later, run the command again to update the record.
The guide distinguishes declaring requirements from exporting the versions currently installed:
Install packages in a virtual environment using pip and venv - Python Packaging User Guide
Return to the Python Packaging User Guide to connect your new requirements.txt file with the commands used to install and export dependencies.
Find “Using a requirements file” and the immediately following “Freezing dependencies” subsection. Read both short subsections. Focus on why -r reads a requirements file and what information pip freeze records.
A frozen requirements file records installed package versions, including any installed dependencies of packages you chose. It does not record the Python interpreter version or guarantee that identical packages will install on every operating system. Add a README.md to your project and note the output of python --version there, along with the setup instruction python -m pip install -r requirements.txt. For this first project, those two files provide a practical starting record.
Keep the local environment directory out of a future Git repository. Create a plain-text file named .gitignore in the project directory with these contents:
.venv/
.venv-check/
Keep requirements.txt and README.md; do not share the environment directory itself. We will work with Git in a later lesson.
Check that the record can rebuild the packages
A requirements file is more convincing when you actually use it. Create a second, temporary environment in the same project to test the recorded installation. First leave the current one:
deactivate
Then create and activate .venv-check with the commands for your system:
Windows Command Prompt:
py -3 -m venv .venv-check
.venv-check\Scripts\activate.bat
Windows PowerShell:
py -3 -m venv .venv-check
.\.venv-check\Scripts\Activate.ps1
macOS or Linux, bash/zsh:
python3 -m venv .venv-check
source .venv-check/bin/activate
Use the same Python version you used for .venv if your laptop has multiple versions installed. From the project directory, restore the packages and verify the result:
python -m pip install -r requirements.txt
python -c "import sys, numpy; print(sys.executable); print(numpy.__version__)"
The interpreter path should contain .venv-check, and the NumPy version should match its line in requirements.txt. If installation fails, read the error rather than assuming the file is wrong: an unavailable Python version, unsupported package version, or network problem can also prevent restoration. When finished, run deactivate. You can remove .venv-check later using your file manager; your working .venv remains available to reactivate next session.
What you now have
Your project has an isolated working environment, a requirements.txt snapshot of installed packages, and a recorded Python version. You also verified that a second environment can install from that snapshot. The distinction is worth keeping: .venv is your local installation; requirements.txt is the portable instruction to install its recorded packages.
Next, you will organize Python code into reusable functions and modules. Keep this project directory and its environment: the same setup will support the numerical work that follows.