Recommended resources
The freely available resources this lesson will direct you to.
Hi! Last time you used git add and git commit to make deliberate checkpoints in your local GIS starter repository. A branch lets you make those checkpoints for a particular task without immediately changing your main line of work.
In this lesson, you’ll create a branch for a clinic-map decision, make a different decision on your original branch, and merge them. The two decisions will deliberately conflict, so you can practise resolving one in VS Code. Allow about 40–45 minutes. Everything stays on your computer; GitHub comes next lesson.
What a branch changes
A Git branch is a named position in your commit history. When you switch branches, Git updates the tracked files in your working folder to match the selected branch’s commits. The branch you are on receives your new commits.
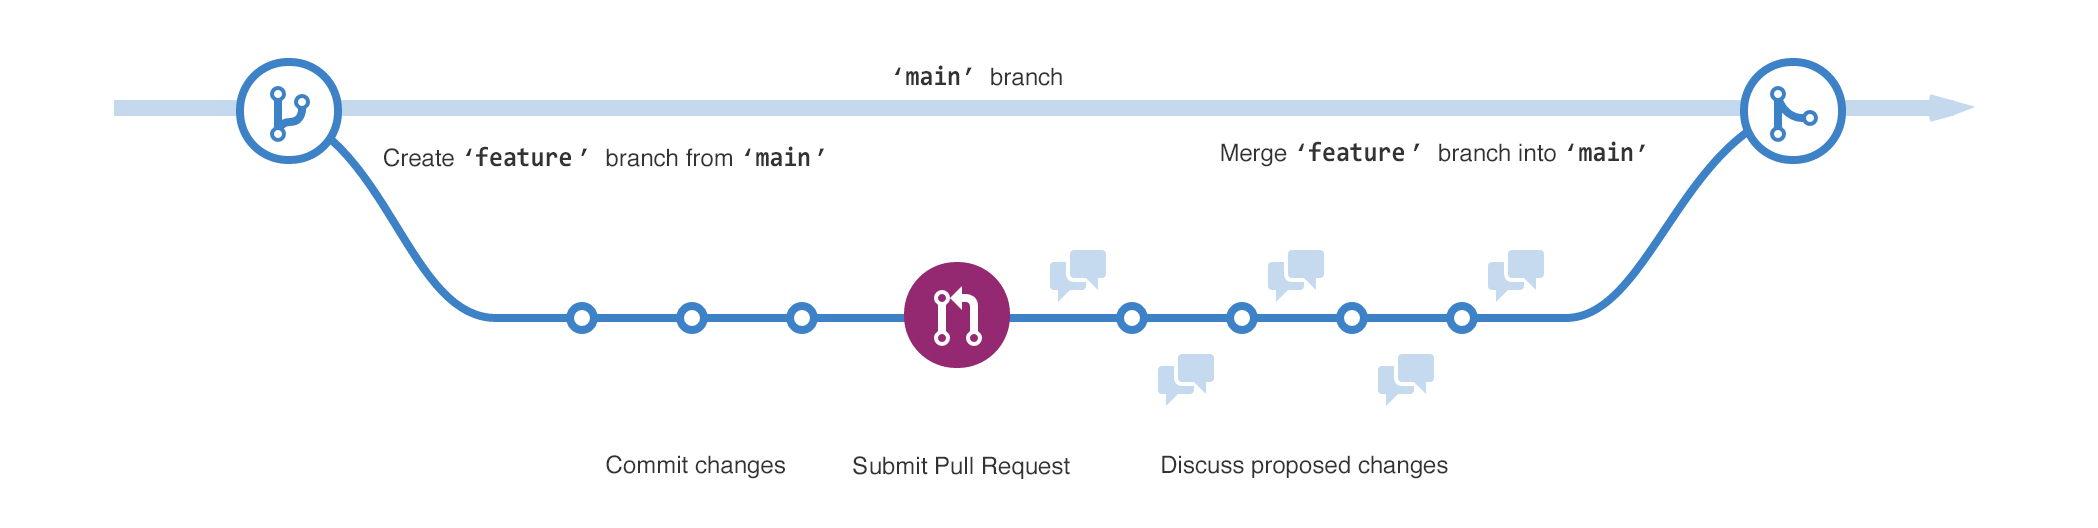
The diagram shows a common feature-branch workflow. Its pull request and discussion steps take place on a hosting service such as GitHub; you do not need a pull request to merge two local branches today.
Watch the relevant parts of Net Ninja’s Git & GitHub Tutorial for Beginners #9 - Merging Branches (& conflicts). The presenter calls the primary branch master; yours might be main or another name.
Git & GitHub Tutorial for Beginners #9 - Merging Branches (& conflicts)
Net Ninja demonstrates which branch receives a merge, then shows Git stopping when two edits compete for the same part of a file.
Watch merge direction for the rule that you first switch to the branch that should receive the changes. Then watch conflict handling for the conflicting edits, the marked-up file, and the manual resolution. We’ll use an explicit commit message rather than the editor-based commit shown in the video.
For the command-line details, read these short passages from the official Pro Git book.
Git - Basic Branching and Merging
The Pro Git section “Basic Branching” shows how to create and enter a branch. “Basic Merging” explains why the branch you have checked out is the merge destination.
In “Basic Branching,” start at “To create a new branch and switch to it at the same time” and read branch creation. Later in that section, start at “However, before you do that” and read switching safely through the explanation of how switching changes your working folder. In “Basic Merging,” start at “All you have to do is check out the branch you wish to merge into” and read merge behavior through the explanation of a merge commit. Substitute your own primary branch name wherever the book says master.
Prepare a small, controlled change
Open the repository from the previous lesson—gis-shell-lab or gis-shell-lab-2—in VS Code. In its PowerShell terminal, run:
Get-Location
git status
git branch --show-current
Confirm you are in the intended repository and have a branch name. Do not proceed with staged changes or uncommitted changes to tracked files: review and finish those first. An unrelated untracked file, such as map_preview.html if you skipped its earlier commit, can remain untouched. Do not use git add . in this lesson.
In VS Code, create a new file named branch-map-plan.txt containing exactly this line:
Clinic marker style: undecided
If that filename already exists, stop rather than overwrite it; choose a different new filename and use it consistently in the commands below. Save with Ctrl+S, then make a starting checkpoint:
git add .\branch-map-plan.txt
git diff --staged
git commit -m "Add clinic marker decision note"
git status
This baseline matters: both branches will change the same committed line. Record your current branch name in a PowerShell variable so the instructions work whether it is called main, master, or something else:
$baseBranch = git branch --show-current
$baseBranch
Keep using this terminal session. If you restart it, you’ll need to set $baseBranch again while checked out on your original branch.
Give each branch a different decision
Create a feature branch and switch to it in one command:
git checkout -b feature/clinic-marker-style
git branch --show-current
The second command should print feature/clinic-marker-style. In branch-map-plan.txt, replace the line with:
Clinic marker style: blue circles
Save and commit only that file:
git add .\branch-map-plan.txt
git commit -m "Propose blue clinic markers"
git status
Now return to the original branch. Closing the file tab before switching can make the change in VS Code easier to follow.
git checkout $baseBranch
git branch --show-current
Open branch-map-plan.txt again. It should say undecided, not blue circles: the blue proposal belongs to the feature branch’s commit. Imagine that, while the feature was being developed, a separate design request favoured green markers. Replace the line on your original branch with:
Clinic marker style: green circles
Save and commit it:
git add .\branch-map-plan.txt
git commit -m "Propose green clinic markers"
git status
There are now two committed answers to the same question. Neither branch contains the other branch’s latest decision.
Merge—and let Git identify the conflict
Make sure git status shows no uncommitted tracked changes. While still on your original branch, bring in the feature branch:
git merge feature/clinic-marker-style
git status
Expect CONFLICT (content) and an unmerged path for branch-map-plan.txt. This is not a failed lesson or a lost commit. Git has paused because it cannot decide which replacement of undecided expresses the final design.
Read the “Basic Merge Conflicts” subsection of Pro Git before editing the marked-up file.
Git - Basic Branching and Merging
This part of Pro Git explains how to locate an unmerged file, interpret Git’s conflict markers, and tell Git that you have resolved it.
In “Basic Merge Conflicts,” start at “If you changed the same part of the same file differently” and read conflict resolution through the instruction to stage the corrected file. The book’s file is index.html; yours is branch-map-plan.txt. You can skip its subsequent git mergetool discussion because you’ll edit directly in VS Code.
Open branch-map-plan.txt. The conflicting area should resemble this (Git may include a little extra identifying text):
<<<<<<< HEAD
Clinic marker style: green circles
=======
Clinic marker style: blue circles
>>>>>>> feature/clinic-marker-style
HEAD means the branch you currently have checked out—your original branch in this merge. The text below ======= came from the feature branch. The markers are not a valid final plan. Nor must you blindly pick one side: you can write a result that meets both design intentions.
For this practice merge, replace the entire file contents, including every marker, with:
Clinic marker style: blue circles with green outlines
Save with Ctrl+S. This is a design choice you made, not a choice Git could infer. In a real project, you would check whether that combined style is actually wanted.
Record and verify the resolution
Inspect the saved file and mark its conflict resolved:
Get-Content .\branch-map-plan.txt
git add .\branch-map-plan.txt
git status
git diff --staged
Get-Content should print only your final line. git status should no longer list an unmerged path; it should indicate that the conflicts are fixed but the merge still needs a commit. If you see conflict markers or the wrong style, edit and save the file, then run git add .\branch-map-plan.txt again. As in the previous lesson, staging captures the saved contents at the time you add them.
When the staged result is correct, complete the paused merge:
git commit -m "Merge clinic marker style decisions"
git status
git log --oneline --graph --all -6
The log should show the blue and green proposal commits joining at your merge commit. git status should show no remaining tracked changes (it may still mention an unrelated untracked file you deliberately left alone). If the log opens in a full-screen viewer, press q to return to PowerShell.
If you become unsure before committing the resolution, git merge --abort can return you to the pre-merge state so you can inspect the two branches and try again. Do not use it after you have successfully committed the merge.
What to carry forward
You created a branch with git checkout -b, made a commit that stayed on that branch, switched to the branch that should receive the work, and used git merge to combine them. A conflict meant Git needed a human decision: you inspected both versions, wrote the intended final file, staged it, and committed the merge.
Next lesson, you’ll connect local Git work to GitHub using clone, push, and pull. Today’s branch and merge needed no remote repository; that distinction will make the GitHub workflow easier to understand.