Recommended resources
The freely available resources this lesson will direct you to.
- Automate EVERYTHING in Davinci Resolve - Python Tutorial for Beginners with AlexTheCreativewww.youtube.com
- I Let an AI Edit My Video Timeline for me - Davinci Resolve Intelliscript Workflowwww.youtube.com
- Scripting API | DaVinci Resolve Wikiwiki.dvresolve.com
- Export Edit Sequences into DaVinci Resolve | Eddie AI | Your AI assistant video editorhelp.heyeddie.ai
Hello! Last lesson established the agreement for a video job: source footage and instructions go in; editable Resolve timelines, viewing copies, and a job report come out. Now we need the route between those endpoints.
This lesson maps the whole prompt-to-edit pipeline. The aim is to see what each stage receives, what it produces, and where a problem should be caught. We’ll use the product-demonstration job from the previous lesson: two source videos, a requested 45-second Reel, and a requested eight-minute YouTube video. Nothing needs to be installed or coded today.
The pipeline at a glance
Read this diagram from top to bottom. The middle column handles information shared by the job. The two right-hand columns show where one set of footage becomes two different edits.
| Stage | Shared job lane | Reel lane | YouTube long-form lane |
|---|---|---|---|
| 1. Intake | Check files, instructions, permissions, and output requests; record a job manifest | Not split yet | Not split yet |
| 2. Analysis | Inspect media; gather speech and visual evidence with source times; identify usable moments | Not split yet | Not split yet |
| 3. Planning | Check candidates against the objective and restrictions | Select one focused story; write a short edit plan | Outline a complete explanation; write a long-form edit plan |
| 4. Resolve creation | Import or link approved media and create the project | Build an editable Reel timeline | Build a separate editable long-form timeline |
| 5. Review | Report omissions and problems; request corrections where needed | Check story, cuts, framing, captions, and sound | Check structure, continuity, pacing, and sound |
| 6. Export and verify | Save the editable project and produce a job report | Render and check a Reel viewing copy | Render and check a long-form viewing copy |
The diagram is a design, not a claim that every box already has a working AI tool behind it. In particular, analysis supplies evidence about the footage; planning makes editorial choices using that evidence. A transcript cannot, by itself, decide which shot best demonstrates a product. Likewise, a valid timeline file cannot tell us whether an edit is persuasive or respects an exclusion.
The handoffs matter as much as the stages. A job manifest says what files and instructions were received. Analysis records identify where something was found in the sources. An edit plan specifies which source ranges to use and in what order. Resolve turns that plan into timelines you can inspect and change. Review decides whether those timelines are ready to render.
1–2. From submitted files to usable evidence
At intake, the system first establishes what it actually has. For the example job, that means locating recording.mp4, phone_demo.mp4, and any approved assets; checking whether they can be read; and recording the requested Reel and long-form outputs. It also checks restrictions such as “don’t show customers’ faces” and “don’t upload footage or transcripts to a cloud service.” If a required video is missing, there is little value in asking AI to plan an edit around it.
The intake handoff is a job manifest: an inventory of files, their locations and roles, the requested versions, and any immediate warnings. It should retain the original instructions. If the computer needs a smaller working copy of demanding footage, that copy must remain traceable to its original.
Analysis then turns playable media into evidence an editor can use. Depending on the footage, that may include file duration and format, a timestamped transcript of speech, candidate scene or shot ranges, representative frames, and notes about relevant sounds. The important common feature is a source reference: “the demonstration appears in recording.mp4 around 03:12” is actionable; “there is a good demonstration somewhere” is not.
Different inputs need different evidence. A spoken interview may be searchable mainly through its transcript. A silent phone demonstration needs visual inspection. A long recording may need to be analyzed in portions, but its findings still need to point back to positions in the original source. On your 16 GB RAM, 4 GB GPU Windows system, this stage should be designed to work with manageable media copies when necessary, without losing those references.
Analysis is also where uncertainty should become visible. Speech recognition may mishear a product name; a sampled frame may miss an important action; an apparent “best moment” may lack context. Its output is therefore a candidate-and-evidence report, not a finished script or a command to publish.
3. Turn evidence into two edit plans
Planning answers a different question: given the available evidence and this job’s instructions, what should each video say and show? It begins by checking candidate moments against the objective, must-include material, exclusions, and approved-asset policy.
For the Reel, a plan might concentrate on the product benefit and demonstration in a brief, self-contained sequence. For the long-form version, it might preserve the explanation leading into the demonstration, show its steps, and include an appropriate ending. The two plans can use some of the same source material, but they should not be the same sequence at different lengths.
Each plan needs enough detail to build and audit an edit: selected source file and range, sequence order, intended text or caption where applicable, and any cue for an approved graphic, music track, or other asset. Those details form an edit-decision record. They let a later process place actual media on a timeline rather than relying on a vague instruction such as “put the good parts first.”
This short demonstration shows one narrower path through analysis, planning, and timeline creation. It is useful because you can see both the speed of transcript-led editing and why its result still needs review.
I Let an AI Edit My Video Timeline for me - Davinci Resolve Intelliscript Workflow
Watch “I Let an AI Edit My Video Timeline for me - Davinci Resolve Intelliscript Workflow” by Chris Sullivan (Five Freaking Onion Rings) as an example of a speech-driven first cut, not a complete blueprint for every kind of footage.
Watch transcription to see the source analyzed. In script selection, notice why the proposed edit keeps wording from the recording. Then watch timeline assembly and cut review; listen for the clipped word endings the creator has to correct.
The demonstration uploads a transcript to an external AI service. Do not treat that as a required pipeline step: the example job’s cloud_upload: false setting would prohibit it. The method also depends on spoken words, so it does not replace visual analysis of a silent demonstration or planning a complete long-form story.
Before a plan reaches Resolve, it should be able to answer: Does the proposed Reel actually show the required demonstration without showing an excluded face? Does the source contain enough coherent material for the requested long-form duration? If not, the planning result should request a change or report the limitation—not fabricate supporting footage or silently drop a restriction.
4. Make the plan editable in Resolve
A plan is not yet a video. At timeline creation, the system must connect its source references to media Resolve can open, then place the selected ranges in the specified order. The Reel and long-form plans become separate timelines, each with its own output shape and editorial structure.
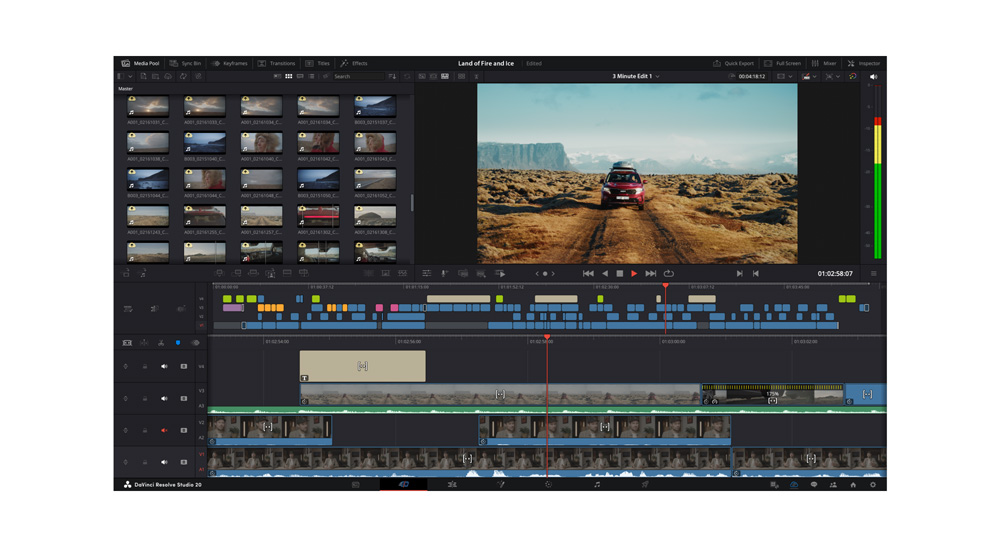
There are two useful ways to understand this handoff without choosing an implementation yet. A script can ask Resolve to import media and create a timeline. Alternatively, another process can prepare an interchange timeline file for Resolve to import. Neither route removes the need to check that clips link to the right source files and appear at the intended times.
Eddie AI’s help article provides a concrete example of the interchange route. You do not need an Eddie account for this lesson; study the import and relinking steps as an illustration of what any such handoff must address.
Export Edit Sequences into DaVinci Resolve | Eddie AI | Your AI assistant video editor
Read Eddie AI’s “Export Edit Sequences into DaVinci Resolve” to see how a prepared edit sequence can become a Resolve timeline—and where the original media may still need to be located.
In “Export Your FCXML from Eddie” and “Importing into DaVinci Resolve,” read the handoff steps, from “Complete Your Edit” through “Link Media.” Focus on the distinction between importing a timeline description and making its referenced video files available.
Resolve also exposes scripting capabilities for importing media, creating timelines, and queuing renders. The API reference is a catalogue, not a beginner coding assignment: skim the named actions to see which parts of our diagram could eventually be driven by a script.
Scripting API | DaVinci Resolve Wiki
Skim the DaVinci Resolve Wiki’s scripting API reference to connect our pipeline stages to possible Resolve actions. Do not try to memorize method names or set up Python yet.
Under “MediaPool,” scan timeline creation options. Later in the same “MediaPool” section, find “RelinkClips” and scan media linking and import. Under “Project,” from “AddRenderJob” to “GetRenderJobStatus,” scan render job controls. Notice that having an API action available does not verify that an editorial decision is good.
The timeline-creation handoff succeeds only when the result is inspectable: both timelines exist, the expected clips appear in order, their media is online, and titles or audio that should remain editable have not been unnecessarily flattened into one video. We will work with Resolve’s interface and automation methods in later modules.
5–6. Review before delivery, then check the render
Review is a gate between an assembled timeline and a viewing copy. First check technical integrity: missing media, wrong order, unintended gaps, abrupt cuts, or text that cannot be read. Then check the editorial promise: whether the Reel gets to its point, whether the long-form explanation makes sense, whether claims match the source, and whether excluded material appears. The transcript-led example’s clipped word endings are a good reminder that even plausible automatic cuts need playback.
Where a problem is found determines where the job resumes. A misheard phrase may require corrected analysis evidence. A weak choice of moments requires a revised plan. A good plan with a badly timed cut requires a timeline correction. Offline media requires fixing the file link. Review is not simply a yes/no label on the final MP4; it tells the system what to repair. A person can approve the result or request a targeted revision before export.
Once approved, export renders each timeline using its requested output profile. That produces viewing copies, while the Resolve project and linked media remain the editable deliverable. Export is not the end of checking: open each rendered file and confirm that it plays, has the intended duration and orientation, contains sound where expected, and shows the approved version rather than an older timeline. Record the file locations, omissions, and unresolved warnings in the job report.
For this course, the pipeline ends with reviewable, editable work and verified exports, not automatic posting. That keeps a failed render, an unsupported claim, or an unapproved asset from being mistaken for a finished publication.
Takeaways
You now have an end-to-end map with six stages: intake, analysis, planning, Resolve timeline creation, review, and export verification. Each stage has a distinct handoff, and the shared footage branches into separate short- and long-form plans before becoming separate timelines. When review finds a fault, the pipeline should revisit the stage responsible rather than restart blindly or conceal the issue.
Next, we’ll examine these stages more closely to decide what is safe to automate, what needs your approval, and where a manual fallback is necessary.