Hello! Welcome back to our course.
In our last lesson, we took the crucial first step in any engineering project: we defined the problem by writing a clear set of design requirements for our linear actuator project. We established what the system needs to do and how we will measure its success.
Today, we'll build on that by setting up our digital workspace. This lesson addresses the learning outcome: Organize project files and documentation for a professional engineering workflow. Think of this as setting up your workshop before you start building. A well-organized project isn't just about neatness; it’s a cornerstone of professional engineering that boosts efficiency, prevents errors, and makes collaboration seamless. This organized structure will also become the backbone of your portfolio.
1. Why Professional File Organization Matters
Before diving into the "how," let's solidify the "why." In a professional environment, you're rarely working in isolation. Your files need to be understandable to colleagues, your manager, and even to your future self when you revisit a project months later.
File Structure : Mechanical Engineering Communication Lab
To understand the fundamental importance of this practice, please read this excellent article from the MIT Mechanical Engineering Comm Lab. It frames file organization not as a chore, but as a critical communication skill.
Please read the section 'Why file organization matters'. Focus on the three key beneficiaries: others, you, and your future self. This will provide the context for all the practical steps we take next.
The key idea is that a logical file structure acts as a map for your project. It allows anyone (including you) to quickly understand the project's components and find what they need without confusion. Avoiding a mess of files named design_final.SLDPRT, design_final_v2.SLDPRT, and design_final_USE_THIS_ONE.SLDPRT is a hallmark of a professional engineer.
2. Best Practices for Naming and Structure
At the heart of good organization are two components: a consistent naming convention and a logical folder structure.
File Naming Conventions
The names you give your files and folders are the most basic level of organization. Getting this right prevents a host of problems, especially when your files interact with different software or systems.
Naming Files and Directories the Right Way
This short video provides a fantastic, practical guide to professional naming conventions. It covers common mistakes and the standards used in professional settings.
Watch the entire video (around 7 minutes). Pay close attention to the rules about avoiding spaces, using dates (YYYY-MM-DD), and the importance of consistency.
To summarize the key rules for our workflow:
- No Spaces: Use underscores (
_) or hyphens (-) instead (e.g.,Linear_Actuator_Bracketinstead ofLinear Actuator Bracket). - Be Descriptive but Concise:
Motor_Mount_Bracket.SLDPRTis much better thanPart1.SLDPRT. - Use YYYY-MM-DD for Dates: This ensures files sort chronologically. For example,
2024-09-20_Design_Review.pptxwill always appear before2024-10-05_FEA_Report.pdf. - Use Versioning Systematically: Use suffixes like
_v1,_v2or_revA,_revBif you are managing file versions manually. (We'll see shortly how Onshape helps automate this). - Be Consistent: Once you choose a convention, stick to it for the entire project.
A Professional Folder Structure
A good folder structure applies the principle of separation of concerns. Each type of file has its own dedicated place. This makes the project predictable and easy to navigate.
The image below shows a high-level map of all the documents and processes in a typical engineering project. Our folder structure aims to create a logical home for each of these items.

Based on industry best practices, we will adopt the following structure for our projects.
Action: Please create this folder structure on your computer for our first project. Name the root folder P1_Linear_Actuator.
P1_Linear_Actuator/
├── 01_Project_Management/
│   ├── Design_Reviews/
│   └── Requirements_and_Specs/
├── 02_Design/
│   ├── Analysis/
│   │   ├── Hand_Calculations/
│   │   └── FEA/
│   ├── COTS_and_Datasheets/  (COTS = Commercial-Off-The-Shelf)
│   └── Research_and_Inspiration/
├── 03_CAD/
│   ├── Exports/
│   │   ├── Drawings_PDF/
│   │   └── Models_STEP/
│   └── Renders/
└── 04_Portfolio/
    ├── Presentation/
    └── Project_Summary/
Let's break down this structure:
01_Project_Management: This holds high-level documents that define and track the project.- Action: Move the requirements table you created in the last lesson into the
Requirements_and_Specssubfolder.
- Action: Move the requirements table you created in the last lesson into the
02_Design: This is for the engineering work that supports your CAD models. It's where you keep your calculations, analysis reports (like FEA), and datasheets for parts you plan to buy (motors, bearings, etc.).03_CAD: This folder is for files exported from your CAD system. Onshape is cloud-based, so your primary CAD data lives online. This local folder is for sharing things like PDFs of drawings or STEP files for manufacturing quotes.04_Portfolio: This is where you will prepare the final deliverables that showcase your work. We will curate the best images, analysis summaries, and a final presentation here.
Test your understanding!
You've just completed a hand calculation to determine the required torque for the lead screw motor in our linear actuator project. In which folder from the structure above would you save the PDF of your calculation notes?
Show answer
You would save it in P1_Linear_Actuator/02_Design/Analysis/Hand_Calculations/. This keeps it separate from CAD files and project management documents, but logically grouped with other analysis work like FEA.
3. Workflow in a Modern CAD Tool (Onshape)
Traditional CAD systems (like SolidWorks or Inventor) are file-based, making disciplined local file management essential. Cloud-native tools like Onshape, however, have built-in data management that changes the workflow.
Your primary CAD data—parts, assemblies, drawings—lives within a single Onshape Document. You don't manage separate files on your computer. Instead, you organize your work inside the document.
Key features of Onshape that support a professional workflow:
- Built-in Version Control: Instead of
_v1,_v2filenames, Onshape has a robust "Version and History" feature. You can create immutable, named versions (e.g., "v1.0 - Initial Concept," "v2.0 - Design for Review") at any point. - Branching and Merging: You can explore design alternatives in separate "branches" and merge the successful changes back into the main design, a workflow borrowed from software development.
- Integrated Commenting and Tasks: You can tag colleagues and assign action items directly on the 3D model, centralizing feedback.
- Reference Manager: Onshape automatically tracks relationships between parts and assemblies, notifying you if a component has a newer version available.
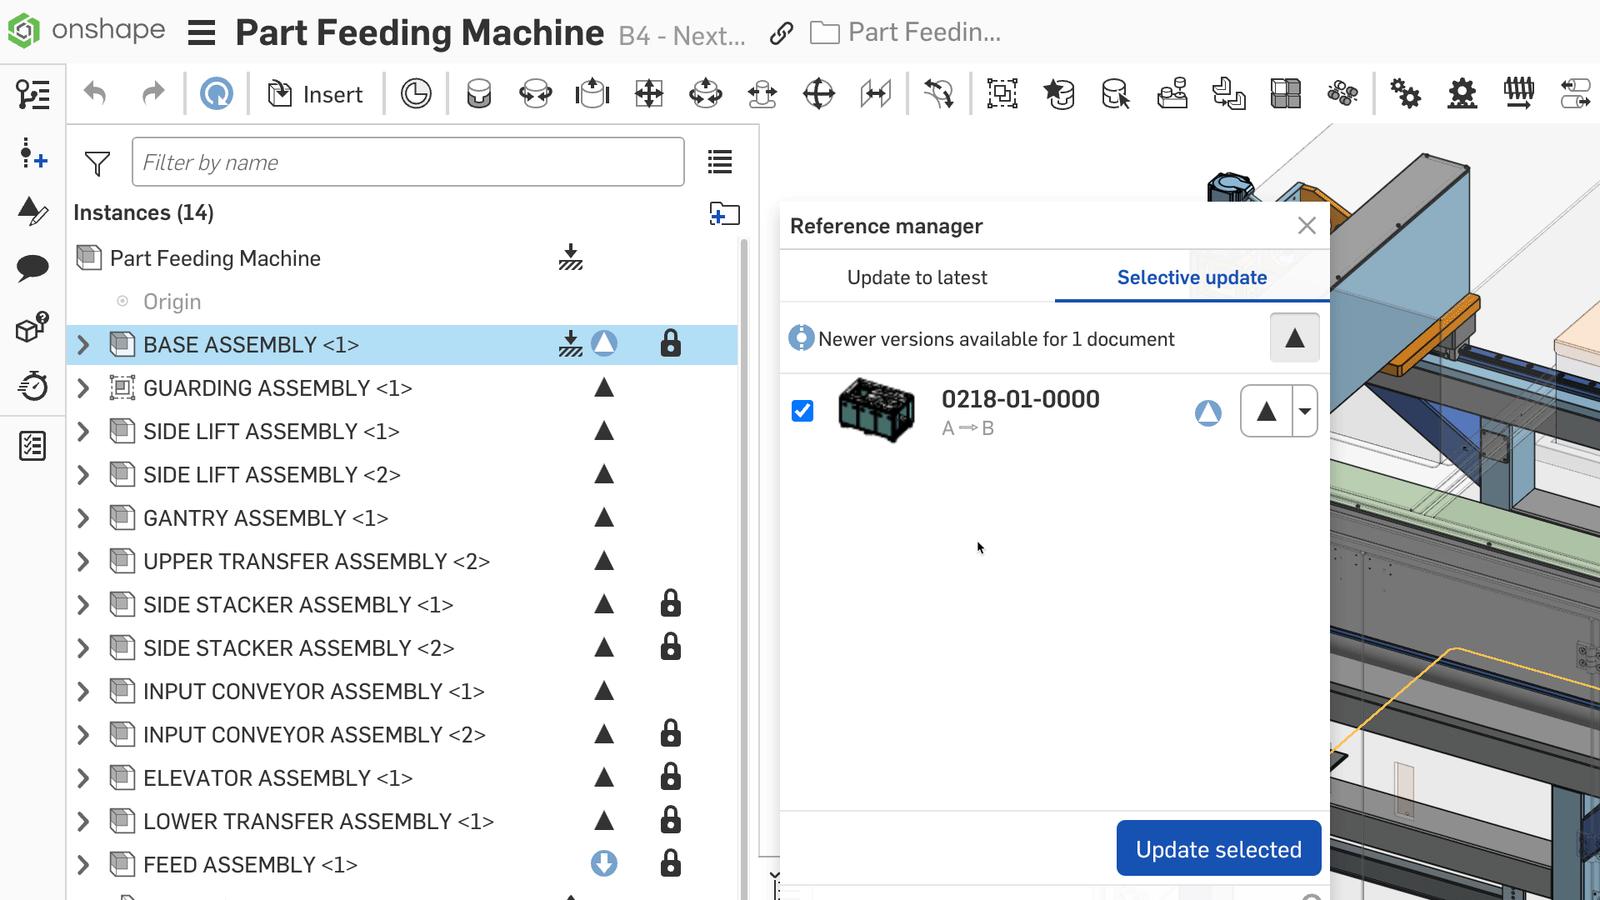
For our projects, we will use a hybrid approach:
- All primary CAD development will happen within a single Onshape Document for each project. We will use folders inside the Onshape document to organize Part Studios, Assemblies, and Drawings.
- All supporting documentation (requirements, calculations, reports, presentations) will be organized in the local folder structure we just created.
4. Tying It All Back to Your Portfolio
Remember, your goal is to create a portfolio that tells the story of your projects. A well-organized project folder makes this incredibly easy. When it's time to build your portfolio, you won't be hunting for files. You'll have everything you need, neatly categorized.
How to Create an Engineering Portfolio
To see how this organizational work pays off, let's watch a relevant section of this video on creating an engineering portfolio.
Watch from 08:24 to 11:00. The speaker describes his process for creating portfolio content. Notice how his first step is to create a folder for every project and gather all the relevant images and files. Our structured approach takes this a step further, ensuring the files are organized from day one.
By setting up a professional structure now, you are building your portfolio as you go. The 04_Portfolio folder will be where you assemble the final narrative, pulling the best pieces from the other folders: the requirements from 01_Project_Management, the analysis results from 02_Design, and the renders from 03_CAD.
Conclusion
Today, we've established the digital foundation for our project work. A professional workflow isn't just about the final CAD model; it's about the entire process, and that process lives within your file structure.
Key Takeaways:
- Professional organization is a skill: It ensures clarity, efficiency, and traceability for you and your team.
- Use consistent naming conventions: Avoid spaces and special characters, use descriptive names, and format dates as
YYYY-MM-DD. - Separate concerns with a logical folder structure: Group files by their function (e.g., project management, design analysis, CAD exports).
- Modern CAD tools have built-in data management: Onshape handles versioning and references internally, so your local folders are for supporting documentation and final exports.
- A good structure builds your portfolio as you go: It makes collecting and presenting your work simple and efficient.
In our next lesson, we will dive into the technical design work. We'll start by analyzing the type of mechanism we need for our linear actuator, addressing the learning outcome: Apply mobility equations to evaluate degrees of freedom in a mechanism. This is the first step in translating our requirements into a physical concept.