Hello! Welcome to your next lesson in finalizing Project 3.
In our last session, we created a complete structural outline for a professional design review presentation using the Situation-Complication-Resolution (SCR) framework. You now have a solid skeleton for your project summary.
Today, we'll build on that structure by focusing on this learning outcome: Present design work using storytelling techniques to explain the problem, solution, and impact. We're moving beyond the what (the structure) to the how—how to weave your technical work into a compelling narrative that engages your audience, whether they're engineering managers, technical peers, or recruiters.
A great presentation doesn't just list facts; it tells a story. This skill will not only make your design reviews more effective but also transform your portfolio from a simple collection of projects into a powerful story of you as a problem-solving engineer.
1. The Core Engineering Story: Problem, Solution, Impact
At its heart, every engineering project tells a simple and powerful story. You start with a problem, you develop a solution, and that solution creates an impact. This is the narrative backbone of your entire presentation.
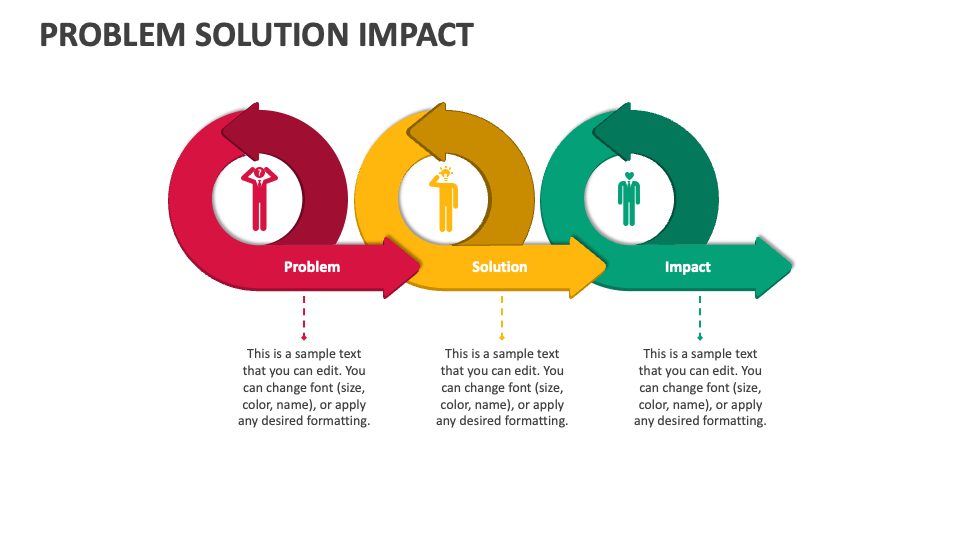
This "Problem, Solution, Impact" model maps directly onto the Situation-Complication-Resolution (SCR) framework we discussed in the last lesson:
- Problem: This encompasses both the Situation (the initial context and need) and the Complication (the specific challenges or obstacles that prevent a simple fix).
- Solution: This is your Resolution—the final design you developed. It's the technical answer to the problem.
- Impact: This is also part of the Resolution, but it focuses on the outcome. What are the benefits? How well does the solution meet the requirements? What value does it create?
To learn more about framing your project within these narrative patterns, let's look at a resource on technical presentations.
Technical Presentation Skills for Solutions Engineers
The following article, 'Technical Presentation Skills for Solutions Engineers,' has an excellent section on storytelling. It details several techniques that are directly applicable to presenting your design work.
Please read the section titled '4. Storytelling and Narrative Techniques'. Focus on these three concepts: Character Development: Think of your project's 'user' as the Hero and your design as the 'Guide'. The Problem-Solution Narrative: Notice how it mirrors the structure we've discussed. The Before-After Transformation: This is a powerful way to demonstrate the 'Impact' of your solution.
This simple, clear narrative ensures your audience understands not just what you designed, but why it matters.
2. Structuring Your Story: Narrative Frameworks
While "Problem, Solution, Impact" is your core message, you can use more sophisticated narrative frameworks to make your presentation even more engaging. We'll explore two popular ones.
To introduce these, let's watch a video that breaks down storytelling specifically for designers.
Storytelling for Designers – 3 techniques to present your designs
The video 'Storytelling for Designers' by Carola Pescio Canale offers practical techniques for presenting your work. We'll focus on two of these frameworks.
Please watch from 02:23 to 17:25. The video covers two main techniques: The Narrative Arc (02:23 - 08:19): Pay attention to how the 'action' or 'intensity' of your story builds to a climax and then resolves. Think about what the 'climax' of your project story would be. The Hero's Journey (08:19 - 17:25): Focus on how the video adapts this classic story structure for a design project. This is a fantastic model for framing your portfolio projects, positioning you as the 'hero' who overcame challenges.
Let's break down how to apply these two frameworks to your own project presentation.
The Narrative Arc
Think of this as managing the energy and tension in your presentation.
- Beginning (Low Action): You set the stage. This is your introduction, problem statement, and requirements (the Situation).
- Rising Action (Building): You walk through your design process. You show your initial concepts, the trade-offs you made, the analyses you ran, and the iterations you went through (the Complication). Each step adds a layer to the story.
- Climax (Peak Action): This is the main event of your presentation. It could be the reveal of your final, validated design, or the moment you show the FEA results that prove your design works under load. It's the point of maximum interest.
- Falling Action & Resolution (Cooling Down): You wrap up by presenting the final deliverables—the drawings, the BOM—and summarizing how your design successfully meets the requirements (the Resolution and Impact).
The Hero's Journey
This framework is especially powerful for portfolio presentations and job interviews, as it frames your project as a personal accomplishment. You are the hero of the story.
- The Ordinary World: The initial state—a problem exists but hasn't been tackled.
- The Call to Adventure: The project begins. You are tasked with designing a solution.
- Crossing the Threshold: You commit to a design concept and enter the "unknown" world of detailed design and analysis.
- Tests, Allies, and Enemies: This is your engineering journey.
- Tests: Running FEA, performing tolerance stack-ups, finding that an initial design fails.
- Allies: A key formula, a specific CAD tool, a helpful component from a supplier.
- Enemies: Unexpected constraints, difficult-to-machine features, conflicting requirements.
- The Ordeal & Reward: The core struggle. This is where you redesign a failing part, solve a complex assembly issue, or finally get the analysis to converge. Your reward is the validated design that works.
- The Road Back & Resurrection: You finalize the design, create the documentation (drawings, BOM), and "return to the ordinary world" with a finished, impactful solution. Your product—and you as an engineer—are transformed.
Test your understanding!
Think about your independent project (Project 3). Using the Hero's Journey framework, what was your "Ordeal"? What was the most significant technical challenge you faced and overcame during the design process?
Show answer
Your "Ordeal" might have been when your initial FEA on a critical bracket showed it would fail, forcing you to go back and apply rib/boss principles to strengthen it. Or perhaps it was figuring out the complex mates required for a specific motion in your OnShape assembly. Identifying this moment of struggle and resolution is key to telling a compelling story about your problem-solving skills.
3. Visual Storytelling: Showing, Not Just Telling
For mechanical engineers, visuals are not just supplemental; they are the primary medium for storytelling. Your CAD models, drawings, and analysis plots are the main characters in your story.
An effective portfolio or presentation uses visuals to guide the audience through the narrative.
Portfolio : Mechanical Engineering Communication Lab
Let's turn to a fantastic resource from the MIT Mechanical Engineering Comm Lab on building a portfolio. It contains excellent, practical advice on using visuals to tell your project's story.
Please read the sections titled 'Frame your story' and 'Creating strong visuals'. Pay close attention to: The 'inverted pyramid' structure for presenting a project. The advice to show process, not just the final 'hero shot'. The tips on integrating text with visuals through annotations.
Here are the key principles of visual storytelling for your design presentation:
- Show the Journey: Don't just show a glamour shot of the final assembly. Include sketches from your brainstorming, images of your decision matrix, screenshots of different design iterations, and FEA plots from both failed and successful analyses. This shows your process.
- Annotate Your Visuals: Use arrows, callouts, and highlighted sections on your CAD renderings and drawings. Point directly to the features you're discussing. If you're talking about the stress on a fillet, show a close-up of that fillet in your FEA results.
- Use a Mix of Views: Combine overall assembly views with detailed component views and section cuts. This helps you orient the audience to the big picture before diving into the technical details of your specific contribution.
- Tell a Story with Data: A graph or a plot is a visual story. Instead of just putting a chart on the screen, walk your audience through it. "Here you can see the initial performance, we then made this change, which resulted in a 30% improvement, exceeding our target."
Conclusion
You now have the tools to transform your structured design review into a compelling story. By framing your work as a narrative, you make it more memorable, more persuasive, and more reflective of your true capabilities as an engineer.
Key Takeaways:
- The Problem, Solution, Impact framework is the essential narrative for any engineering project.
- The Narrative Arc helps you structure the emotional and intellectual journey of your presentation, building to a climax.
- The Hero's Journey is a powerful model for presenting your portfolio projects, positioning you as the problem-solving protagonist.
- Visual storytelling is crucial. Use visuals to show your process, annotate key features, and guide your audience through your design journey.
Preview of the Next Lesson:
In our next lesson, we will address the final piece of the presentation puzzle: "Adapt the content and structure of a technical presentation for different audiences (e.g., engineering peers, managers)." We'll discuss how to take the core story you've crafted and tailor it to be maximally effective for who you're talking to.