Hello! Welcome back to your second lesson.
In our last session, we got acquainted with the Onshape user interface, learned how to navigate the 3D space, and created our first document for "Project 1". Today, we'll build on that by learning how to manage that document like a professional engineer.
This lesson focuses on a core strength of Onshape that sets it apart from traditional file-based CAD systems. You will learn to manage Onshape documents, including creating, organizing, and using its powerful versions and history features. In a real-world engineering environment, you don't just create a final design; you iterate, explore alternatives, and document milestones. Mastering these tools is fundamental to maintaining a clean, professional workflow and is essential for the portfolio projects we'll be building.
1. The Onshape Document: A Project Container
First, let's redefine what a "document" is in Onshape. Unlike traditional CAD where a .SLDPRT or .CATPart file represents a single part, an Onshape document is a comprehensive project container. It can hold everything related to a design in one place.
This article from the Onshape Help Center explains the unique philosophy behind Onshape documents. It covers what they can contain and offers best practices for how to structure your projects.
Please read the introduction and the sections titled 'Keeping project information in one document' and 'Best practices and strategies'. Pay close attention to the idea that a document can hold Part Studios, Assemblies, Drawings, and even imported files like PDFs.
As you've just read, a single document is your project hub. Let's apply this organization principle right away.
- Open the "Project 1 - Linear Motion System" document you created in the last lesson.
- At the bottom, you'll see two default tabs:
Part Studio 1andAssembly 1. - Right-click on the
Part Studio 1tab and choose Rename. Change the name to "P1 Components". This is where we'll model the parts for our first project. - Right-click on the
Assembly 1tab and rename it to "P1 Main Assembly". This is where we'll eventually assemble those components.
This simple habit of naming tabs descriptively is the first step toward a well-organized project that anyone on a team could understand.
2. Versions and History: Your Design's Timeline
Onshape automatically records every single action you take in the History. But for marking significant project milestones—like a design ready for review or a formal release—we use Versions. A Version is an immutable (unchangeable), named snapshot of your document at a specific point in time.
To see this in action, let's first add some simple geometry to our Part Studio.
- In the "P1 Components" tab, create a new sketch on the
Topplane. - Sketch a
Center point rectanglecentered on the origin. - Dimension it to be 100mm x 50mm.
- Exit the sketch and use the Extrude tool to give it a height of 20mm.
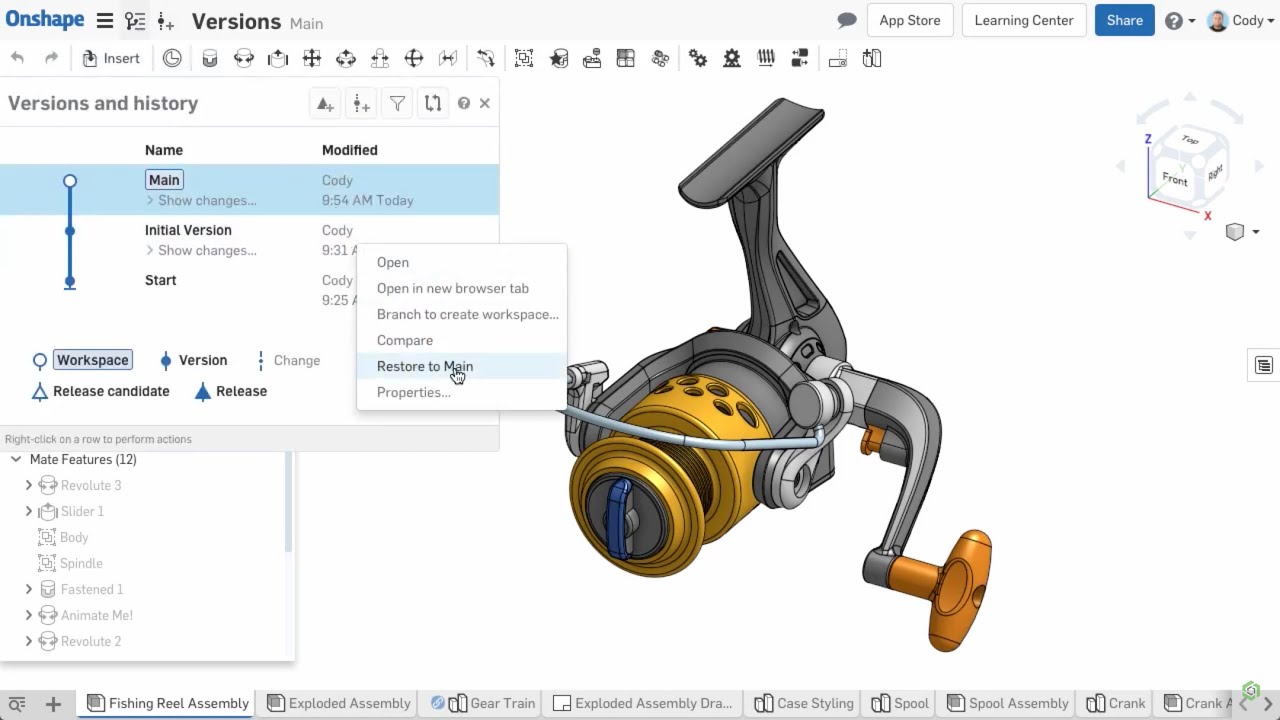
You now have a simple block. If you click the Versions and history icon ( ) on the left-hand toolbar, you'll see every step you just took recorded.
Now, let's create our first formal version.
The 'Versioning and Branching' documentation explains how to use the Versions and history panel. This section specifically details the process of creating a formal, named version.
First, read the brief introduction to the panel. Then, focus on the section 'Creating a version'. Follow the steps to create a version for the block you just modeled. Finally, skim the 'Understanding the graph' section to familiarize yourself with the key terms: Version, Workspace, and Branch.
Following the guide, click the Create version icon ( ) at the top of the
Versions and history panel. Name it "V1.0 - Base Plate Concept" and add a description like "Initial block model for project setup."
You've now captured a formal milestone. To see why this is so powerful, go back to your model (the "Main" workspace) and make a change. For example, add a hole through the center of the block. Your live model is now different, but if you click on the "V1.0" version in the history graph, you'll see the original block without the hole. This provides a permanent, auditable record of your design at key stages.
3. Branching: Safely Exploring New Ideas
What if you want to test a design change without committing it to your main design? This is a common scenario in industry, for example, when exploring a cost-reduction idea or a new feature. For this, we use Branching.
Creating a branch makes a complete, independent copy of your design in a new workspace. You can experiment freely in this new branch without any risk to your main line of development.
The best way to understand this workflow is to see an example.
This section of the documentation provides a perfect, real-world analogy for using branching in a team environment to design a bicycle. It clearly shows how different designers can work on separate components in parallel.
First, read 'Creating a branch and workspace' to understand the mechanics. Then, carefully read the 'Branching example' with the bicycle. This example is key to understanding the why behind branching.
Let's apply this to our own project. Imagine we want to try adding large fillets to our base plate, but we're not sure if it's the right direction.
- In the
Versions and historypanel, right-click on your "V1.0 - Base Plate Concept" version. - Select Branch to create workspace....
- Name the new branch "Fillet Exploration". Click Create.
You are now in a new workspace.
- Use the Fillet tool to add 10mm fillets to the four vertical edges of the block.
- Now, look at your
Versions and historygraph. You will see the new "Fillet Exploration" branch splitting off from the "Main" branch. - Click on Main in the graph to switch back to your main workspace. The fillets are gone!
You have successfully isolated a design change in a separate branch. This allows you to develop ideas in parallel and later decide if you want to merge them back into the main design.

Test your understanding!
Imagine you've just finished the initial design for a mounting bracket. Your team lead approves it for a preliminary design review. At the same time, you are asked to investigate if making the bracket from sheet metal instead of a solid block would be feasible.
How would you use Versions and Branches to manage this situation in Onshape?
Show answer
- First, you would create a Version from your current main workspace and name it something like "V1.0 - Solid Bracket for PDR" (Preliminary Design Review). This creates a permanent, read-only record of the approved design.
- Next, you would right-click on that new version and create a Branch. You would name this branch "Sheet Metal Study" or similar.
- In the new "Sheet Metal Study" workspace, you would then modify the design to explore the sheet metal concept. All this work is isolated from the main design, and the V1.0 version is safely preserved for the review.
Conclusion
In this lesson, we moved beyond basic navigation and into the core of professional project management within Onshape. You learned that:
- Onshape documents act as project containers, holding all related parts, assemblies, and files.
- Using tabs helps keep your document organized and easy to understand.
- You can create a Version to capture an immutable snapshot of your design at a key milestone.
- You can create a Branch to explore new design ideas in an isolated workspace without affecting your main progress.
This version control system is one of the most powerful features of Onshape, enabling robust, professional workflows that prevent data loss and make design exploration safe and easy.
In our next lesson, we will finally dive into creating meaningful geometry. We will learn how to create and constrain 2D sketches, which are the fundamental building blocks for all 3D models.