Hello! Welcome back. In our last lesson, you successfully learned how to place and "wrap" the features of the face onto the 3D structure of the Loomis head. You now have a complete, constructed head in a neutral pose.
Today, we're going to make that head move. This lesson directly addresses the learning outcome: Draw a constructed head tilted up or down (pitch), showing the shifting of features and foreshortening of planes. We will focus on this single axis of rotation—pitch—to understand how perspective fundamentally alters the head's proportions and the visibility of its different surfaces. This is a crucial step in being able to deconstruct and draw heads from any angle you see or imagine.
A Quick Recap: Your Construction Tools
Remember the two key methods we've discussed for head construction:
- The Loomis Method: Building from a sphere with sliced sides, which is great for achieving organic, flowing forms.
- The Box Method: Enclosing the head in a rectangular prism, which provides a rigid and accurate perspective guide. Think of it as a "bounding box" for your drawing.
Today, we'll see how to apply the concept of pitch to both of these methods.
The Theory of Tilt: What Changes When a Head Looks Up or Down?
Before we start drawing, let's first understand what we should be looking for. When a head tilts, the relationship between its different parts changes dramatically. A short video from Proko explains these key changes very clearly.
How to Draw the Head from Extreme Angles
The video 'How to Draw the Head from Extreme Angles' clearly explains the visual effects of tilting a head up or down. Pay close attention to the concepts of foreshortening and the changing shapes of the jaw and nose.
Please watch from 01:54 to 03:41. Focus on the four key observations the video makes about up-tilts and down-tilts.
Based on the video, here are the critical observations to keep in mind:
- Foreshortening of the Thirds: The three equal divisions of the face (hairline-to-brow, brow-to-nose, nose-to-chin) are only equal in a straight-on view.
- Looking Up: The head recedes from the chin upwards. The forehead becomes the most foreshortened (smallest) third, while the chin and jaw area appear largest.
- Looking Down: The head recedes from the forehead downwards. The top of the head appears largest, and the jaw/chin area is the most foreshortened.
- Shifting Feature Lines: The horizontal lines for the brows, eyes, nose, and mouth are no longer straight but become curved ellipses.
- Looking Up: These lines curve upwards, like a smile.
- Looking Down: These lines curve downwards, like a frown.
- Changing Jaw Shape: The form of the jaw changes significantly.
- Looking Up: You begin to see the bottom plane of the jaw. The jawline can look wider and more "boxy."
- Looking Down: The jaw tucks into the neck, appearing more triangular as the chin moves closer to the chest.
- Revealed and Hidden Planes:
- Looking Up: The underside of the nose and chin become visible.
- Looking Down: The top of the nose bridge and the top plane of the head become more prominent.
Test your understanding!
You are drawing a character looking down at a map on a table. Which of the three facial "thirds" (forehead/hair, brow-to-nose, nose-to-chin) will appear the largest, and which part of the nose will be most visible?
Show answer
The forehead and hair section will appear largest because it is closest to the viewer. The nose-to-chin section will be the most foreshortened and appear smallest. The top plane (the bridge) of the nose will be most visible, while the nostrils will be hidden.
Constructing the Tilt, Step-by-Step
Now that you know what to draw, let's focus on how to construct it accurately. We'll explore this using both the Loomis and Box methods.
Approach 1: The Loomis Method
The Proko lesson materials provide the clearest, most direct way to incorporate tilt into the Loomis method. The key is to establish the angle of tilt at the very beginning of the construction.
How to Draw the Head from Any Angle
The article 'How to Draw the Head from Any Angle' by Proko will walk you through modifying the Loomis construction to handle tilts. It's a very systematic approach.
Please read the sections titled 'Finding the Up and Down tilt' and the numbered summary that follows it (Let’s go through that one more time). Focus on how the angled brow line dictates all subsequent proportions.
The process is as follows:
- Draw the Sphere: Start with your perfect circle for the cranium.
- Draw the Side Plane: Draw the oval for the side of the head.
- Establish the Tilt: This is the most important step. Draw the brow line across the sphere at the desired angle. For an up-tilt, angle it up. For a down-tilt, angle it down. This single line defines the 'pitch' of the head.
- Find the Other Thirds:
- Project the brow line's curve around the sphere.
- Use the height of the side-plane oval to measure the distance from the brow line to the nose line, and from the brow line to the hairline.
- From the nose line, measure one more of these units down to find the chin. Remember that perspective will cause these curved lines to appear closer together (foreshortened) as they recede.
- Attach the Jaw: Connect the jaw from the brow line and the side plane down to the chin marker you just created.
Approach 2: The Box Method
The box method is excellent for reinforcing the rules of perspective. If you can draw a box tilted up or down, you can draw a head tilted up or down. This method is especially powerful for your goal of deconstruction.
draw faces from ANY angle | a complete guide
In the video 'draw faces from ANY angle,' the creator demonstrates how to use a simplified box to represent the head at different angles. This structural approach is a great way to verify your perspective.
Watch the segment from 18:08 to 19:35. Notice how the simple, blocky form is used to represent a head looking up and a head looking down. This is the foundation upon which you can build the more organic Loomis shapes.
This approach helps you "think through" the form in the simplest possible terms. Before adding any curves or features, you can ask:
- Looking up: Is the bottom plane of my box visible? Are the vertical lines converging downwards?
- Looking down: Is the top plane of my box visible? Are the vertical lines converging upwards?
You can start with a box and carve the Loomis head out of it, or you can draw a Loomis head and then enclose it in a box to check that your curves align with the perspective.
Practice Exercise (20-25 minutes)
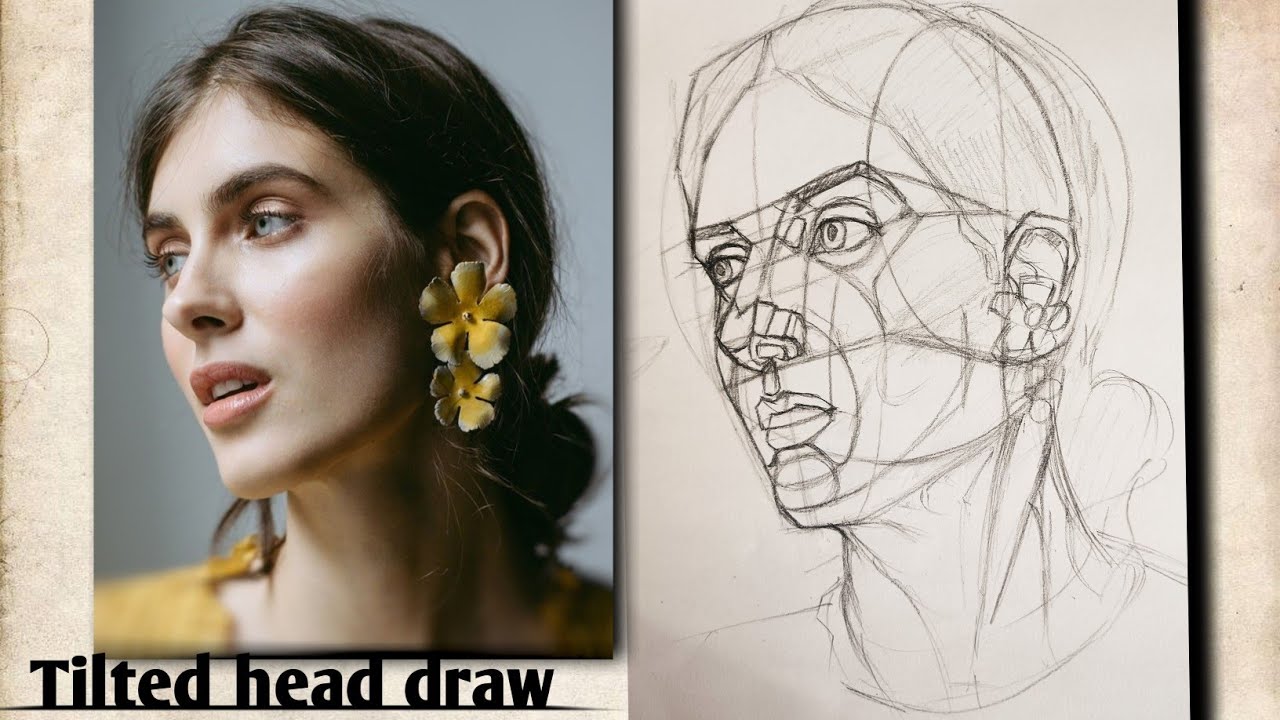
It's time to put this into practice. For this exercise, you'll create two construction drawings: one looking up and one looking down. You can find photo references online or take a picture of yourself.
- Setup: Find a reference photo of a head tilted up (a "worm's-eye view").
- Draw the Up-Tilt:
- Using the Loomis method, start with a sphere and establish a strong upward angle for your brow line.
- Map out the foreshortened thirds. Notice how small the forehead space is.
- Block in the jaw, ensuring you show its bottom plane.
- Lightly sketch in the simplified forms for the eyes, nose, and mouth, making sure they follow the upward curves. Pay attention to showing the underside of the nose.
- Setup: Find a reference photo of a head tilted down (a "bird's-eye view").
- Draw the Down-Tilt:
- Repeat the process, but this time establish a strong downward angle for the brow line.
- Notice how large the top of the head is and how the chin is tucked away.
- Block in the jaw. Its bottom plane will be hidden.
- Lightly sketch the features, following the downward curves. The bridge of the nose will be prominent, and the lips will be sharply downturned.
Focus on clean, confident construction lines. The goal is not a finished portrait, but an accurate structural drawing that demonstrates your understanding of pitch.

Conclusion
Congratulations on tackling a complex but essential skill. By learning to control the pitch of the head, you've moved from static portraits to dynamic ones. You can now convey a character's gaze and attitude simply by manipulating your construction.
Key Takeaways:
- Pitch (up/down tilt) is controlled by the initial angle of the brow line in your construction.
- Foreshortening is key: planes moving away from the viewer appear smaller. When looking up, the forehead shrinks; when looking down, the chin area shrinks.
- Tilting the head reveals new planes (like the underside of the jaw in an up-tilt) and hides others.
- All horizontal feature lines (for eyes, mouth, etc.) become curved ellipses that follow the primary tilt of the brow line.
- You can use either the Loomis method (sphere-based) or the Box method (structure-based) to construct these tilted views.
Next Lesson Preview:
You've now mastered pitch. In the next lesson, we will complete our study of head rotation by tackling the remaining two axes: yaw (turning side-to-side) and roll (tilting ear-to-shoulder). This will give you the complete toolset to construct a head at any angle you can imagine.