Hello! Welcome to the first lesson in our new module, "Creating AI Talking Avatars."
In the last few lessons, you've built a strong foundation in creating dynamic visual assets, from animating static images to directing camera movements in AI-generated video clips. You now have the skills to create compelling scenes and B-roll. We're now going to focus those skills on one of the most powerful and popular applications of AI video: making a character talk.
This lesson tackles a crucial first step, addressing the learning outcome: Prepare a source photograph for an AI avatar to maximize lip-sync and animation quality. The quality of your final talking avatar depends almost entirely on the quality of the image you start with. Think of it as the "garbage in, garbage out" principle—a poor source image will always lead to disappointing results. By the end of this lesson, you'll know exactly what makes a perfect source photo and how to prepare one.
1. The "Golden Rules" of a Good Source Photo
When you ask an AI to animate a photo, it's not just "playing" a video over an image. The AI analyzes the facial structure, identifies key points like the corners of the eyes and mouth, and then generates new frames that mimic speech and expression. For this to work well, the AI needs a clean, clear reference.
Let's start by reviewing the official guidelines from a popular tool, HeyGen. They provide an excellent, easy-to-understand list of what works and what doesn't.
How to Get Started with Photo Avatars
This guide from HeyGen, 'How to Get Started with Photo Avatars,' is a perfect starting point. It clearly outlines the best practices for selecting a photo.
Please read the section titled 'Tips for creating a virtual character when uploading photos'. Focus on the '✅ Works best' and '⚠️ Usually doesn’t work well' lists. Also, pay close attention to the final point about the character being too small in the picture.
To summarize and expand on these points, here is a checklist for the ideal source photo:
Do:
- Use a high-resolution, clear image. The face should be in sharp focus.
- Ensure the face is well-lit. Use even, frontal lighting that avoids harsh shadows on the face.
- Choose a forward-facing pose. The subject should be looking directly at the camera.
- Keep facial features unobstructed. Make sure hair, hands, or accessories aren't covering the eyes, eyebrows, or mouth.
- Use a neutral expression. A closed mouth and a relaxed facial expression provide the best canvas for the AI to animate.
- Frame it as a close-up or portrait. The face should occupy a significant portion of the image.
Don't:
- Use blurry, grainy, or low-resolution photos.
- Use photos with dramatic side-lighting or shadows that obscure facial features.
- Use profile shots or photos where the head is tilted significantly.
- Have the subject smiling widely, talking, or making an exaggerated expression.
- Use group photos or images where the face is very small.
2. Why These Rules Matter for Animation Quality
Understanding why these rules are important will help you troubleshoot issues later. Let's dig a bit deeper into the common challenges and the technical reasons behind these guidelines.
How to Create Video Avatars from Photos? Tips & Tricks
The D-ID blog provides more excellent advice in its article, 'How to Create Video Avatars from Photos?'. It reinforces the selection criteria and explains some common pitfalls.
First, read the section 'What to Consider When Choosing the Right Photo for Your Avatar'. This will reinforce the points from the HeyGen guide. Then, read 'NEW for 2025: Common Challenges (and How to Overcome Them)' to better understand problems like mismatched lighting and lip-sync issues.
As the articles explain, the AI needs to perform "facial mapping." It identifies landmarks to understand the face's structure.
- Bad lighting or obstructions hide these landmarks, causing the AI to guess, which results in distorted or "glitchy" animation.
- A non-neutral expression (like a big smile) gives the AI a distorted starting point for the mouth. When it tries to animate talking, the result often looks unnatural because it has to fight against the existing expression.
- A low-resolution or small face doesn't provide enough pixel data for the AI to analyze accurately, leading to poor-quality lip-sync and blurry results.
3. Practical Steps: Preparing Your Image
Now, let's turn theory into practice. This section will guide you through the steps to get your image ready for animation.
Step 1: Select or Generate Your Image
You have two options:
- Use an AI-generated image: Revisit the character you designed in Module 2. Does it meet the criteria we just discussed? If you used a prompt specifying a "symmetrical face, looking at the camera, neutral expression," you're likely in a good position.
- Use a real photograph: Find a clear headshot of yourself or someone else (with their permission, of course).
Critically evaluate your chosen image against the checklist from Part 1.
Step 2: Enhance Image Quality (If Needed)
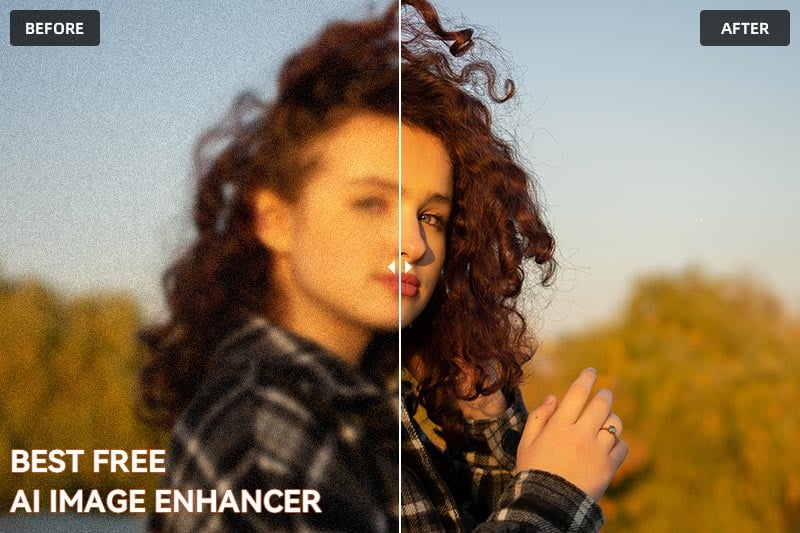
What if your photo is a little blurry or low-resolution? You don't have to discard it. You can use a free AI image enhancer or upscaler to improve its quality. These tools are fantastic for sharpening details and increasing resolution, giving the avatar generator a much better file to work with.
Your Task (15 minutes):
- Find a free AI image enhancer. You can search for "free AI image enhancer" or "AI photo upscaler." Tools like those offered by AVC Labs, Clipdrop, or Fotor often have free versions.
- Upload your chosen source image. If it's already perfect, great! If it's slightly blurry or you want to see the effect, process it through the enhancer.
- Download the improved, high-resolution version.
Step 3: Crop and Frame for Success
Finally, you need to ensure the face is properly framed. As the HeyGen article noted, the character shouldn't be too small in the picture. Most avatar tools will give you an opportunity to crop and adjust your image upon upload.
This short video clip demonstrates this final adjustment step.
How to use AI Lip Sync in Dzine | Tutorial
This clip from a tutorial for the Dzine platform visually demonstrates the principles of selecting and framing your image. Pay attention to the specific recommendations.
Watch from 00:52 to 01:45. Focus on the narrator's recommendations for a 'high quality well-lit portrait' and 'a close-up of the upper body'. Also, notice how the tool allows for adjusting the aspect ratio and repositioning the face in the frame after uploading.
The key is to aim for a portrait or bust shot (head and shoulders), where the face is the clear hero of the image.
By completing these three steps—Select, Enhance, and Frame—you will have a professional-quality source image ready for animation.
Conclusion
In this lesson, you've learned the most critical factor for creating a high-quality talking avatar: preparing the source photograph. A great final video is impossible without a great starting image.
Key Takeaways:
- The "Golden Rules" for a source photo are: high-resolution, forward-facing, clear and unobstructed facial features, even lighting, and a neutral expression.
- These rules exist because the AI needs to accurately map facial landmarks to generate realistic animation and lip-sync.
- You can use free AI tools to enhance and upscale images that aren't perfect, significantly improving your chances of a good result.
- Proper framing, focusing on a close-up or portrait shot, ensures the AI has enough data to work with.
Next Lesson Preview:
Now that you have a perfectly prepared photograph, our next lesson will guide you through the exciting process of bringing it to life. You'll learn how to combine your image with a voiceover track to create your very first talking head video using a free AI tool.