Hello! Welcome back.
In our last lesson, we focused on writing highly detailed, multi-part prompts to act as a blueprint for each shot. You learned how to translate your "Shot Spec Card" into a structured command for the AI.
However, as you may have experienced, even with identical text prompts, AI models can produce slight variations in a character's appearance from one clip to the next—a phenomenon known as "character drift." For building a narrative, this can break the audience's immersion.
Today, we'll address this head-on. This lesson is dedicated to the core skill of maintaining visual consistency. You will learn how to use anchor images and character reference sheets to maintain visual consistency across multiple clips. This is a crucial step in moving from generating isolated clips to crafting a coherent story with believable characters.
The Foundation of Consistency: Anchor Images & Character Sheets
Before diving into the "how," let's establish why this is so important and define our key tools. In traditional filmmaking, a whole department is dedicated to continuity. In AI video, that role falls to you, the creator.
Consistent Character AI: Pro Tips & Workflow
To understand the importance of this, let's quickly review the core principles. The article 'Consistent Character AI' provides a great summary of why visual stability is essential for storytelling.
Please read the introduction and the section 'Why character consistency matters in AI storytelling'. This will frame our practical work today by highlighting the impact on immersion, credibility, and emotional connection.
To achieve this consistency, we'll use two primary assets:
- The Anchor Image: This is your single, definitive "master" image of the character. It should be a clear, high-quality shot, typically in a neutral pose, that serves as the visual bedrock for all subsequent generations.
- The Character Reference Sheet (or "Character Bible"): This is a more comprehensive document or image that details your character's unchangeable attributes. It can be a detailed text document, a visual grid of different angles and expressions, or both.
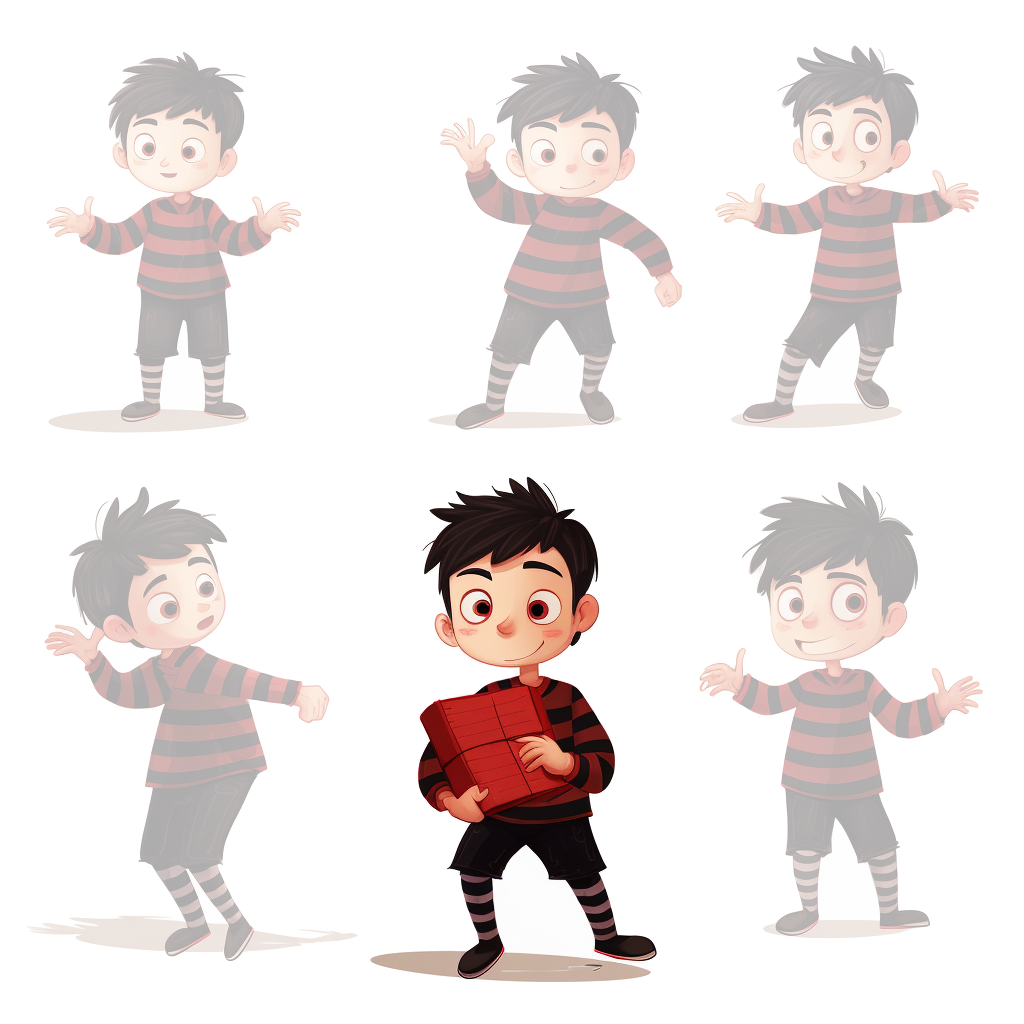

Step 1: Create Your Character's Blueprint
The most common cause of character drift is inconsistency in the information you provide the AI. The solution is to create a definitive blueprint for your character before you start generating clips.
The "Character DNA" Document
A powerful way to do this is by creating what's called a "Character DNA" document. This is your internal specification sheet that defines the character's core, unchangeable traits.
How to Create Consistent AI Cartoon Characters (2026)
The article 'How to Create Consistent AI Cartoon Characters' provides a brilliant, practical template for this. While it focuses on cartoons, the principle is universal for any style.
Please read the section 'Step 1: Write Your "Character DNA" (This Is Your Real Asset)'. Copy the 'Character DNA Template' into a text file for your own use and study the example for the character 'Luna'. Pay special attention to the Pro Tip about picking 1-2 'Anchor Traits'—bold, memorable shapes that the AI can easily latch onto.
Using this template for our robot, Bolt, might look something like this:
- Name: Bolt
- Role/archetype: Curious, lonely scavenger
- Silhouette: Small (2ft tall), boxy chassis, caterpillar tracks
- Face landmarks: Large, expressive binocular-style eyes
- Signature details: Dented orange metal plates, single thin antenna
- Style rules: Cinematic, gritty, realistic textures, inspired by 'WALL-E'
- Never change: Binocular eyes, orange color, caterpillar tracks
- Allowed to change: Pose, expression (eye light color/intensity), level of dust/grime
Generating the Anchor Image
With your Character DNA defined, the next step is to generate the perfect anchor image. This image should give the AI all the information it needs about your character's proportions, outfit, and core features in a single, clean reference.
How to Create Consistent AI Cartoon Characters (2026)
Let's continue with the same article to see how to generate this master image effectively.
Now, read 'Step 2: Generate Your Anchor Character (The "Master Image")'. Focus on the 'What to aim for in the anchor image' checklist (full body, neutral pose, etc.). This checklist is your guide to creating a high-utility reference.
Step 2: Using Your References in Practice
Now that you have your blueprint (the DNA document) and your visual guide (the anchor image), it's time to put them to work.
The Two-Layer Prompt System
To prevent "prompt drift," where you accidentally change your character's description, it helps to formalize the prompting structure we discussed in the last lesson.
The guide on creating consistent characters introduces a simple but effective two-layer prompt system:
- Identity Block: The core description from your Character DNA document. This part never changes.
- Scene Block: The description of the specific action, setting, and camera work for the current shot. This part changes every time.
By copying and pasting the exact same Identity Block into every prompt, you continuously reinforce the character's core look.
The Nano Banana Workflow
Since you're already familiar with Nano Banana, let's see a practical demonstration of how to use these reference assets directly within the tool. Many modern AI video generators use a similar "ingredient" or "reference" based workflow.
Consistent Character Sheets in Nano Banana (Prompts Included!)
This video from AI Video School provides a clear, step-by-step walkthrough of creating and using a character reference sheet in Nano Banana.
Please watch these three short segments: How to create the reference sheet (01:34 - 02:15): See how a single image is turned into a multi-angle character sheet. How to use the sheet (02:15 - 03:18): Pay close attention to how both the start image and the reference sheet are used as 'ingredients' to generate the video. This is a key technique. Workflow Recap (03:38 - 04:20): This provides a concise summary of the entire process.
Advanced Technique: Frame-to-Frame Chaining
For creating longer sequences, you can use a technique called "frame-to-frame chaining."
- Generate your first clip (e.g., 5 seconds of Bolt walking).
- Take the very last frame of that clip and use it as the start image for your next prompt.
- Generate the next clip (e.g., 5 seconds of Bolt stopping).
This creates a seamless transition, as the AI is starting from the exact position and lighting where the last clip ended. When you combine this with also providing the main character reference sheet, you get incredibly robust consistency.
Test your understanding!
Imagine you have just generated a 5-second clip of Bolt walking through the junkyard. You used your main anchor image as a reference.
Now, you want to create the next 5-second clip where he stops and tilts his head down.
What three key "ingredients" would you use in a tool like Nano Banana to generate this second clip, ensuring maximum consistency with the first?
Show answer
You would use the following three ingredients:
- The last frame of the first clip: This serves as the new "start image" for the second clip (this is frame-to-frame chaining).
- Your original Character Reference Sheet/Anchor Image: You include this again to constantly reinforce the character's core identity.
- Your new text prompt: This describes the new action, e.g., "Bolt stops abruptly and tilts his head down slowly, his antenna light begins to blink."
Using all three provides multiple layers of consistency control.
Conclusion
Today you've learned the fundamental strategy for achieving character consistency, moving beyond text-only prompts to a more robust, professional workflow. You are now equipped to ensure your characters remain recognizable and believable as they move through your narrative.
Key Takeaways:
- Visual consistency is essential for narrative immersion and credibility.
- A "Character DNA" document defines your character's unchangeable traits and serves as your north star.
- A high-quality "Anchor Image" provides the AI with a clear, definitive visual reference.
- In your AI tool, always use your anchor image or reference sheet as a guiding "ingredient" in addition to your text prompt.
- For longer sequences, use frame-to-frame chaining by making the last frame of one clip the start image for the next.
We have now established how to create a consistent character. But a static character isn't very engaging. In our next lesson, we will focus on bringing dynamism to your scenes by learning how to control camera angles and movements (pan, tilt, zoom) through specific prompt language, allowing you to direct the audience's eye and build cinematic energy.