Hello! Welcome to the second-to-last lesson of our course.
In our last session, we built a troubleshooting toolkit for analyzing and solving the common production challenges that crop up in longer AI video projects. You learned to diagnose issues like identity drift and physics glitches, and to apply targeted solutions using precise prompting and strategic workflows.
Now, it's time to take all the knowledge you've accumulated—from structuring a story to generating shots, editing, and troubleshooting—and consolidate it into a powerful, personal asset. This lesson is about formalizing your entire creative process. Our learning outcome is to document your personal end-to-end video production workflow for future reference. This documented workflow will become your personal playbook, ensuring your creative process is efficient, repeatable, and consistently high-quality.
Why Document Your Workflow?
As a consultant, you know the power of a well-documented process. It transforms ad-hoc activities into a reliable system. The same principle applies to your creative work. Documenting your AI video production workflow isn't about stifling creativity with rigid rules; it's about building a foundation that frees you up to focus on the most important part: the story.
Let's begin by looking at a simple framework for creating any kind of workflow documentation.
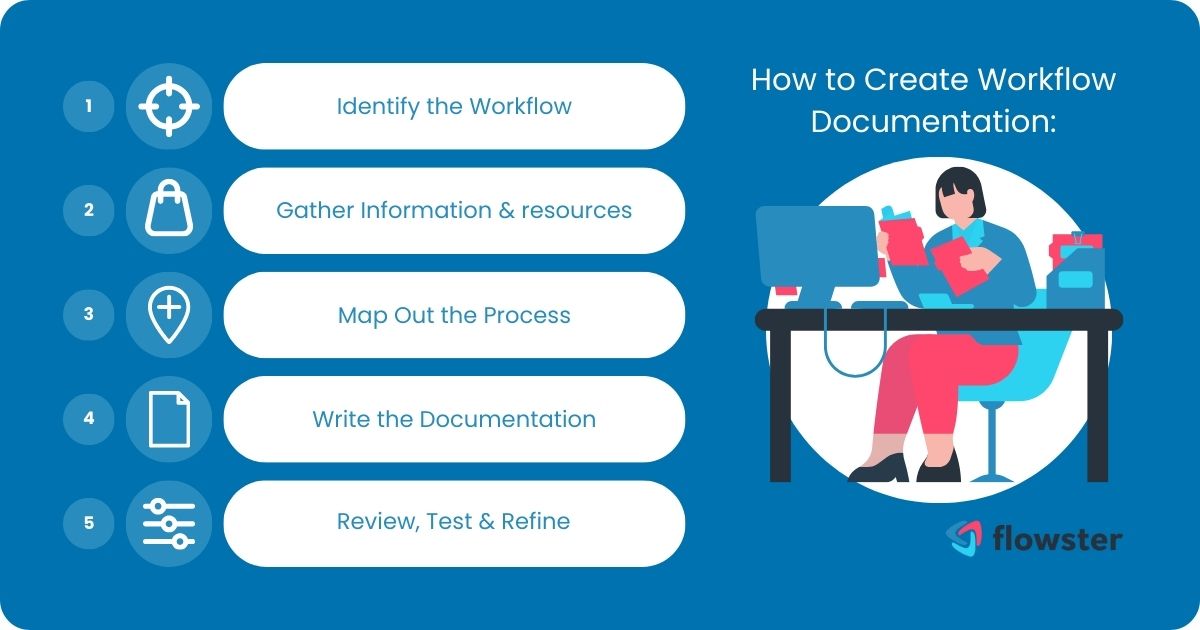
A personal workflow document will help you:
- Work Faster: You won't have to reinvent your process for every new video.
- Maintain Quality: You can ensure you're always using the best techniques you've discovered.
- Scale Up: A clear process makes tackling longer, more complex 3-5 minute projects manageable.
- Improve Systematically: With a documented baseline, you can test new tools or techniques and measure their impact.
- Remember What Works: AI tools and techniques change rapidly. Your workflow document is your personal knowledge base, capturing what works for you with the tools you use.
The Anatomy of an AI Filmmaking Workflow
An end-to-end AI filmmaking workflow can be broken down into distinct stages, moving from abstract idea to concrete final product. Think of it as a production line for your stories.
A great overview of what a typical workflow looks like is provided in the following video.
Step-by-Step: The State of AI Filmmaking Workflows
The hosts of VP Land discuss the state of AI filmmaking and outline the typical steps creators are taking. This will help you see how your own process fits into the broader landscape.
Watch from 00:07 to 02:51. Pay attention to how they describe the standard 'text -> image -> image-to-video' pipeline and the need to use multiple tools together. They emphasize that while tools change, the core workflow remains stable.
Building on that overview and everything we've covered in this course, a comprehensive workflow consists of four main phases:
Phase 1: Pre-Production (The Blueprint)
This is where you plan everything. The quality of your final video is determined here.
- Ideation & Story Structure: The initial concept and 3-act structure.
- Script & Beat Sheet: Writing the narrative and breaking it into key moments.
- Shot List & Storyboard: Translating the script into a visual plan.
- Asset Pack Creation: Generating your "anchor images" for consistency. This includes:
- Character Sheets (front, side, 3/4 views, different expressions).
- Style Guides (a master image or detailed prompt defining the look).
- Location References (key background plates).
- Prop Sheets (for any recurring important objects).
Phase 2: Production (The Digital Shoot)
This is the generation phase where you create your raw visual materials.
- Prompt Engineering: Writing and refining the prompts for each shot.
- Image & Video Generation: Using your chosen AI tools to create the clips.
- Asset Management: Keeping all your generated files organized in a logical folder structure.
Phase 3: Post-Production (The Assembly)
This is where you bring everything together to form a coherent narrative.
- Audio Production: Generating AI voiceovers, selecting music, and finding sound effects.
- Video Editing: Sequencing clips, pacing the story, and adding transitions.
- Synchronization: Aligning audio (dialogue, music) with the video, including lip-syncing.
Phase 4: Polish & Delivery
The final touches.
- Color Correction & Grading: Ensuring a consistent look across all shots.
- Final Export: Rendering the video in the desired format.
- Archiving: Saving your project files and your workflow notes for future reference.
This structure, detailed in the article "AI Storyboard To Animation Pipeline," is crucial because, as the author notes, your goal isn't just to "generate video," but to "generate video that survives revisions."
How to Document Your Workflow: Tools & Templates
Now, let's get practical. You need a place to build and store this document. While a simple text file or spreadsheet can work, a tool like Notion is exceptionally well-suited for this task because it allows you to combine text, databases, images, and checklists all in one place.
The following video is a masterclass in using Notion to organize a filmmaking workflow. While the creator is a traditional filmmaker, the principles and templates are directly applicable to our AI-first process.
How To PLAN & ORGANISE Your VIDEOS! | Notion Filmmaking Workflow
Filmmaker Niklas Christl demonstrates his complete video production workflow inside Notion. We'll focus on how he structures his ideas, projects, scripts, and shot lists.
This is a detailed video, so we'll break it down: Project Management (03:21 - 10:06): Watch this section to understand how he creates a master database for all his video projects. Focus on the properties he uses (status, niche, publish date). This is perfect for tracking your 1, 3, and 5-minute video projects. Scripting within a Template (10:06 - 14:58): This is the core of his planning. Observe how he uses a project template to structure his script. Pay close attention to how he separates voice-overs, on-camera dialogue, and b-roll descriptions using colors and italics. You can adapt this to note your prompts and visual descriptions. Building a Shot List (14:58 - 19:02): See how he creates a detailed shot list database within the project page. The properties he uses (Chapter, Description, Shot Type, FPS, Comments) are exactly what you need for planning your AI generations. This is how you'll organize the plan for every shot in your 3-5 minute film.

Building Your Personal Workflow Document
Let's start drafting your workflow. You can use the templates and structures from the resources we've discussed. The article "AI Storyboard To Animation Pipeline" provides fantastic, copy-paste-ready templates.
1. Folder Structure
A clean folder structure is non-negotiable. It saves you from chaos. Here is a robust template from the LINK article you can adopt:
project_name/
├── 01_script/
├── 02_storyboard/
├── 03_assets/
│   ├── characters/
│   ├── style_guides/
│   ├── locations/
│   └── props/
├── 04_audio/
│   ├── voiceover/
│   ├── music/
│   └── sfx/
├── 05_generations/
│   ├── scene_01/
│   │   ├── shot_01_v1/
│   │   └── shot_01_v2/
│   └── scene_02/
└── 06_exports/
    ├── final_cut/
    └── social_media_versions/
In your workflow document, copy this structure and modify it to fit your needs.
2. The Shot Specification Card
For each shot you plan, having a "spec card" keeps you organized during generation. This can be an entry in your Notion shot list database. Again, adapted from the LINK article:
| Field | Your Entry |
|---|---|
| Shot ID | s01_sh03 (Scene 1, Shot 3) |
| Duration | 4 seconds |
| Shot Type | Medium Close-Up |
| Camera | Static, eye-level |
| Action | Character lifts coffee mug to their lips, looks thoughtfully out the window. |
| Reference Image | link_to_character_sheet.png, link_to_location_plate.png |
| Prompt | (Your full prompt text here) |
| Seed # | 123456789 (If applicable) |
| Output File | s01_sh03_final.mp4 |
| Notes | Ensure steam is visible from the mug. Keep lighting consistent with previous shot. |
3. The Prompt Structure
Consistency in your prompts leads to consistency in your output. Document your preferred prompt structure.
The article 'The AI Filmmaking Blueprint' from SBN Media provides a professional-grade example of a workflow broken into three phases: Blueprint, Digital Shoot, and Final Assembly. We will use it to see how experts document their breakdowns.
Read 'Part 1: Screenplay Breakdown for Prompts (The Blueprint)' and 'Part 2: Generations (The Digital Shoot)'. Focus on the level of detail they capture in their breakdowns: Character, Location, Color Grade, and especially the 'Prompt Engineering Documentation' where they create a 'prompt lexicon'.
Inspired by that professional breakdown, your documented prompt structure could look like this:
- Subject (Locked):
[Character description from your character sheet] - Action (Variable):
[The specific action for this shot] - Camera (Locked per scene):
[Shot type, angle, movement] - Environment (Semi-locked):
[Location description, key props, time of day] - Style (Locked):
[Your style guide prompt] - Constraints (Negative Prompt):
[Things to avoid, e.g., "no glasses, no logos"]
Test your understanding!
You're starting your 3-minute project. Using the Notion workflow from the Niklas Christl video (LINK) as a model, what are the first three things you would create inside your main project page?
Show answer
Based on his workflow, you would create:
- A Script/Content Section: A page or toggle list where you write out your story, separating dialogue, visual descriptions, and prompt ideas.
- A Shot List Database: A new inline database with properties for Shot ID, Description, Shot Type, Prompt, Status (e.g., To Generate, Generated, Final), etc.
- An Asset Section: A place to upload or link to your key "anchor images" - your character sheets, style guides, and location plates.
Conclusion
You've now journeyed through the entire process of AI filmmaking, from initial concept to final polish. This lesson has equipped you to formalize that journey into a personal, documented workflow. This isn't just a final assignment; it's the creation of your most valuable tool as a creator. It's a living document that will evolve with you as you experiment and as the technology itself matures.
Key Takeaways:
- A documented workflow is your personal playbook for creating AI videos efficiently and consistently.
- Your workflow should cover all four phases: Pre-Production, Production, Post-Production, and Delivery.
- Tools like Notion are ideal for creating dynamic, organized workflow documents.
- Your documentation should include practical templates for folder structures, shot lists, and prompt engineering.
- This process of documentation turns your experience—both successes and failures—into a repeatable and improvable system.
Preview of the Final Lesson
With your production workflow documented, you have a master plan for all future creative endeavors. In our final lesson, we will wrap up the course by compiling your capstone portfolio. This will be a showcase of the skills you've developed, featuring your completed 1, 3, and 5-minute video projects and the workflow document you've just created.