Hello again! Welcome back.
In our last lesson, we mastered the art of simulating user interactions in a UI test. We learned how to use accessibilityIdentifiers to find elements and then perform actions like .tap(), .typeText(), and .swipeUp() to navigate through a user flow. We also made our tests more reliable by using waitForExistence to handle asynchronous UI updates.
However, performing actions is only half the story. A test that doesn't verify the outcome is incomplete. Today, we'll focus on the other, more critical half: verification. Our learning outcome is to use element queries and assertions to verify UI state during a UI test. We will move beyond simply checking if an element .exists to validating specific details like text content, element counts, and enabled/disabled states. This is how we build tests that can precisely detect regressions.
The Core of Verification: Queries and Assertions
At a high level, UI test verification involves two steps:
- Query: Find the UI element(s) you are interested in.
- Assert: Check if the properties of those elements match your expectations.
Apple's XCTest framework provides powerful tools for both. Let's start with a brief overview from Apple on how to add these validations to your test code.
WWDC25: Record, replay, and review: UI automation with Xcode | Apple
This short clip from a WWDC session provides a great conceptual introduction to adding validations (assertions) to a recorded UI test.
Watch from 00:15:44 to 00:16:30. Pay attention to the two main validation methods mentioned: waitForExistence (which we've seen) and the more generic wait(for:toEqual:), which hint at the power of checking specific element properties.
Now let's dive into the APIs that make this possible.
1. Mastering Element Queries
In the last lesson, we primarily used app.buttons["identifier"] to find a single element. But XCUITest offers a much richer query system.
An XCUIApplication instance provides properties like buttons, staticTexts, textFields, tables, etc. Each of these returns an XCUIElementQuery object—a "live" query that represents all matching elements currently on screen.
You can then refine this query to find exactly what you need.
This article, "Fundamentals of XCUITest", provides an excellent technical breakdown of how to query for elements and what you can do with them. We'll focus on the querying mechanisms first.
Please read the following sections: "Interacting with UI elements" and "Getting Elements in the View": This introduces the element type properties like app.buttons and shows how to subscript them. "Predicate String": This is a powerful technique for an experienced developer. It shows how you can build more flexible queries, like finding an element whose label contains some text, which is great for dynamic content.
The key takeaways from that reading are:
- You start with a broad query (e.g.,
app.staticTexts). - You can narrow it down with an identifier (e.g.,
app.staticTexts["productTitle"]). - You can use
NSPredicatefor complex matching logic, like case-insensitive searches or partial string matches.
Scoping Queries for Stability
A very effective "pro" technique is to scope your queries. Instead of searching the entire app, you can search within a specific container element. This makes your tests faster and more resilient to UI changes elsewhere on the screen.
For example, instead of app.buttons["deleteButton"] (which might find delete buttons elsewhere), you could write:
let productCell = app.cells["productCell_123"]
let deleteButton = productCell.buttons["deleteButton"]
deleteButton.tap()
This ensures you are tapping the delete button inside the specific cell you care about.
2. Asserting UI State
Once your query has located an element (or a set of elements), you use XCTest assertion functions to verify its state. You're already familiar with the test...() method structure, and assertions are the heart of these methods.
The most common assertion functions are:
XCTAssertTrue(_:message:): Asserts that a condition is true.XCTAssertFalse(_:message:): Asserts that a condition is false.XCTAssertEqual(_:_:message:): Asserts that two values are equal.XCTAssertNotEqual(_:_:message:): Asserts that two values are not equal.
You combine these with the properties of an XCUIElement or XCUIElementQuery.
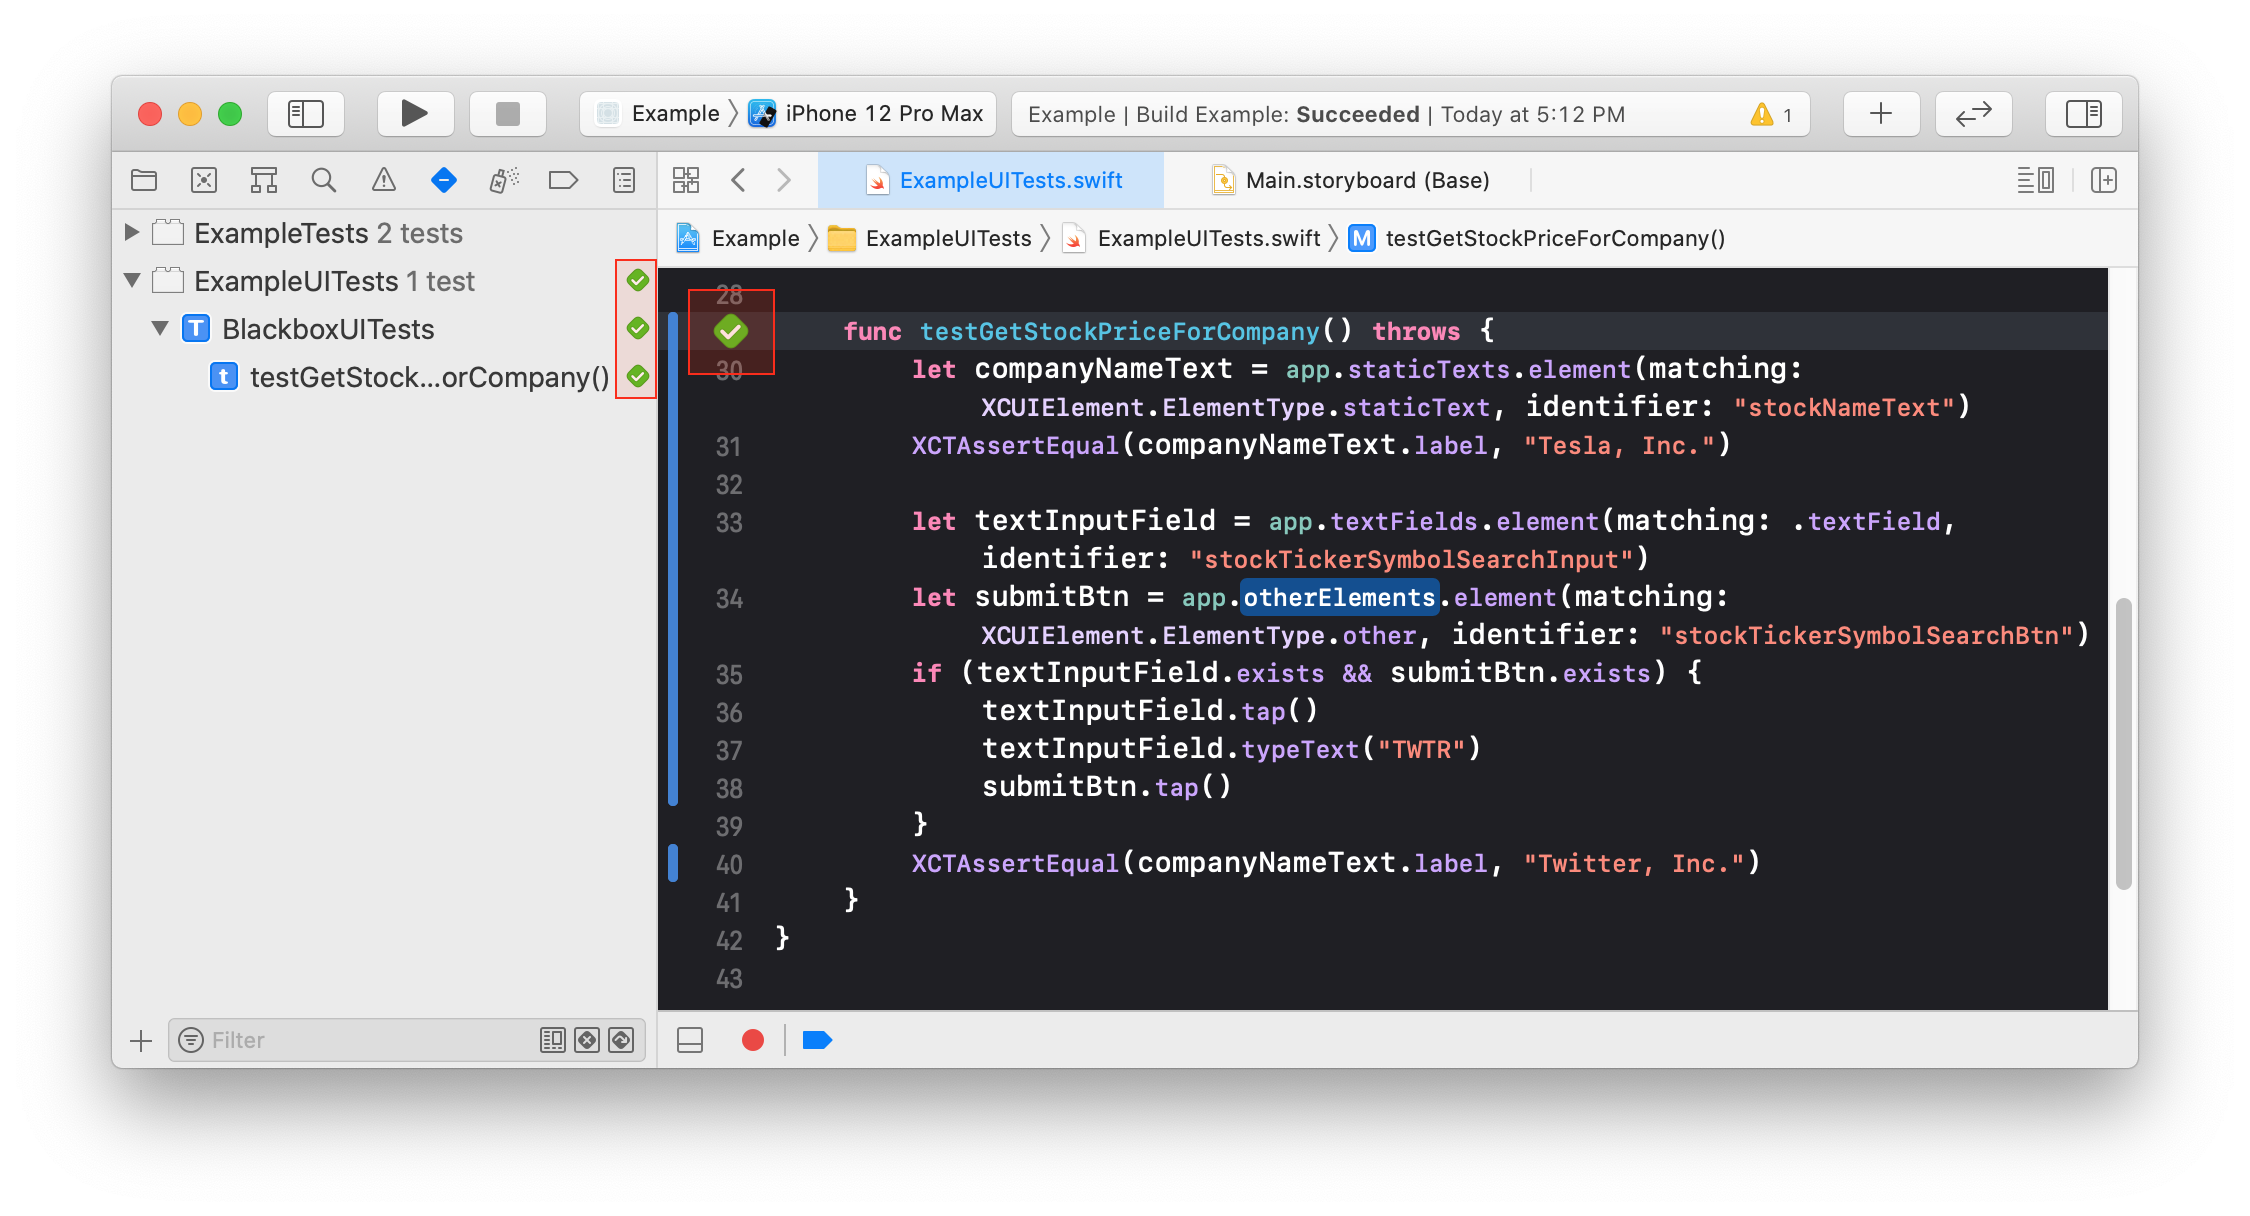
Let's look at the most useful properties for assertions.
Let's return to the "Fundamentals of XCUITest" article to see the APIs for assertions and element properties.
Please read these two sections: "Element Properties": Focus on exists, isHittable, label, value, and isEnabled. These are the properties you will check most often. "Assertions": This section formally introduces the XCTAssert functions and provides a clear example of using XCTAssertEqual to verify an element's label.
3. Practical Queries and Assertions in Action
Theory is great, but seeing these techniques in a real test is where it all clicks. The following video demonstrates how to write a suite of professional UI tests, focusing heavily on robust queries and specific assertions.
We'll break it down to focus on specific skills.
Asserting Element Counts
A common requirement is to verify the number of items in a list, especially after adding or deleting one. This involves using the .count property of a query.
How to Run Automated UI Tests in iOS with XCUITest - SwiftUI - Xcode 16
In this segment, the presenter writes a test to verify the initial state of a list. Notice how a predicate is used to create a flexible query for all list items, and then .count is asserted.
Watch from 07:04 to 10:58 and again from 19:35 to 26:12. The key takeaways are: Using a predicate to find all elements whose identifiers begin with a certain prefix. Asserting that the count of the resulting query is greater than zero. Scoping the search within a container view (collection) to make the test more robust.
Asserting State Changes After an Action
The most powerful tests verify that an action causes the expected state change. For example, tapping "Delete" should reduce the item count by one.
How to Run Automated UI Tests in iOS with XCUITest - SwiftUI - Xcode 16
This next clip builds on the last one. It shows how to capture the state before an action, perform the action, and then assert that the state has changed correctly.
Watch from 26:12 to 31:12. Pay close attention to this pattern, as it's fundamental to good testing: Arrange: Get the initialCount of items. Act: Tap the delete button. Assert: Get the finalCount and assert that finalCount == initialCount - 1.
Asserting Element Properties like isEnabled
Sometimes the UI change isn't about existence or count, but about an element's properties. A great example is a button that should become disabled when there are no items to act upon.
How to Run Automated UI Tests in iOS with XCUITest - SwiftUI - Xcode 16
Here, the presenter tests that the 'Remove' button becomes disabled after all items have been removed. This is a perfect example of verifying application logic through UI state.
Watch from 31:12 to 34:31. The key assertion here is XCTAssertFalse(deleteButton.isEnabled). This is a much more specific and meaningful check than just seeing if the button exists.
Asserting Appearance and Disappearance
In the last lesson, we used waitForExistence to handle delays. This function returns a boolean, making it a perfect tool for assertions involving asynchronous appearance or disappearance of UI, like a modal sheet.
How to Run Automated UI Tests in iOS with XCUITest - SwiftUI - Xcode 16
Finally, let's see how to properly assert that a sheet appears when a button is tapped, and disappears after an action is taken within it. This combines waiting with assertion.
Watch from 39:13 to 43:19. Notice the use of XCTAssertTrue(sheet.waitForExistence(timeout: 1)) to verify the sheet appears and a similar pattern to verify it disappears. This is the professional way to test transient UI.
Conclusion
Today you've made the leap from simply driving the UI to validating its behavior with precision. By combining specific queries with targeted assertions, you can write tests that provide a strong safety net against regressions.
Key Takeaways:
- Queries are powerful: Go beyond simple identifiers. Use predicates for flexibility and scope your queries within containers for stability.
- Assertions are specific: Don't just check for existence. Use
XCTAssertEqualto check an element's.label,XCTAssertFalseto check its.isEnabledstate, and assert the.countof a query. - Test the logic: Your UI tests should verify the business logic of your app as it's reflected in the UI (e.g., a button is disabled, a count decreases).
- The Arrange-Act-Assert pattern is key: Capture the initial state, perform an action, and then assert that the final state is what you expect.
Preview of the Next Lesson:
While property-based assertions are excellent for checking data and state, they can't easily catch visual regressions—like a button that's moved 10 pixels to the left, a wrong color, or an incorrect font. In our next lesson, we will explore a complementary technique: implementing snapshot testing to prevent unintended UI regressions. This will add another powerful tool to your testing arsenal.