Hello! In the last lesson, you used if and switch to choose what a program does. Now you’ll use loops to repeat an operation—whether you know the number of repetitions, have a list of values, or need to keep checking a condition.
Keep using app.js and node app.js. Allow about 40 minutes to watch the short video segments, build the program, and change a few values to observe what happens. These are JavaScript loops, and the same behavior carries into TypeScript.
Repeat a known number of times with for
Watch the opening of JavaScript Loops Made Easy from codeSTACKr. Focus on the three parts inside the for parentheses and on why the final counter value is not printed.
JavaScript Loops Made Easy by codeSTACKr introduces the standard for loop with a counter you can trace.
Watch the counted loop, from the introduction through the ascending and descending examples. Notice when the counter changes and when the condition is checked again.
Replace app.js with this code, save it, and run node app.js:
const plannedTasks = 5;

for (let taskNumber = 1; taskNumber <= plannedTasks; taskNumber++) {
  console.log("Task slot:", taskNumber);
}

console.log("Finished listing task slots.");
It prints task slots 1 through 5, followed by the finished message. A single execution of the loop body is called an iteration. Here is what controls each iteration:
let taskNumber = 1sets the starting value once. We useletbecause the value changes.taskNumber <= plannedTasksis checked before every iteration. A false result skips the body and exits the loop.taskNumber++adds one after each completed iteration.
After printing slot 5, the counter becomes 6. The condition 6 <= 5 is false, so slot 6 is never printed. Change plannedTasks to 3 and rerun. Then try 0: the condition is false on its first check, so the body runs zero times, but the finished message still prints.
This is a good fit for for: the counter’s start, stopping rule, and update are visible together. Check all three when a loop runs one time too many or too few.
Visit each value with for...of
Sometimes the job is not “repeat five times” but “do something with every status in a list.” The next part of the video compares a numbered for loop with for...of.
Continue JavaScript Loops Made Easy to see the distinction between accessing a list by index and taking each value directly.
Start at array indexes, where the counter is used to select values. Then watch for...of, which gives the loop body each value without an index. Keep the braces in your own code for readability.
Append this to app.js:
const taskStatuses = ["todo", "done", "in_progress", "done", "todo"];
let completedTasks = 0;

for (const status of taskStatuses) {
  console.log("Status:", status);

  if (status === "done") {
    completedTasks++;
  }
}

console.log("Completed tasks:", completedTasks);
The square brackets create a short list of values—an array. You’ll work with arrays in more detail later; for now, you only need to know that for...of takes its values one at a time. On each iteration, status refers to the current string. It can be const because that binding is not reassigned within the iteration. By contrast, completedTasks is let because you update the total. The final line prints Completed tasks: 2.
Unlike the previous for loop, this one does not need a counter or a stopping comparison: it finishes after the last value. It also runs zero times if the array is empty.
There are occasions when you need a numbered for loop to access an item’s position. Read a short comparison in MDN’s Looping code:
Looping code - Learn web development | MDN
MDN compares the two approaches and identifies common indexing mistakes.
Under “The standard for loop,” find the subsection “Looping through collections with a for loop.” After its indexed cats example, read the indexing comparison, starting with the explanation of a zero-based index and ending with the two potential mistakes. Focus on why for...of is simpler when you need values rather than positions.
For this task-status program, you need each value, not its position, so for...of is the clearer choice.
Keep going while a condition holds
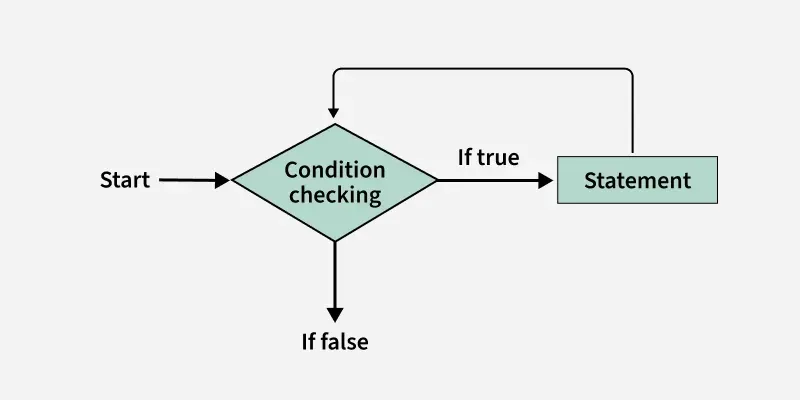
A while loop checks its condition before each iteration, like for, but leaves the update inside the body. Watch the video’s while demonstration, paying particular attention to what would happen without the update.
Return to JavaScript Loops Made Easy for a while loop and its stopping condition.
Watch the while loop. Focus on the counter update at 00:07:10–00:07:33 and the warning about skipping that update when using continue near the end.
Suppose a program may retry an operation, but should stop once it succeeds or after three attempts. Append this simulation to app.js; it does not make a real connection:
let attempts = 0;
let connected = false;

while (!connected && attempts < 3) {
  attempts++;
  console.log("Connection attempt:", attempts);

  if (attempts === 2) {
    connected = true; // Simulate success on the second attempt.
  }
}

if (connected) {
  console.log("Connected after", attempts, "attempts.");
} else {
  console.log("Could not connect after", attempts, "attempts.");
}
The loop prints attempts 1 and 2, then reports success. Before a third iteration, it checks !connected && attempts < 3 again. connected is now true, so the loop stops. This is why while suits a condition-driven task: success might happen on different attempts.
The condition is checked before the body, so a while loop can run zero times. Set connected initially to true and observe that no attempt is printed. Set the simulated success check to attempts === 5 instead; the three-attempt limit then stops the loop and prints the failure message.
Every loop needs a way to finish. In this example, attempts++ advances toward the limit, while a successful attempt changes connected. If neither value could change, the condition might remain true indefinitely. When experimenting with a loop that won’t stop in your terminal, press Ctrl+C to interrupt Node.js.
Stop early or skip one iteration
You met break in switch: it exits the switch. Inside a loop, break exits the loop instead. continue is different—it skips the rest of the current iteration and proceeds to the next one.
Append one final pass over the existing taskStatuses array:
for (const status of taskStatuses) {
  if (status === "done") {
    continue;
  }

  console.log("Active status:", status);

  if (status === "in_progress") {
    break;
  }
}

console.log("Stopped reviewing active statuses.");
The first "todo" is printed. The first "done" is skipped, so it is not printed. "in_progress" is printed and then break ends the loop; the later statuses are never visited. The message after the loop still runs.
Use these statements deliberately. In a while loop, a continue placed before the update that makes its condition eventually false can cause an infinite loop. The retry example updates attempts near the top of the body, so its stopping limit remains effective.
What to carry forward
Use for when a counter makes the repetitions clear, for...of when you need each value in a list, and while when repetition depends on a changing condition. Each checks whether to run before its body, so each may run zero times. break stops a loop early; continue skips to its next iteration.
You can now make a program choose an action and repeat it. Next, you’ll package behavior into functions so you can call it with different inputs rather than rewriting the same code.