Welcome to the first lesson of your journey into building advanced market intelligence systems. Given your extensive background in data science and business analytics, you've likely worked with sophisticated tools and platforms. This course aims to empower you to build those tools yourself, starting from the ground up with Python.
Our first step is to establish a robust and professional development environment. This may seem like a basic preliminary, but a correctly configured environment is the bedrock of all future work. It ensures that your projects are stable, reproducible, and scalable—principles that are just as critical in software development as they are in market research and business strategy.
In this lesson, you will learn to set up a complete Python development environment and manage software packages using pip, the standard Python package installer. Mastering this workflow is the essential first step before we can begin writing any code.
The Anatomy of a Development Environment
Before we begin, it's important to distinguish between two key components:
- The Python Interpreter: This is the program that reads and executes your Python code. You can think of it as the engine.
- The Integrated Development Environment (IDE): This is the software you'll use to write, organize, and debug your code. It's your workshop, complete with text editors, file browsers, and debugging tools. We will be using Visual Studio Code (VS Code), a powerful and popular choice.
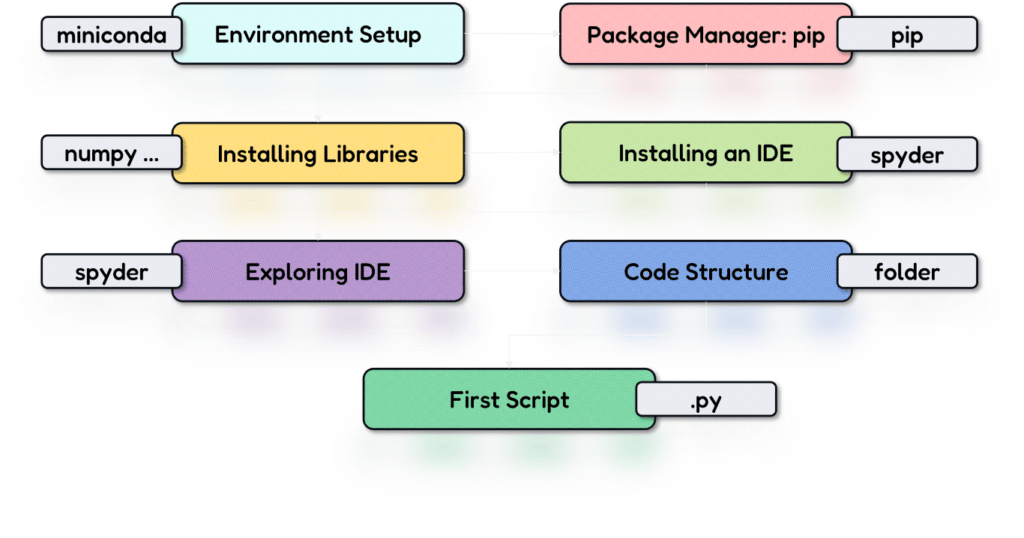
The process we'll follow involves installing the interpreter, setting up the IDE, and then learning to manage the specific libraries—or "packages"—each project needs.
1. Installing Python and VS Code
Our first task is to install the Python interpreter and the VS Code IDE. The official VS Code documentation provides excellent video tutorials that walk through this process.
Getting Started with Python in VS Code (Official Video)
This video from the official Visual Studio Code channel will guide you through installing Python and then integrating it with VS Code via the necessary extension.
Watch the first part on installing the Python interpreter from this timestamp. It covers installation on both macOS and Windows. If you are on Windows, pay close attention to the instruction to "add python to path". Next, watch the section explaining why the Python extension is needed in VS Code, from this segment. This clarifies the relationship between the interpreter you just installed and the tools provided by the IDE.
With Python and the VS Code extension installed, your core "workshop" is now ready.
2. Managing Project Dependencies: pip and Packages
Python's power is vastly extended by its ecosystem of third-party packages—collections of pre-written code that you can use in your own projects. Your work in data science has undoubtedly relied on packages like pandas for data manipulation or scikit-learn for modeling.
The standard tool for installing and managing these packages is called pip (a recursive acronym for "Pip Installs Packages"). pip is included with your Python installation.
Let's explore the basic commands for pip. The following video provides a clear, hands-on demonstration. While it shows packages being installed "globally" (available to all projects on your system), this will serve as a crucial foundation for understanding why we'll take a different, more professional approach next.
Python Virtual Environment and pip for Beginners
This video by Dave Gray provides a friendly introduction to using pip from the command line.
Please watch the section covering the basic pip commands from the beginning to this point. Focus on understanding the syntax for: pip install <package_name>: To install a new package. pip list: To see all installed packages. pip install <package_name>==<version>: To install a specific version. pip install --upgrade <package_name>: To update a package. pip uninstall <package_name>: To remove a package.
3. The Professional Standard: Virtual Environments
Installing packages globally, as shown in the last video, can lead to significant problems in the long run. Imagine one project requires an older version of a financial modeling library, while a new project needs the very latest version. Installing one will break the other. This is known as a dependency conflict.
The solution is to create an isolated virtual environment for each project. A virtual environment is a self-contained directory that holds a specific version of the Python interpreter and its own set of installed packages. It's like having a separate, clean toolbox for every project you work on.
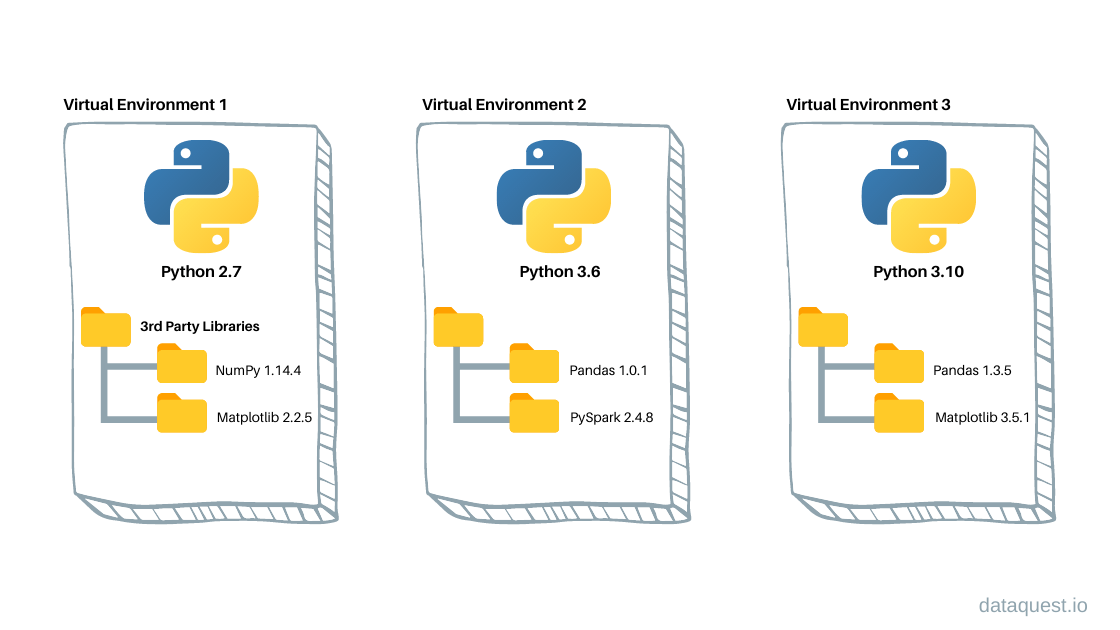
This practice is the industry standard for all serious Python development. We will use venv, a tool built directly into Python's standard library, to create these environments.
The next video segment first explains the "why" and then the "how" of virtual environments.
Python Virtual Environment and pip for Beginners
Continuing with Dave Gray's tutorial, we'll now see the rationale for and the method of using virtual environments.
First, watch the conceptual explanation of why virtual environments are necessary from this timestamp. Then, watch the demonstration on how to create and activate a virtual environment using the command line from this section. You'll learn the commands to create, activate, and deactivate an environment.
4. An Integrated Workflow in VS Code
While it's essential to understand the command-line tools, VS Code provides an integrated and more streamlined way to manage virtual environments. Once a virtual environment is activated, VS Code's terminal will automatically use that environment's interpreter and packages.
This final video shows you how to create an environment and install packages directly within the VS Code interface. This will be your primary workflow for the projects in this course.
Getting Started with Python in VS Code (Official Video)
This clip from the official VS Code channel demonstrates the integrated workflow for creating an environment and installing packages.
Watch the section from this timestamp. It shows you how to use the Command Palette in VS Code to create a new virtual environment and then use the integrated terminal to install a package with pip. Notice how the terminal prompt changes once the environment is active.
5. Ensuring Reproducibility with requirements.txt
Your experience in research and analytics has taught you the importance of reproducibility. If a colleague—or you, six months from now—wants to run your project, they need an easy way to install the exact same set of dependencies.
The standard way to do this in Python is with a requirements.txt file. This is a simple text file that lists all the packages and their specific versions required for a project.
You can generate this file automatically using a pip command.
Install packages in a virtual environment using pip and venv
The official Python Packaging User Guide explains this process clearly.
Please read the sections on using a requirements file and freezing dependencies. Pay close attention to the two key commands: pip freeze > requirements.txt: This command "freezes" the current state of your environment's packages and saves it to the file. pip install -r requirements.txt: This command reads the file and installs all the listed packages.
This requirements.txt file should be saved with your project's source code. Anyone with this file can then perfectly replicate your environment with a single command. As a best practice, the virtual environment folder itself (often named .venv) should not be saved to version control, only the requirements.txt file that describes it.
Your Project Setup Workflow
To summarize, here is the professional workflow you will use to start any new project:
- Create a Project Folder: Make a new directory for your project.
- Open in VS Code: Open this folder in VS Code.
- Create Virtual Environment: Use the VS Code Command Palette (
Ctrl+Shift+PorCmd+Shift+P) to runPython: Create Environment, chooseVenv, and select your Python interpreter. This will create a.venvfolder in your project directory. - Activate Environment: VS Code will typically activate the environment automatically. You can confirm this by opening a new terminal (
Ctrl+` orCmd+`) and seeing(.venv)at the beginning of the prompt. - Install Packages: Use
pip install <package_name>in the terminal to add any libraries you need. - Freeze Dependencies: Periodically run
pip freeze > requirements.txtto keep your requirements file up-to-date as you add or update packages.
Conclusion
In this lesson, we have laid the crucial groundwork for all the advanced topics to come. You have set up a complete, professional Python development environment and learned the standard practices for managing project dependencies.
Here are the key takeaways:
- A development environment consists of a Python interpreter and an IDE like VS Code.
- Virtual environments are essential for isolating project dependencies and preventing conflicts.
pipis the command-line tool used to install, update, and remove Python packages within an activated environment.- A
requirements.txtfile ensures that your project is reproducible by declaratively listing all its dependencies.
Now that your workshop is fully equipped, we are ready to start building. In the next lesson, you will write your first lines of Python code, learning about variables, data types, and the basic operators that form the building blocks of any program.