Hello! Welcome to the first lesson in your Irrigation System Design course.
Before any lines are drawn on a plan or a single sprinkler is chosen, every successful irrigation design begins with one fundamental step: understanding the water source. This lesson focuses entirely on that starting point. We will cover how to accurately assess the water supply available to you by measuring its static pressure and its flow rate.
By the end of this 60-minute lesson, you will be able to confidently measure these two critical parameters. This knowledge forms the absolute foundation for every calculation and design decision we will make in the upcoming modules. Getting this right prevents designing a system that the water source simply cannot support.
Let's begin.
1. The Two Pillars of Water Supply: Pressure and Flow
In irrigation design, pressure and flow are the two most important characteristics of your water source. It's crucial to understand what they are and how they relate to each other.
-
Pressure (bar): Think of pressure as the "force" pushing the water through the pipes. We measure it in bars. There are two types of pressure to consider:
- Static Pressure: This is the pressure in the system when all taps and valves are closed and no water is moving. It represents the maximum potential pressure your system can have.
- Dynamic (or Working) Pressure: This is the pressure in the system while water is flowing. It is always lower than static pressure because of friction created by water moving through pipes, fittings, and valves. Sprinkler heads have a minimum working pressure required to function correctly.
-
Flow Rate (L/min or m³/h): This is the volume of water that the source can deliver over a period of time. It's the "quantity" of water available. We typically measure it in Liters per Minute (L/min) or cubic meters per hour (m³/h). The total flow rate of your water source determines the maximum number of sprinklers you can run at the same time.
The relationship is simple but critical: as you demand more flow, the dynamic pressure drops. Your task as a designer is to find the maximum flow rate your system can use while still maintaining enough working pressure for your chosen sprinklers or drip emitters to operate effectively. This is often called the System Design Capacity.
2. How to Measure Static Pressure
Measuring static pressure is straightforward. You will need a pressure gauge that can be attached to a standard outdoor tap (hose bib).
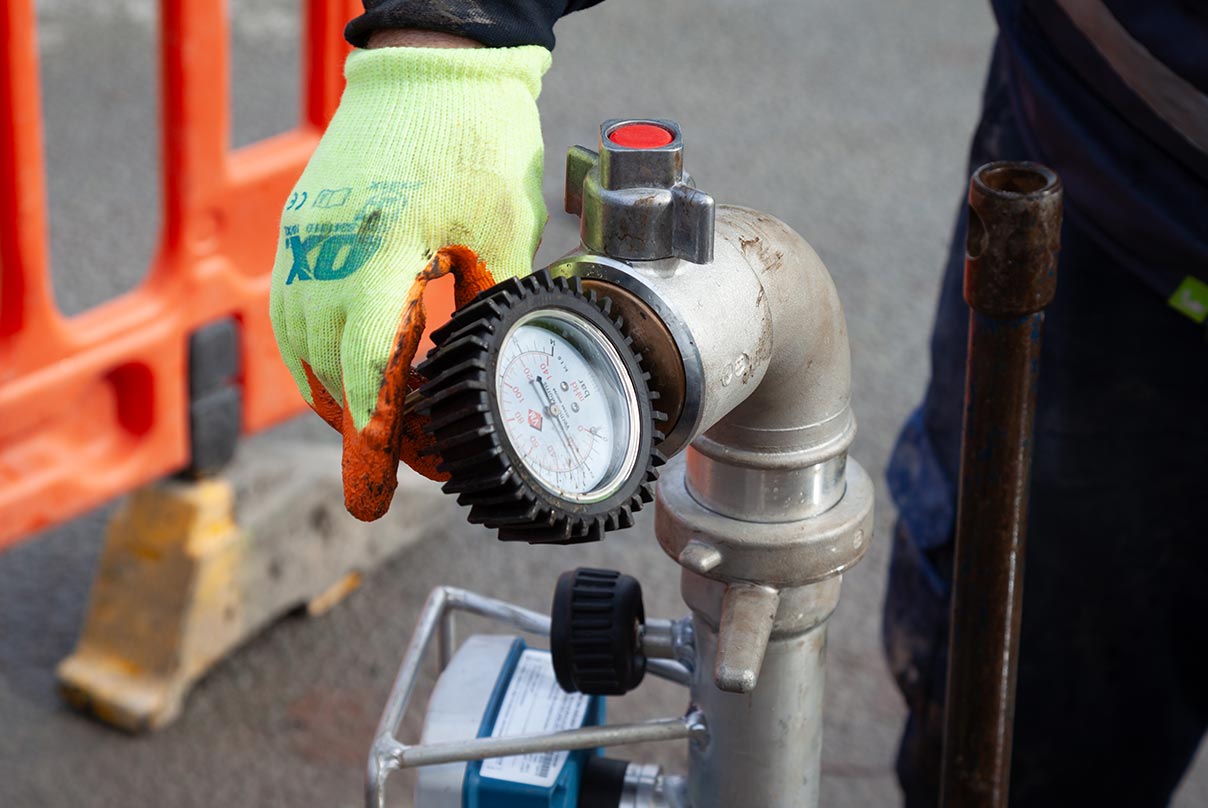
Here is the process:
- Ensure no water is running. Make sure all taps, appliances (like washing machines or dishwashers), and any other water outlets on the property are turned off.
- Attach the gauge. Screw the pressure gauge onto an outdoor tap. It's best to use the tap closest to the property's water meter or where the main water line enters the property, as this will give you the most accurate reading before any pressure is lost to the internal plumbing.
- Open the tap. Turn the tap on fully.
- Record the reading. The value shown on the gauge is your static pressure in bars.
This single number is your starting point for all hydraulic calculations.
3. How to Measure Available Flow Rate
There are two common methods for determining the available flow rate.
Method 1: The Bucket and Stopwatch Test
This is a direct, practical method that gives you a real-world measurement of the flow from a specific tap. It's simple and requires minimal equipment.

For a visual guide on this process, the following video is helpful. Note that it uses US units (Gallons/PSI), but the physical process shown is identical. We will use metric units for our calculations.
How to Measure Water Pressure & Flow Rate for Perfect Irrigation
Watch this short video from Nature's Always Right for a practical demonstration of measuring pressure and flow. Focus on the physical steps of using the gauge and filling the container.
Watch from 0:17 to 2:06. Pay attention to how the pressure gauge is used and how the time to fill a bucket is measured. We will adapt the calculation to metric units next.
Here is the process using metric units:
- Get a container of a known volume. A large bucket with volume markings (e.g., 10, 15, or 20 Liters) is ideal.
- Prepare your stopwatch. A smartphone timer works perfectly.
- Measure the time. Turn the tap on fully and start the timer simultaneously. Stop the timer the moment the water reaches your known volume mark.
- Calculate the flow rate. Use the following formulas:
To get Liters per Minute (L/min):
To get cubic meters per hour (m³/h), which is very common in professional practice:
Note: 1 m³ = 1000 Liters, and 1 hour = 3600 seconds. The conversion factor is 3600/1000 = 3.6.
Example:
It takes 20 seconds to fill a 15-Liter bucket.
- Flow in L/min = (15 L / 20 s) × 60 = 0.75 × 60 = 45 L/min
- Flow in m³/h = (15 L / 20 s) × 3.6 = 0.75 × 3.6 = 2.7 m³/h
Test your understanding!
You perform a bucket test at a client's villa. It takes 30 seconds to fill your 20-Liter container. What is the available flow rate in L/min and m³/h?
Show answer
- Calculation in L/min:
- Calculation in m³/h:
The available flow rate is 40 L/min, or 2.4 m³/h.
Method 2: Using Professional Sizing Charts
Major irrigation manufacturers provide charts that allow you to determine a recommended design capacity based on your static pressure and the size of the incoming water line and meter. This is a very common method in the industry.
This guide from Hunter Industries, a major manufacturer, provides a clear, step-by-step process.
Determine System Design Capacity
Please read the following sections from Hunter's guide on 'Determine System Design Capacity'. This explains the professional method of using infrastructure size and pressure readings to find your available flow rate using a pre-calculated chart.
Read the sections titled '1. Water pressure (bar; kPa)', '2. Water volume (l/min)', and '3. System Design Capacity'. Pay close attention to the chart at the end. We will practice using it next.
As you've read, this method requires three pieces of information:
- Static Pressure (which you already know how to measure).
- Water Meter Size (stamped on the meter body, typically 15mm, 20mm, or 25mm for residential sites).
- Service Line Size (the diameter of the pipe from the street to the building).
Once you have this data, you can use the "Sprinkler System Design Capacity" chart to find two key values:
- Max l/min: This is the maximum flow rate you should design for. Exceeding this can cause poor performance.
- Working Pressure: The chart also gives you an estimated working pressure at that flow rate. This helps you select the right sprinkler models later.
Test your understanding!
Using the Sprinkler System Design Capacity chart from the Hunter resource, determine the "MAX l/min" and the approximate "Working pressure" for the following scenario:
- Static Pressure: 4.0 bar
- Water Meter: 20 mm
- Service Line: 25 mm (PVC)
Show answer
- Find the 4.0 bar column for static pressure.
- Go down to the 20 mm water meter section.
- Find the row for the 25 mm service line.
- The intersection shows a "MAX l/min" of 53.
- The approximate working pressure is the value in that column, just below the static pressure, which is 3.2 bar (derived from the chart structure, where working pressure is a percentage of static pressure).
Therefore, the recommended System Design Capacity is 53 L/min at an approximate working pressure of 3.2 bar.
Key Takeaways
This first step is non-negotiable for a professional design. You now have the skills to assess any municipal water source for an irrigation project.
- The design of any irrigation system is limited by the available pressure (bar) and flow rate (m³/h or L/min).
- Static pressure is the maximum pressure available when no water is flowing. Working pressure is the pressure during operation and is always lower.
- You can determine the available flow rate using two primary methods:
- Direct Measurement: The bucket and stopwatch test provides a real-world flow measurement.
- Capacity Charts: Using static pressure and pipe/meter sizes with manufacturer charts gives a reliable design capacity.
Next Steps
Now that you know how to determine how much water is available, our next lesson will focus on determining how much water your landscape needs. We will introduce the concept of hydrozoning—a core principle in landscape architecture and efficient irrigation—where we group plants with similar water needs together. This will set the stage for calculating the specific water requirements for each part of your design.