Hello! Welcome back.
In our last lesson, we introduced the overall structure of a system design interview and the high expectations for senior candidates. We outlined a basic 4-step approach as a roadmap. Today, we're going to build on that foundation and formalize it into a detailed, systematic framework you can apply to any system design problem.
The goal for this lesson is to describe a systematic framework for solving system design problems, breaking it down into its core phases: clarifying requirements, performing estimations, creating a high-level design, executing a deep dive, and articulating trade-offs. For an experienced engineer like you, mastering a repeatable framework is not about memorizing steps; it's about having a reliable mental model to structure your deep technical knowledge under pressure.
Why a Framework is Crucial
System design questions are intentionally broad and ambiguous. Without a structured approach, it's easy to get lost, focus on the wrong details, or run out of time. A framework ensures you:
- Collaborate with the interviewer to define a clear scope.
- Address all critical aspects of the design.
- Demonstrate a logical and organized problem-solving process.
- Manage your time effectively.
Different experts give their frameworks different names, but they all share the same fundamental steps. We'll explore a consolidated version and then see how it maps to other popular models.
A 4-Phase Systematic Framework
Think of the interview as progressing through four distinct phases. Let's start with a video that outlines this flow. It's a great high-level overview before we break down each step.
System Design Interview: A Step-By-Step Guide
The ByteByteGo channel provides a clear, 4-step structure that we will use as our core framework. Pay attention to how each step logically builds on the previous one.
Please watch the introduction from 00:07 to 01:07 to get an overview of the four steps.
Now, let's dissect each of those phases.
Phase 1: Understand the Problem and Establish Scope (5-10 mins)
This is arguably the most critical phase. A mistake here can lead you to design the wrong system entirely. Your goal is to move from ambiguity to clarity.
1. Clarify Requirements:
You need to pin down both what the system does (functional) and how it should do it (non-functional).
- Functional Requirements: These are the features. For a system like Instagram, this would be "User can upload a photo," "User can see a feed of photos," etc.
- Non-Functional Requirements: These are the system's qualities. This is where scalability, availability, and latency come into play. Examples: "The system should support 10 million daily active users," "Photo uploads must be durable (never lost)," "The feed should load in under 200ms."
2. Perform Back-of-the-Envelope Estimations:
Once you have an idea of scale (e.g., users, requests per second), you can do some rough calculations. This isn't about getting a precise number; it's about understanding the order of magnitude. These estimates for storage, bandwidth, and compute will inform your design choices and help you identify potential bottlenecks early. (We will have a dedicated lesson on this topic later).
This video segment provides excellent detail on how to navigate this first phase.
System Design Interview: A Step-By-Step Guide
Let's dive deeper into the first step. This part of the ByteByteGo video explains how to ask clarifying questions for both functional and non-functional requirements and introduces the idea of estimation.
Watch the detailed explanation of Step 1, from 01:32 to 04:05.
Phase 2: Propose High-Level Design and Get Buy-in (10-15 mins)
With the requirements clear, you can now sketch the initial architecture. The goal here is a "mile-high" view, not a detailed component-level diagram. You want to create a simple blueprint that satisfies the core functional requirements.
This phase typically includes:
- High-Level Diagram: Draw the main components (e.g., Client, Load Balancer, API Gateway, Web Servers, Database) and show how they connect.
- API Design: Define the primary API endpoints. For a URL shortener, this might be
POST /api/v1/shortenandGET /{short_url}. This establishes a clear contract between the client and your backend. - Data Model: Think about the core data entities you'll need to persist. For a chat application, this would be
User,Channel, andMessage. This will guide your database choice later.
Watch this next clip to see how these pieces come together.
System Design Interview: A Step-By-Step Guide
This video segment covers the second step: creating the high-level design. It walks through defining APIs, drawing the initial diagram, and thinking about the data model.
Please watch from 04:05 to 07:22.
Phase 3: Design Deep Dive (15-20 mins)
This is where you demonstrate your seniority. You've built a high-level system; now you need to make it scalable, resilient, and performant by addressing the non-functional requirements.
Your process for the deep dive should be:
- Identify Bottlenecks: Look at your high-level design and ask, "What breaks first when we scale up?" Is it the single database? A stateful service?
- Propose Solutions: For each bottleneck, propose one or more solutions. For a database under heavy read load, you might suggest adding a caching layer or read replicas.
- Articulate Trade-offs: This is key. No solution is perfect. When you propose caching, you must also discuss the trade-offs, such as potential for stale data and the need for a cache invalidation strategy. Compare your proposed solutions on dimensions like consistency vs. availability, cost, complexity, and performance.
- Choose and Justify: Based on your trade-off analysis, choose a solution and justify why it's the best fit for the specific requirements of this problem.
This next clip illustrates how to approach the deep dive phase effectively.
System Design Interview: A Step-By-Step Guide
The deep dive is where you'll spend a significant portion of the interview. This clip explains how to structure your deep dive discussions by identifying problems and weighing the trade-offs of different solutions.
Watch from 07:22 to 09:20 to understand the deep dive process.
Phase 4: Wrap Up (3-5 mins)
In the final minutes, you want to consolidate your discussion and show you can see the bigger picture.
- Summarize: Briefly recap your design, highlighting the most important components and the key decisions you made (e.g., "We chose a fan-out-on-write approach for the news feed to optimize for read latency, accepting the trade-off of higher write-time computation.").
- Discuss Further Improvements: Mention potential future steps. This could include adding monitoring and alerting, refining a specific component, or discussing how the system would handle a 100x scale increase.
- Address Error Handling & Operations: Briefly touch on how the system handles failures (e.g., retries, circuit breakers) and operational aspects (e.g., logging, metrics).
Frameworks in Practice: RESHADED
To reinforce these concepts, let's look at another popular framework called RESHADED. You'll see it covers the exact same core ideas, just with more granular steps. Seeing the same logic in a different package helps solidify the underlying principles rather than just one mnemonic.
Ultimate System Design Interview Guide for 2025
The 'Ultimate System Design Interview Guide' presents the RESHADED framework. As you read through its steps, map them back to the 4-phase model we just discussed. This will help you see the common patterns across different approaches.
Read the section titled 'III. Applying the RESHADED Framework' and its subsection 'Advantages of RESHADED'. Notice how 'Requirements' and 'Estimation' map to our Phase 1, 'Storage schema', 'High-level design', and 'API design' map to our Phase 2, and 'Detailed design' and 'Evaluation' map to our Phase 3.
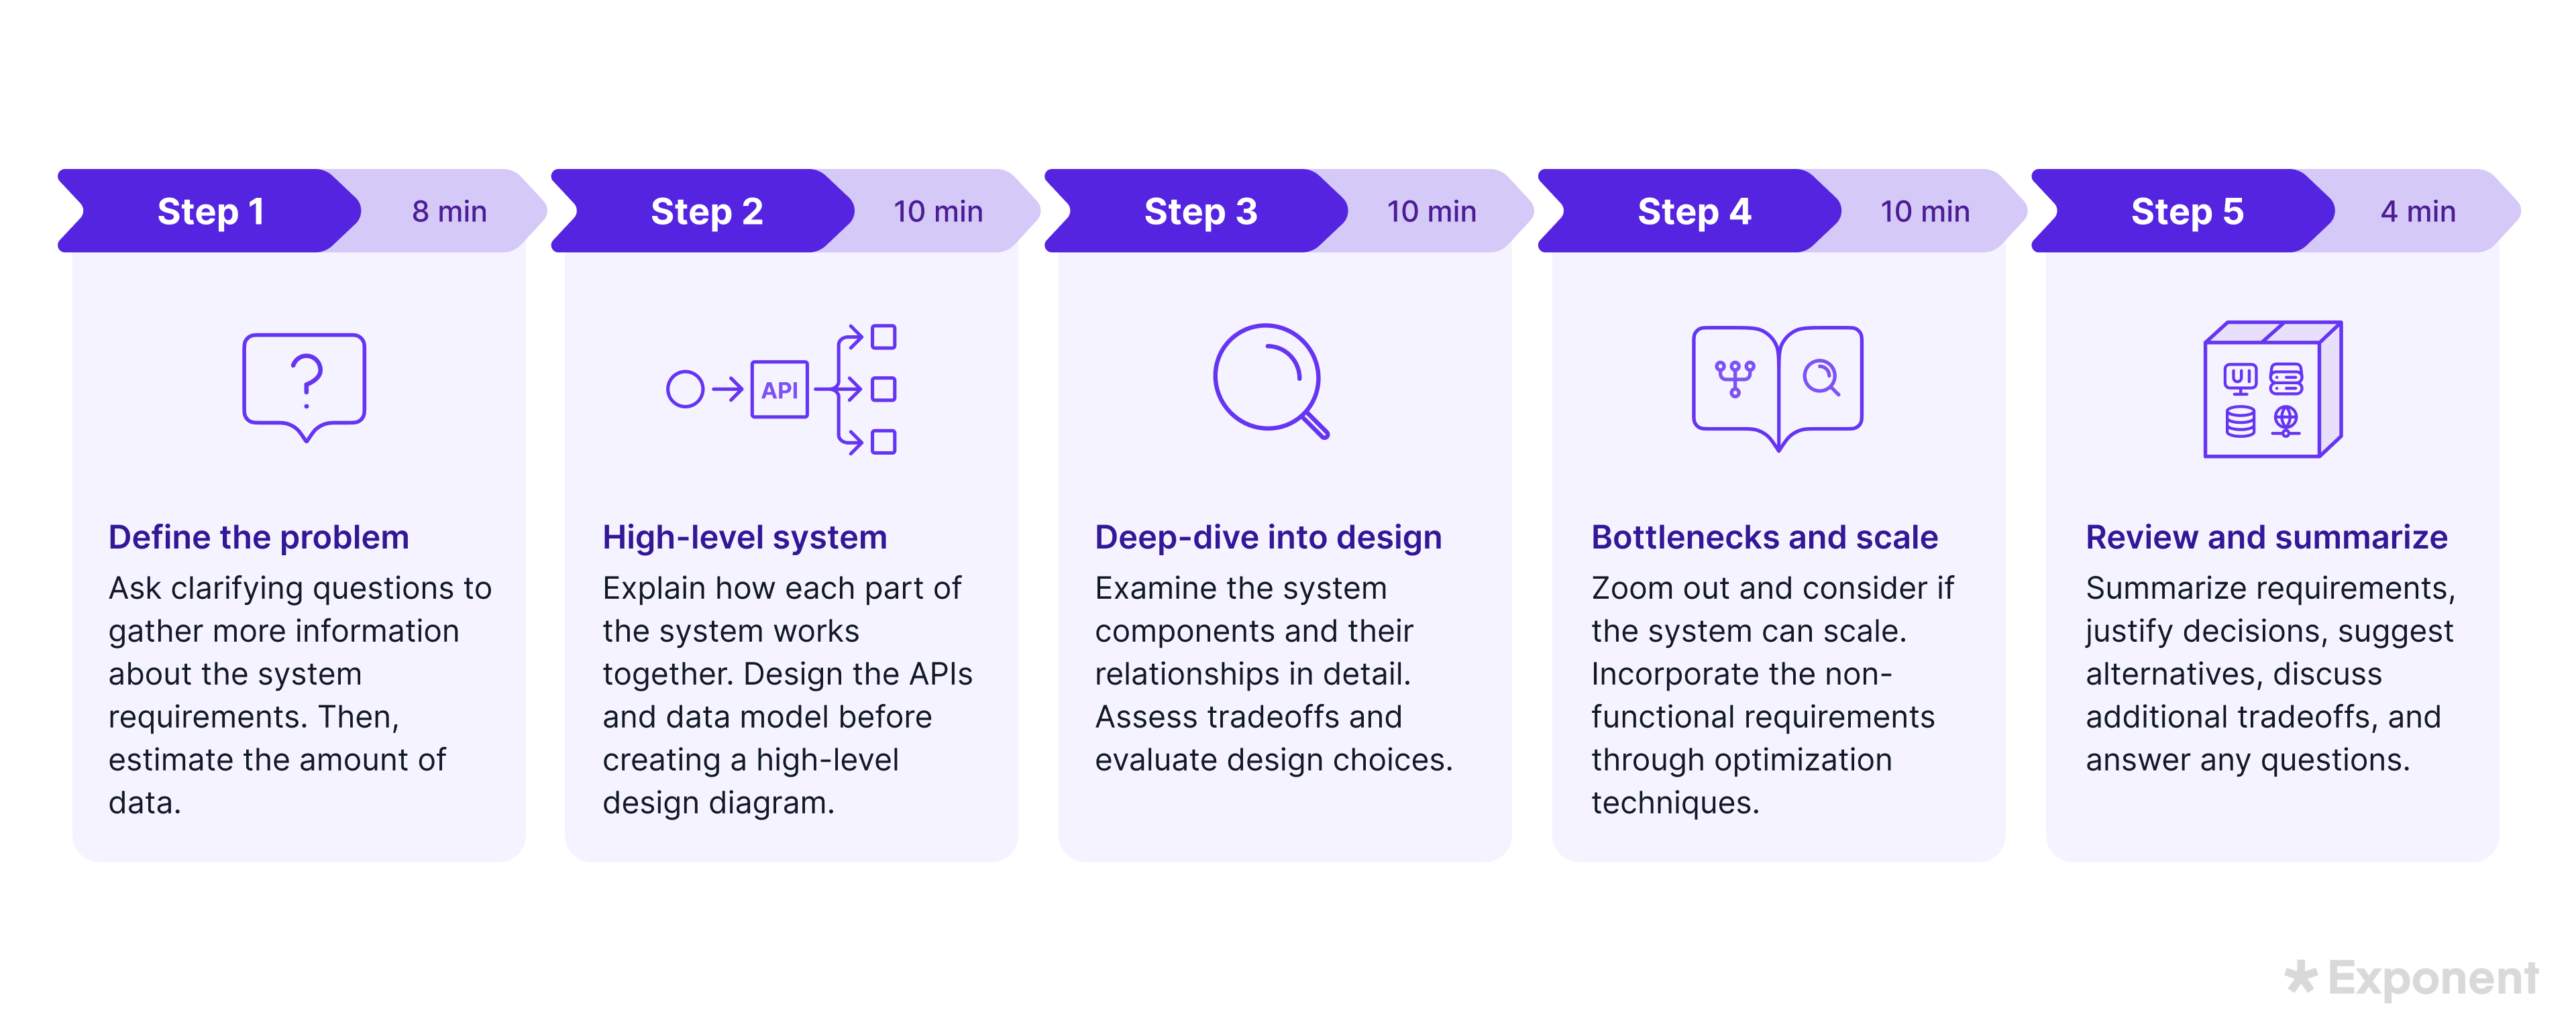
Here's a visual summary that provides yet another take on a structured framework, which can serve as a quick mental checklist during an interview.
Conclusion
Today we've transformed the basic outline from our last lesson into a robust, actionable framework for any system design interview. The key is not to rigidly follow a script, but to internalize this logical flow to guide your conversation and ensure you hit all the marks of a senior-level candidate.
Key Takeaways:
- A systematic framework consists of four main phases: Scoping (Requirements & Estimation), High-Level Design (Blueprint, APIs, Data Model), Deep Dive (Bottlenecks & Trade-offs), and Wrap-up.
- The initial scoping phase is critical for defining what you will build and the constraints you must meet.
- The high-level design provides a simple, working blueprint that satisfies functional requirements.
- The deep dive is where you address non-functional requirements and demonstrate seniority by identifying bottlenecks and articulating complex trade-offs.
- Different named frameworks (ByteByteGo's 4-step, RESHADED, etc.) all follow these same fundamental principles.
In our next lesson, we'll zoom in on the very first part of this framework: "Clarify functional and non-functional requirements by asking effective questions." We'll explore the types of questions you should ask to set the stage for a successful interview.