Hello! Welcome back to our module on "Advanced Networking and Data Persistence."
In our last lesson, we saw how to create, manage, and share named volumes to provide persistent storage for our applications. This is a vital step, but persistent data is only truly safe if it's backed up.
Today, we will tackle the crucial operational task of implementing a backup and restore strategy for Docker volumes. As a DevOps Engineer, ensuring data integrity and recoverability is a core responsibility. This lesson will equip you with two powerful methods to protect the data your stateful applications rely on, covering disaster recovery, data migration, and cloning environments for testing.
Why is Backing Up Volumes So Important?
While Docker volumes persist data even when containers are removed, they don't protect against data corruption, accidental deletion, or host machine failure. A robust backup strategy is non-negotiable for production systems.
Backup and Restore of Docker Volumes: A Step-by-Step Guide
To start, let's briefly review the primary motivations for backing up volumes. The article 'Backup and Restore of Docker Volumes' provides a clear summary.
Read the introductory section and the 'Why?' section, which covers Disaster Recovery, Testing and Development, and Replication.
As the article highlights, backups are essential for:
- Disaster Recovery: Restoring service after data loss or a system failure.
- Data Migration: Moving an application and its state to a new host or cloud environment.
- Testing & Development: Cloning a production database into a staging environment to test new features with realistic data.
The image below illustrates the general concept of migrating data by backing up a volume from one host and restoring it on another.
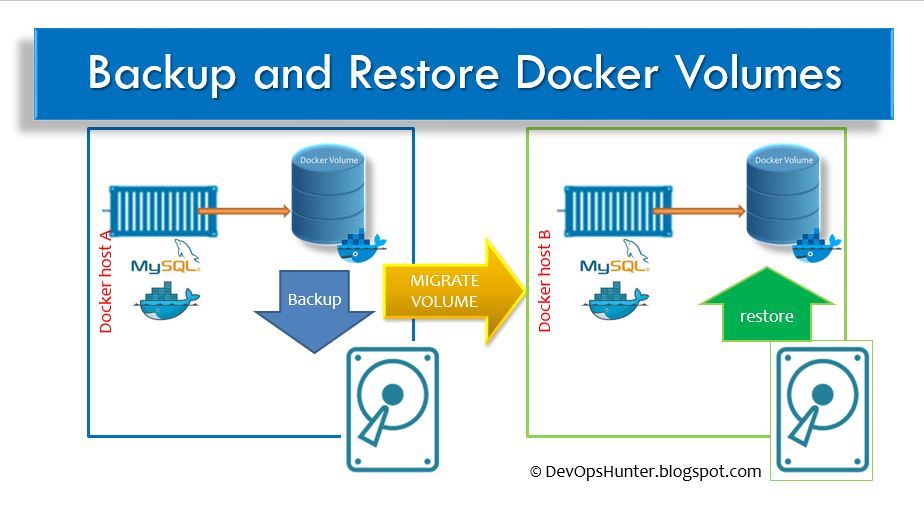
Now, let's explore how to perform this workflow.
Method 1: The Manual Backup Container
The most fundamental way to back up a volume is to use a temporary "sidecar" container. This container mounts the volume you want to back up, mounts a host directory for the backup file, and then runs a tool like tar to create an archive. This approach gives you a full understanding of the underlying mechanics.
The official Docker documentation outlines this exact process.
The official Docker documentation provides the authoritative reference for this technique. Please review the following section.
Read the section titled 'Back up, restore, or migrate data volumes'. Pay close attention to the docker run commands for both the backup and restore operations. Note the use of --volumes-from and the bind mount $(pwd):/backup.
The core logic is:
- Backup: Run a new, temporary container (
--rm) with access to the target volume (either via--volumes-from <source_container>or--mount source=<volume_name>...). Bind-mount a local directory (e.g.,$(pwd)) into the container. Execute atarcommand to archive the volume's contents into the bind-mounted directory. - Restore: Run another temporary container. Mount a new or empty volume where you want to restore the data. Bind-mount the local directory containing the backup file. Execute a
tarcommand to extract the archive into the target volume.
Practical Demonstration: Backing Up a PostgreSQL Database
Let's see this theory in action. The following video provides a complete, step-by-step demonstration of backing up a PostgreSQL database volume and restoring it.
How to Backup and Restore Docker Volumes
The video 'How to Backup and Restore Docker Volumes' from WittCode walks through the entire process, from creating a database with sample data to backing it up and verifying the restoration.
Watch the entire video (around 6 minutes). It covers four key steps: 00:00 - 01:41: Setting up a PostgreSQL container with an initialized volume. 01:41 - 03:33: Creating the backup .tar file using a temporary busybox container. 03:33 - 04:50: Restoring the backup into a new, empty volume. 04:50 - 06:11: Verifying the restore by launching a new PostgreSQL container with the restored volume and querying the data.
This manual method is excellent for one-off backups, migrations, or when you need full control over the process. However, for regular, automated backups in a production environment, a more specialized tool is often preferable.
Test your understanding!
You have a named volume webapp-data that contains important application files. You want to create a compressed backup of this volume named webapp-backup.tar.gz in your current working directory on the host.
Write a single docker run command to achieve this using the ubuntu image and the tar utility. The volume is not currently attached to any running container.
Show answer
Here is the correct command:
docker run --rm \
  --mount source=webapp-data,target=/data \
  -v "$(pwd)":/backup \
  ubuntu \
  tar -czvf /backup/webapp-backup.tar.gz /data
Explanation:
docker run --rm: Runs a container and automatically removes it when it exits.--mount source=webapp-data,target=/data: Mounts the named volumewebapp-datainto the container at the path/data.-v "$(pwd)":/backup: Bind-mounts the current host directory into the container at/backup.ubuntu: Specifies the image to use, which contains thetarutility.tar -czvf ...: The command executed inside the container. It creates (c) a gzipped (z) archive (f) named/backup/webapp-backup.tar.gzfrom the contents of the/datadirectory. Thev(verbose) flag is optional but helpful for seeing which files are being archived.
Method 2: Automated Backups with Restic
For a more robust, "set-it-and-forget-it" solution, you can use dedicated backup tools that run as containers themselves. Restic is a popular open-source tool that provides fast, secure, and efficient backups. It supports features like encryption, deduplication (saving significant space), and multiple back-end storage options (local disk, S3, etc.).
Running Restic in Docker allows you to create a centralized backup service for all your other containers.
Docker Backup and Restore Made EASY with Restic
The video 'Docker Backup and Restore Made EASY with Restic' from Jim's Garage provides an excellent overview of setting up a Restic-based backup system using Docker Compose.
Watch the video from 00:32 to 08:32. This will guide you through the setup and usage: 00:32 - 02:00: Introduction to the Restic Compose setup (backup, prune, check services). 02:00 - 04:23: Configuring the crucial volume mounts for the backup service: where backups are stored, a temporary restore location, and the source data to back up. 04:23 - 07:26: Deploying the stack and verifying that backups (snapshots) are created. 07:26 - 08:32: The restore process: finding a snapshot ID and using the restic restore command.
The Restic approach offers several advantages for a production environment:
- Automation: Backups run on a schedule (
CRON) without manual intervention. - Efficiency: Deduplication means only changed data blocks are stored, saving time and storage space.
- Security: Backups are encrypted by default.
- Lifecycle Management: Old backups can be automatically pruned based on retention policies.
This pattern is highly relevant in a DevOps context, where automating operational tasks is a primary goal.
Conclusion
You now have two effective strategies for backing up and restoring Docker volumes. Choosing the right one depends on your specific needs.
Key Takeaways:
- Volume backups are critical for disaster recovery, data migration, and cloning environments.
- The manual
tarmethod uses a temporary container to archive volume data. It's ideal for understanding the mechanics, for one-off tasks, and for simple setups. - The automated tool method, exemplified by Restic, uses a dedicated service to manage scheduled, encrypted, and efficient backups. This is the preferred approach for production systems.
- In both cases, the core principle is the same: grant a container access to both the data volume and a backup location (local or remote) to perform the operation.
In our next lesson, we will shift our focus from data persistence back to networking. We'll explore the different network drivers available in Docker—bridge, host, and overlay—and understand when to use each to build isolated and scalable application environments.