Hello and welcome to the first lesson in your journey to creating a YouTube channel! We're starting with the big picture: the complete roadmap of how a video goes from a simple thought to a finished piece on your channel. Understanding this process from the outset is the most effective way to demystify video creation, making it feel less like an intimidating mountain and more like a series of manageable steps.
The goal for this lesson is to map out the five key stages of video production. We'll call them Idea, Assets, Assembly, Polish, and Publishing. This framework will not only guide you through this course but will also serve as a reliable blueprint for every video you create, helping you manage your time and creative energy effectively, especially with your goal of producing one video per month.
The Creative Workflow: A Bird's-Eye View
Before we break down each stage, it's helpful to see what the entire process looks like from a creator's perspective. The following video by Matthew Encina provides an excellent and motivating overview of how to plan, shoot, edit, and publish a YouTube video. As you watch, don't worry about memorizing every detail. Instead, just get a feel for the flow and the different kinds of activities involved.
How to Make YouTube Videos – Plan, Shoot, Edit, Post, Grow
This video, "How to Make YouTube Videos," offers a concise and professional walkthrough of the entire creative process.
Please watch the full video, which is about 8 minutes long. Notice how he moves from planning and scripting to filming, editing, and finally, publishing. This will give you a great mental model before we dive into our specific five-stage framework.
As you can see, a successful video isn't just about hitting record. It's a structured process, and having a structure is the best antidote to feeling overwhelmed or stuck—a common feeling for any creator, especially when just starting out.
The 5 Stages of Video Production
The professional video production world uses terms like "Development," "Pre-production," "Production," "Post-production," and "Distribution." We're going to use a simpler, more action-oriented set of labels that map directly onto those concepts.
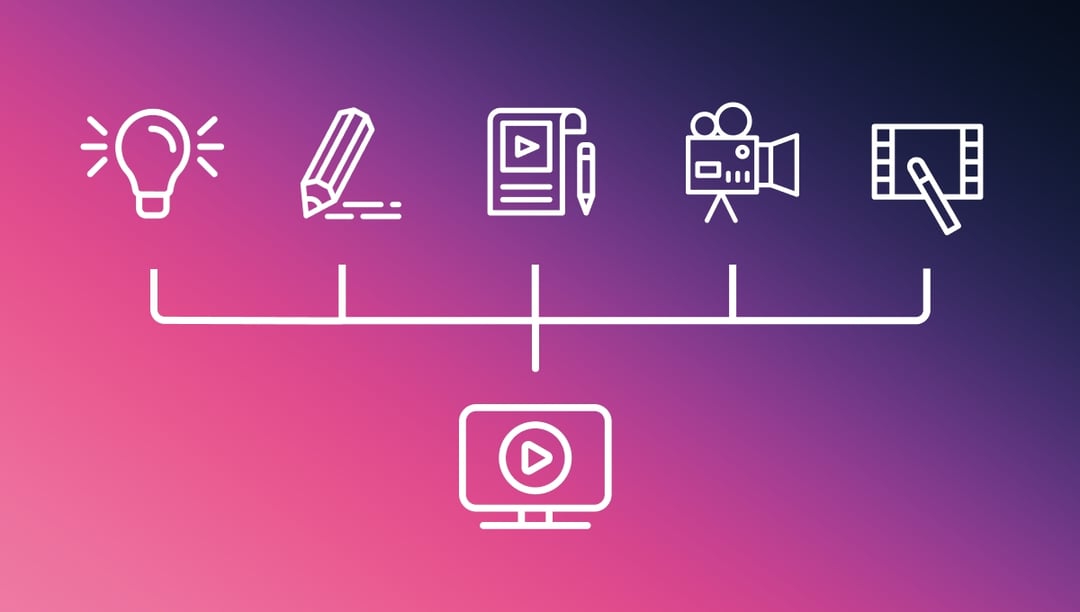
Our five stages are:
- Idea: Defining your video's purpose, argument, and script.
- Assets: Gathering all your raw materials (footage, audio, music, etc.).
- Assembly: Creating the first rough version of your video in your editing software.
- Polish: Refining the edit, correcting color, mixing audio, and adding titles.
- Publishing: Uploading the video and preparing it for your audience.
Let's explore each of these stages in more detail.
Stage 1: Idea
This is the foundation. Every other step depends on the clarity you achieve here. For your personal video essays, this stage is about crystallizing the core reflection or message you want to share. It's not just about what you want to talk about, but what you want the viewer to think or feel.
A great video starts with a great script. As you're focused on "faceless" essays, your voice and words will do the heavy lifting.
How To Make Video Essays (Best Microphone and Copyright Claims Explained)
In the video "How To Make Video Essays," creator troyoboyo17 shares his process, starting with what he considers the most crucial step.
Watch the very beginning of the video, from the opening segment on scripting. His advice to "write what you know and write what you love" is especially relevant for the personal and reflective style you're aiming for.
This stage isn't about writing a perfect, finished script on the first try. It's about brainstorming, outlining, and getting your core ideas down. In a future lesson, we'll focus specifically on a simple structure for outlining your narratives. For now, just know that this planning phase is the most critical part of the entire process.
Stage 2: Assets
Once you have a clear idea and a script, you need to gather the "ingredients" for your video. Since you're creating a faceless channel, your assets will be the visuals and sounds that bring your script to life.
This stage involves:
- Filming: Using your smartphone to capture the original footage you planned, like the landscapes and sunsets on your island.
- Voiceover Recording: Using your earphones and smartphone to record your script.
- Sourcing: Finding supplementary materials online, such as royalty-free video clips, images, and music.
The resource below provides a very detailed breakdown of the professional production process. The first few phases it describes—Development, Pre-production, and Production—all feed into our "Idea" and "Assets" stages.
The Video Production Process: Your Ultimate Guide - Assemble
This guide from Assemble offers a comprehensive look at the standard industry workflow. We'll use it to understand the professional equivalents of our stages.
First, read the brief introductory paragraphs, starting from the overview. This will introduce you to the five standard phases. Then, focus on the sections that correspond to our Idea and Assets stages: Skim through Section 1, "Development," to see how professionals approach initial planning. Read through Section 2, "Pre-Production." This is the heart of the Assets stage, involving tasks like creating storyboards and shot lists. Finally, quickly read the introduction to Section 3, "Production," to understand that this is where all the filming happens.
Don't be intimidated by the scale of professional productions described. The principles are the same whether you're a Hollywood studio or a single creator with a smartphone. The key takeaway is that planning and gathering materials happen before you even open your editing software.
Stage 3: Assembly
Now you have your script, your voiceover, and a folder full of visual clips. The Assembly stage is where you open Movavi Video Editor and put the basic structure of your story together.
The goal here is not to make a perfect video. The goal is to create a "rough cut." This typically involves:
- Placing your voiceover track on the timeline.
- Laying down visual clips that correspond to what you're saying.
- Trimming the clips to match the pacing of your narration.
This is where you see if your story works. You'll find out if you have enough footage, if the pacing feels right, and if the emotional beats are landing. Think of it as building the skeleton of your video. This is the most practical way to combat perfectionism: give yourself permission to create a messy first draft.
Stage 4: Polish
Once the skeleton is in place, you can start adding the muscles and skin. The Polish stage is where you take your rough cut and make it shine. This is where you engage the more detailed features in Movavi.
This stage includes tasks like:
- Color Correction: Making sure all your clips (from your phone, from online sources) have a consistent look and feel.
- Audio Mixing: Balancing the volume of your voiceover, music, and any natural sounds so everything is clear and creates the right mood.
- Adding Titles & Text: Creating simple, clean titles or text overlays to introduce the video or emphasize a point.
- Refining the Edit: Making small adjustments to the timing of your cuts to improve the rhythm and flow.
The "Post-Production" section in the Assemble article you just reviewed covers this stage in detail.
The Video Production Process: Your Ultimate Guide - Assemble
Let's revisit the Assemble guide to see how the pros handle the polishing phase.
Find Section 4, "Post-Production," and read the descriptions for Editorial and Sound and Picture Post Production. This covers everything from the rough cut to final color and sound mixing.
Stage 5: Publishing
Your video is finished and exported from Movavi. The final stage is getting it onto YouTube and in front of viewers.
This involves more than just clicking "Upload." This stage includes several key creative and strategic tasks:
- Thumbnail: Designing an evocative thumbnail in Affinity that makes someone want to click.
- Title & Description: Writing a compelling title and a clear, helpful description.
- Uploading: Configuring all the settings in YouTube, such as tags, category, and privacy settings.
The creator in the video below gives a great summary of this final, crucial step.
How to Make YouTube Videos – Plan, Shoot, Edit, Post, Grow
Let's return to Matthew Encina's "How to Make YouTube Videos."
Watch the final section of the video about the publishing process, from the final stage. Pay attention to how he emphasizes the importance of the thumbnail and title.
An important part of this stage, especially for video essays that use clips from other media, is understanding copyright. We will dedicate time to this later, but it's good to be aware that this is a key consideration during the publishing process.
Conclusion
You've now seen the entire map for creating a video. By breaking the process down into these five distinct stages—Idea, Assets, Assembly, Polish, and Publishing—you transform a daunting creative challenge into a manageable project. This framework is your most powerful tool against perfectionism, as it allows you to focus on one thing at a time: planning, then gathering, then building, then refining, and finally, sharing.
Key Takeaways:
- Video creation is a structured process, not a chaotic burst of inspiration.
- Idea: Everything starts with a clear message and a script.
- Assets: Gather all your ingredients before you start cooking.
- Assembly: Focus on structure first and create a rough draft.
- Polish: Refine your video only after the main structure is in place.
- Publishing: The work isn't done until you've prepared your video for its audience.
In our next lesson, we will put this knowledge into practice. Now that you have the map, we'll plan our first, very small journey. We will focus on defining a "Minimum Viable Video"—a short, simple project designed to get you through all five stages successfully and build the momentum you need to start your channel.