Hello! Welcome to the final lesson of your project-focused sprint within the "Advanced Git and Collaborative Workflows" module.
In our last session, you did an excellent job implementing a feature using the Feature Branch Workflow. You created a branch, wrote the code for your portfolio's homepage, and opened a pull request to propose merging your changes into the main branch. This is the heart of collaborative development.
Today, we'll complete that feature's lifecycle. We will simulate a full software release by merging your pull request, marking this new version with a Git tag, and publishing formal release notes on GitHub. This process turns a simple code merge into a significant, trackable event for your project.
This lesson directly addresses the learning outcome: Simulate a software release by merging the feature branch, tagging the release, and publishing release notes on GitHub.
Recap: Where We Left Off
You have an open pull request in your my-devops-portfolio repository titled feat: Create basic HTML structure for homepage. It's been "reviewed" (we'll assume it was approved!), and it's ready for the final step: integration.
1. Merging the Pull Request
Merging is the action of integrating the changes from your feature branch (feat/homepage-structure) into your target branch (main).
- Navigate to your
my-devops-portfoliorepository on GitHub and click on the "Pull requests" tab. - Click on your open pull request.
- At the bottom of the PR, you'll see a green button that says "Merge pull request".
- A Note on Merge Options: If you click the small arrow next to the button, you'll see options like "Squash and merge" or "Rebase and merge". These are different strategies for combining histories. For now, the default "Create a merge commit" is perfectly fine. It preserves the entire history of your feature branch.
- Click the "Merge pull request" button, and then click "Confirm merge".
After the merge is complete, GitHub will give you an option to "Delete branch". It is a strong best practice to delete your feature branch after it has been merged. This keeps your repository clean and prevents the branch from being used again by mistake. Go ahead and click it.
Your code is now officially part of the main branch!
2. Understanding Releases: Git Tags and Semantic Versioning
Just because the code is in main doesn't mean it's a "release." A release is a formal, stable version of your project that you can share with users. In Git, we mark these specific points in history using tags.
To give our tags meaning, we use a convention called Semantic Versioning (SemVer). It provides a clear, universal way to communicate the nature of changes in a release.
To learn the fundamentals of tags and SemVer, please read the first few sections of the following article.
Using Git Tags for Semantic Versioning (Step-by-Step Guide)
This article, 'Using Git Tags for Semantic Versioning', clearly explains the purpose of Git tags and the MAJOR.MINOR.PATCH structure of SemVer. This is a foundational concept for releasing software.
Please read the sections titled 'What is Semantic Versioning?' and 'What is a Git Tag?'. Focus on what the MAJOR, MINOR, and PATCH numbers represent.
Test your understanding!
You have a project at version v1.2.5. You just fixed a small bug that caused a button to be misaligned. According to Semantic Versioning, what should the new version number be?
Show answer
The new version should be v1.2.6. Since this was a backward-compatible bug fix, you only increment the PATCH number.
3. Creating and Pushing a Tag
Now let's apply this to your project. You've added a new, backward-compatible feature (the homepage structure). Since this is the very first version of your application, we'll call it v0.1.0.
Follow these steps in your terminal, inside your my-devops-portfolio project directory.
-
Sync with the remote repository. Your local
mainbranch doesn't have the merge commit yet. You need to pull it from GitHub.# Switch to your main branch git checkout main # Pull the latest changes (including the merge) git pull origin main -
Create an annotated tag. We'll use an annotated tag (
-a) because it's considered a best practice for releases. It stores extra metadata, like the author, date, and a message, making it a full object in Git.# Create an annotated tag for version 0.1.0 git tag -a v0.1.0 -m "Initial release with homepage structure"The
-mprovides the tagging message, which is like a commit message for your tag. -
Push the tag to GitHub. By default,
git pushdoes not send tags to the remote repository. You must push them explicitly.# Push all your local tags to the remote repository git push --tags
Your tag v0.1.0 is now associated with the latest commit on main in your GitHub repository.
4. Publishing a Release on GitHub
A Git tag is just a pointer. A GitHub Release is a much richer object built on top of a tag. It provides a permanent home for your release, complete with:
- Formatted release notes (a changelog).
- Links to the source code at that point in time.
- Optional binary files (e.g., installers, compiled executables).
This is what a finished release looks like on GitHub:
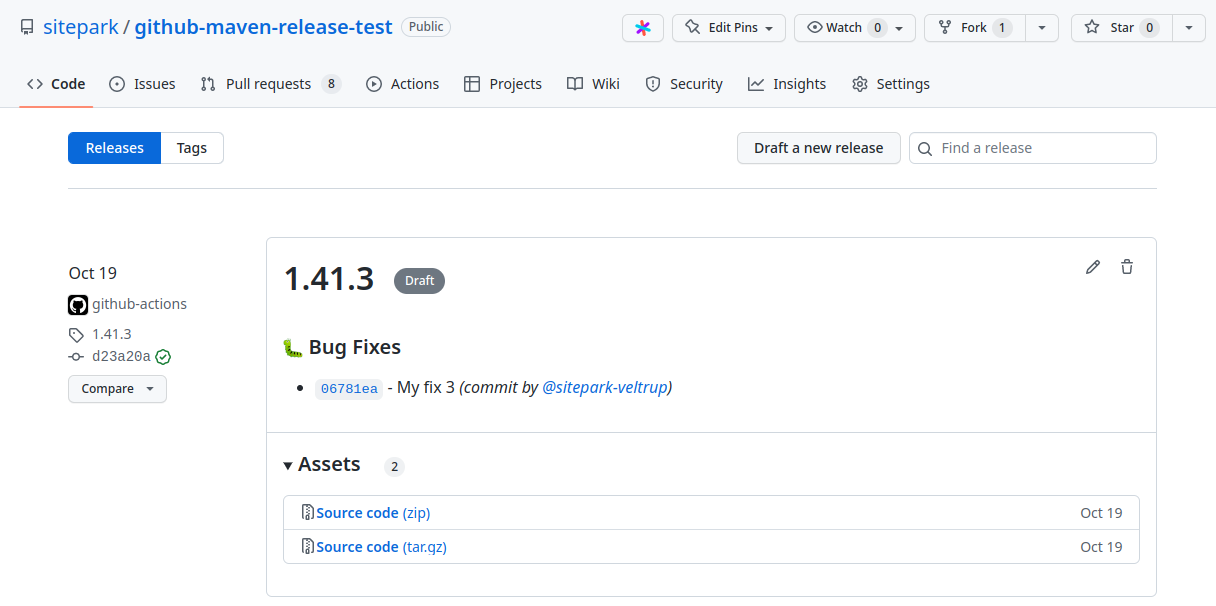
Let's create one for v0.1.0. The official GitHub documentation provides the best guide for this.
Managing releases in a repository
The official documentation, 'Managing releases in a repository', walks you through the GitHub user interface for creating a release from a tag you've already pushed. This is the final step in presenting your release to the world.
Follow the steps in the 'Creating a release' section using the Web Browser instructions. You've already pushed your tag, so you can start from step 1 on the GitHub website.
Here's a summary of the steps from the guide you'll be following:
- On your repository page, click the "Releases" link on the right sidebar.
- Click "Draft a new release".
- Under "Choose a tag", select the
v0.1.0tag you just pushed. - For the "Release title", enter something descriptive, like
Version 0.1.0: Initial Homepage. - In the "Describe this release" box, write your release notes. For this release, you can write:
Pro-Tip: For larger projects, GitHub has an "Auto-generate release notes" button that automatically summarizes all the pull requests included since the last release.### What's New 🎉 * Adds the basic HTML structure for the portfolio homepage, including header, main, and footer sections. This is the first functional version of the portfolio site. - Click "Publish release".
You have now successfully published your first software release! You can see it listed under the "Releases" tab, and the tag will be prominently displayed on your repository's main page.
This diagram helps visualize where tags fit into a larger development strategy, marking key points on the main (or master) branch.

Conclusion
Congratulations on completing the full feature lifecycle! You have now experienced the end-to-end process that is fundamental to DevOps and modern software engineering.
Key Takeaways:
- Pull requests are integrated into the main codebase via a merge.
- Git tags are used to create a permanent pointer to a specific commit, marking it as a version.
- Semantic Versioning (SemVer) provides a standard for version numbers (
MAJOR.MINOR.PATCH). - GitHub Releases are user-friendly pages built from Git tags that include release notes and downloadable assets.
In our next lesson, we'll step away from the "happy path" workflow and dive into troubleshooting. You will learn how to diagnose and resolve a common and sometimes confusing situation in Git: the 'detached HEAD' state.