Welcome to the final lesson in our module on Advanced Networking and Core Services! Over the last few lessons, we've explored the building blocks of network communication, from IP addressing and DNS to securing our server with firewalls and controlling traffic flow with static routes.
Today, we'll bring many of these concepts together in a practical, hands-on exercise. The goal of this lesson is to achieve the learning outcome: Set up a simple web server (e.g., Nginx) and verify network connectivity to it. By the end of this session, you will have a working web server running on your Linux system, accessible over the network. This is a fundamental task for any DevOps engineer, as web servers are the backbone of most modern applications.
1. What is Nginx?
Before we start typing commands, let's briefly discuss what Nginx is. Nginx (pronounced "engine-x") is a high-performance open-source web server. It's renowned for its stability, rich feature set, and low resource consumption.
In the DevOps world, you'll encounter Nginx everywhere. While it can serve static web pages directly (which we'll do today), it's also commonly used as a:
- Reverse Proxy: To pass requests to backend application servers.
- Load Balancer: To distribute traffic across multiple backend servers.
- HTTP Cache: To speed up content delivery by storing frequently requested files.
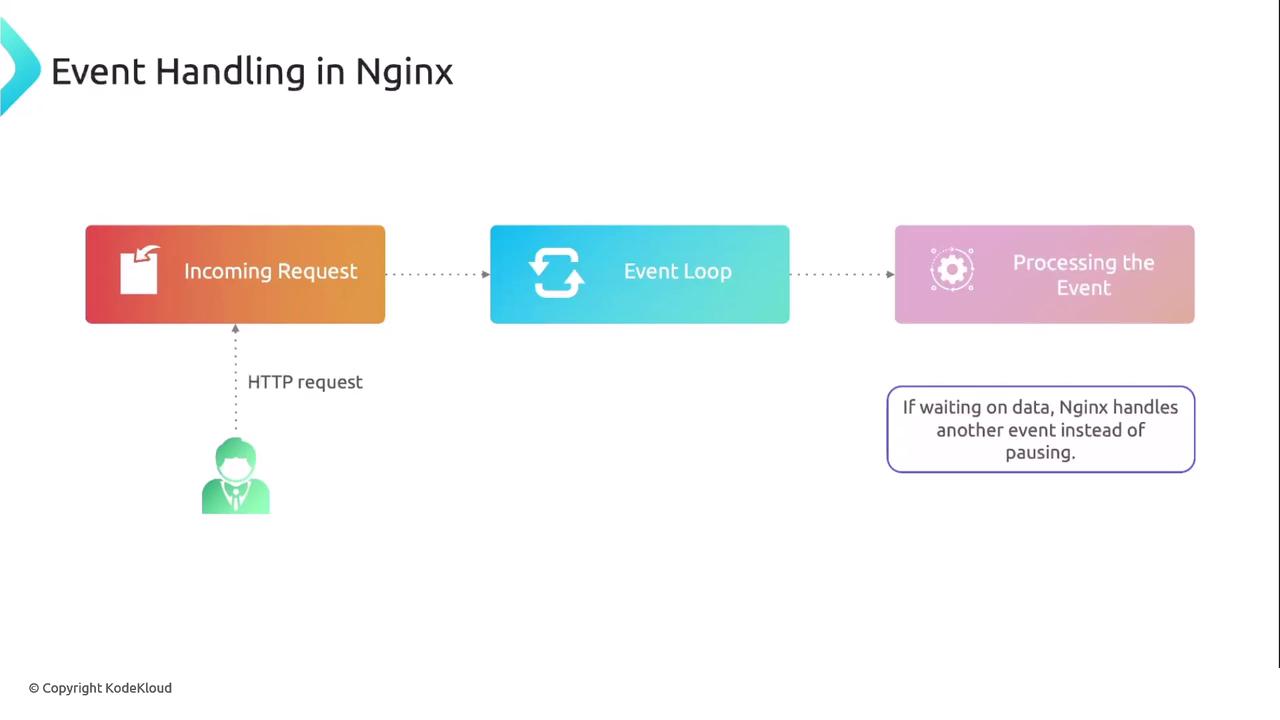
One of the secrets to Nginx's performance is its event-driven, non-blocking architecture. Unlike older web servers that might create a new process for every request, Nginx can handle thousands of concurrent connections within a single process, making it incredibly efficient.
2. Step 1: Installing Nginx
First, we need to install the Nginx software package on our Ubuntu server. We will use the apt package manager, which you've used before to manage software.
The following guide from DigitalOcean provides a clear, step-by-step process. We'll follow it for the rest of this lesson.
How To Install Nginx on Ubuntu
Let's begin by installing Nginx. This first section of the tutorial walks you through updating your package lists and installing the nginx package.
Please read and follow the instructions in 'Step 1 – Installing Nginx'. You should execute the apt update and apt install nginx commands on your Linux system. You can also verify the installation as shown.
After completing these steps, Nginx will be installed on your server. The installation process also configures Nginx to start automatically as a system service.
3. Step 2: Managing the Nginx Service
Now that Nginx is installed, let's review how to manage its service using systemctl. This is a critical skill for controlling any background process on a modern Linux system, and it's a concept we first covered in Module 2. The main commands you'll use are:
sudo systemctl status nginx: Check if the service is running.sudo systemctl stop nginx: Stop the web server.sudo systemctl start nginx: Start the web server.sudo systemctl restart nginx: Stop and then start the service.sudo systemctl reload nginx: Reload the configuration without dropping connections (very useful!).sudo systemctl enable nginx: Ensure the service starts on boot.sudo systemctl disable nginx: Prevent the service from starting on boot.
Let's use the DigitalOcean guide to see these commands in action.
How To Install Nginx on Ubuntu
This section of the guide covers the basic systemctl commands for managing the Nginx process.
Read through 'Step 4 – Managing the Nginx Process' to familiarize yourself with these commands. Try stopping and starting the Nginx service and check its status after each command to see the effect.
4. Step 3: Configuring the Firewall
Just because the web server is running doesn't mean anyone can access it. As we learned in a previous lesson, the ufw firewall blocks all incoming traffic by default. We need to create a rule to allow HTTP traffic.
Fortunately, the Nginx package automatically registers itself with ufw, providing a simple application profile we can use.
How To Install Nginx on Ubuntu
Now, let's allow web traffic through the firewall. This is a crucial step that connects directly to what we learned about ufw.
Follow the instructions in 'Step 2 – Adjusting the Firewall'. You will list the available application profiles and then enable the 'Nginx HTTP' profile, which opens port 80.
By allowing the Nginx HTTP profile, you've instructed the firewall to permit incoming TCP traffic on port 80, the standard port for HTTP.
5. Step 4: Verifying Connectivity
This is the moment of truth! With the service running and the firewall configured, we can now test if our web server is accessible.
There are two primary ways to do this:
- Locally (from the server itself): Use
curl localhost. This sends an HTTP request to your own machine and should return the HTML of the Nginx default page. - Remotely (from your web browser): Find your server's public IP address (
ip addr showorcurl -4 icanhazip.com) and enterhttp://your_server_ipinto your browser's address bar.
Let's follow the guide to complete this verification.
How To Install Nginx on Ubuntu
It's time to check our work. This section will guide you through verifying that the Nginx service is running and accessible from the web.
Read and follow 'Step 3 – Checking your Web Server'. First, use systemctl status nginx to ensure the service is active. Then, find your server's IP address and access it in a browser. You should see the 'Welcome to nginx!' page.
Test your understanding!
You have installed Nginx and enabled the 'Nginx HTTP' rule in ufw. However, when you try to access your server's IP in a browser, the connection times out. What are the first two things you should check on the server?
Show answer
- Check the service status: Run
sudo systemctl status nginxto make sure the Nginx service is active and running without errors. - Check the firewall status: Run
sudo ufw statusto confirm that the rule to allow 'Nginx HTTP' (or traffic on port 80) is active. It's easy to create a rule but forget to enable the firewall itself (sudo ufw enable).
6. Step 5: Serving Your Own Custom Content
Seeing the default Nginx page is great, but the real goal is to serve your own content. To do this, we'll create a custom server block. A server block (similar to a "virtual host" in Apache) is a configuration unit that tells Nginx how to handle requests for a specific domain name or IP address.
The standard practice on Ubuntu is:
- Create a configuration file for your site in
/etc/nginx/sites-available/. - Create a symbolic link to that file in the
/etc/nginx/sites-enabled/directory.
Nginx only reads configuration files from the sites-enabled directory. This structure allows you to easily enable or disable sites without deleting their configuration files.
How To Install Nginx on Ubuntu
Let's replace the default page with our own. This final practical step will teach you how to set up an Nginx server block to host a custom website.
Carefully follow all the instructions in 'Step 5 – Setting Up Server Blocks'. You will: Create a new directory for your site's files (/var/www/your_domain). Create a simple index.html file inside it. Create a new server block configuration file in /etc/nginx/sites-available/. Enable your new server block by creating a symlink. Test the Nginx configuration and restart the service. After restarting, refresh your browser. You should now see your custom HTML page instead of the default Nginx page.
Conclusion
Congratulations! You have successfully installed and configured a web server, made it accessible by configuring the firewall, and served custom content using a server block. This exercise served as a capstone for this module, requiring you to apply your knowledge of packages (apt), services (systemctl), firewalls (ufw), and basic file system management.
Key Takeaways:
- Nginx is a high-performance web server widely used in DevOps for serving content, reverse proxying, and load balancing.
- Installing a service is only the first step; you must also manage the process with
systemctland configure the firewall (ufw) to allow access. - Connectivity can be verified locally with
curland remotely with a browser and the server's IP address. - Nginx uses server blocks to manage configurations for multiple sites. The best practice is to store configs in
/etc/nginx/sites-availableand enable them with symlinks in/etc/nginx/sites-enabled. - Always test your configuration (
sudo nginx -t) before reloading the service to avoid downtime.
This concludes our module on Advanced Networking and Core Services. You now have a solid foundation in the networking principles that underpin all modern infrastructure.
In the next module, Version Control with Git, we will shift gears from infrastructure and networking to code and configuration management. You'll learn how to track changes, collaborate with others, and manage your project's history—an absolutely essential skill for any DevOps role.