Hello! Welcome back.
In our last lesson, we took the essential first step of initializing a local Git repository with git init and peeked inside the .git directory to understand how Git sets up its "engine room." Our project folder is now ready to be tracked, but so far, Git doesn't know about any of our files or changes.
Today's lesson addresses the learning outcome: Stage and commit changes with meaningful commit messages. We will cover the most fundamental, day-to-day workflow in Git: recording a "snapshot" of your work. You'll learn about the two-step process of staging and committing, and more importantly, how to write professional commit messages—a crucial skill for effective collaboration in any DevOps team.
1. The Core Git Workflow: From Working Directory to Repository
Before we type any commands, it's critical to understand the three "areas" Git uses to manage your project:
- Working Directory: This is your project folder, containing all the files you can see and edit.
- Staging Area (or Index): This is an intermediate area where you prepare the changes you want to include in your next "snapshot." It acts as a draft space, allowing you to be selective about what you save.
- Repository: This is the
.gitdirectory, where Git permanently stores the history of your project as a series of snapshots, called commits.
The flow is always from the working directory, to the staging area, and finally into the repository.
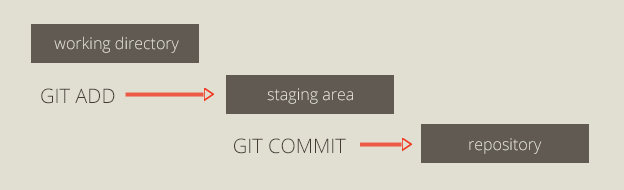
To get a clear conceptual understanding of this workflow, the following video provides an excellent explanation.
Git Tutorial for Beginners: Learn Git in 1 Hour
In this segment from the 'Git Tutorial for Beginners' by Programming with Mosh, the instructor explains why the staging area is a key feature in Git and how it allows you to carefully craft your commits before saving them.
Watch from 17:03 to 21:42. Pay close attention to the analogy of a commit as a 'snapshot' and the staging area as what you are 'proposing for the next commit'.
The key takeaway is that the staging area gives you precise control. You can modify ten files but choose to commit the changes from only three of them, creating a clean, logical checkpoint.
2. Staging Changes with git add
Now, let's get practical. To move your changes from the working directory to the staging area, you use the git add command. You can monitor the status of your files at any time with git status.
Let's practice this in the my-first-repo directory we created in the last lesson.
Hands-on Practice:
- Navigate to your repository:
cd my-first-repo - Create a new file:
echo "Initial content for our new app" > app.py - Check the status:
git status
You'll see a message about "Untracked files," andapp.pywill be listed in red. This means Git sees the file but isn't tracking it yet. - Stage the file:
git add app.py - Check the status again:
git status
Now you'll see a message "Changes to be committed," andapp.pywill be listed in green. You have successfully staged your first change!
The following video demonstrates this process, including how to add multiple files and what happens when you modify a file after it has been staged—a common source of confusion for beginners.
Git Tutorial for Beginners: Learn Git in 1 Hour
Let's continue with the same video to see a practical demonstration of git status and git add.
Watch from 22:27 to 25:28. The video shows how to add single files, multiple files using wildcards (*.txt), and the entire directory (.). Notice how the output of git status changes and how a file can be both staged (old version) and modified (new version) at the same time.
3. Creating a Snapshot with git commit
Once your staging area contains exactly what you want to save, you create a commit using the git commit command. Each commit is a permanent record in your project's history. It includes the changes, the author, the date, and a commit message.
The simplest way to commit is with the -m flag, which lets you provide a short message directly on the command line.
Hands-on Practice (continued):
- Ensure
app.pyis still staged. If not, rungit add app.py. - Commit the file:
git commit -m "Initial commit of the application file" - Check the status:
git status
The output will now say "nothing to commit, working tree clean." You have successfully saved your first snapshot!
This process is also covered in the following article, which provides clear, written steps.
An Intro to Git and GitHub for Beginners (Tutorial)
This tutorial from HubSpot offers a concise written guide to the add and commit workflow, reinforcing what we've just practiced.
Read the sections 'An interlude: The staging environment, the commit, and you', 'Step 3: Add a file to the staging environment', and 'Step 4: Create a commit'. This will solidify your understanding of the commands and the concepts behind them.
Test your understanding!
You have modified two files, file_A and file_B. You want your next commit to only include the changes from file_A. What are the correct steps?
git commit -m "Update file_A"git add .thengit commit -m "Update file_A"git add file_Athengit commit -m "Update file_A"
Show answer
Option 3 is correct. You must first use git add file_A to explicitly stage only the changes from that file. Then, git commit will create a snapshot containing only what's in the staging area. Option 1 would fail because nothing is staged. Option 2 would incorrectly include the changes from file_B as well.
4. Crafting Meaningful Commit Messages
Writing a good commit message is not just a formality; it's a critical skill for professional developers and DevOps engineers. Clear messages make the project history readable, help team members understand your changes, and make debugging much easier.
This article from The Odin Project explains exactly why commit messages are important enough to warrant careful attention.
Read the sections 'Introduction' through 'Are commit messages so important they deserve their own lesson?'. This will set the stage for why we are focusing on this.
A standard, high-quality commit message has two parts: a subject and a body.
- Subject: A short, single line summarizing the change.
- Body: A more detailed explanation of why the change was made, the problem it solves, and how it solves it.
To write a multi-line commit message, you simply run git commit without the -m flag. This will open your default text editor (which you've set to VS Code), where you can write your subject, leave a blank line, and then write the body.
Let's continue with The Odin Project article to learn the structure of a good commit message and how to write one.
Read the sections 'Bad vs. good commits' and 'How to commit with a subject and body in the message'. Pay attention to the example of improving a vague message and the mechanics of using the editor for commits.
Best Practices and Conventions
Over time, the development community has established a set of conventions for writing great commit messages. Following these makes your commit history consistent and easy to parse, both for humans and for automated tools.
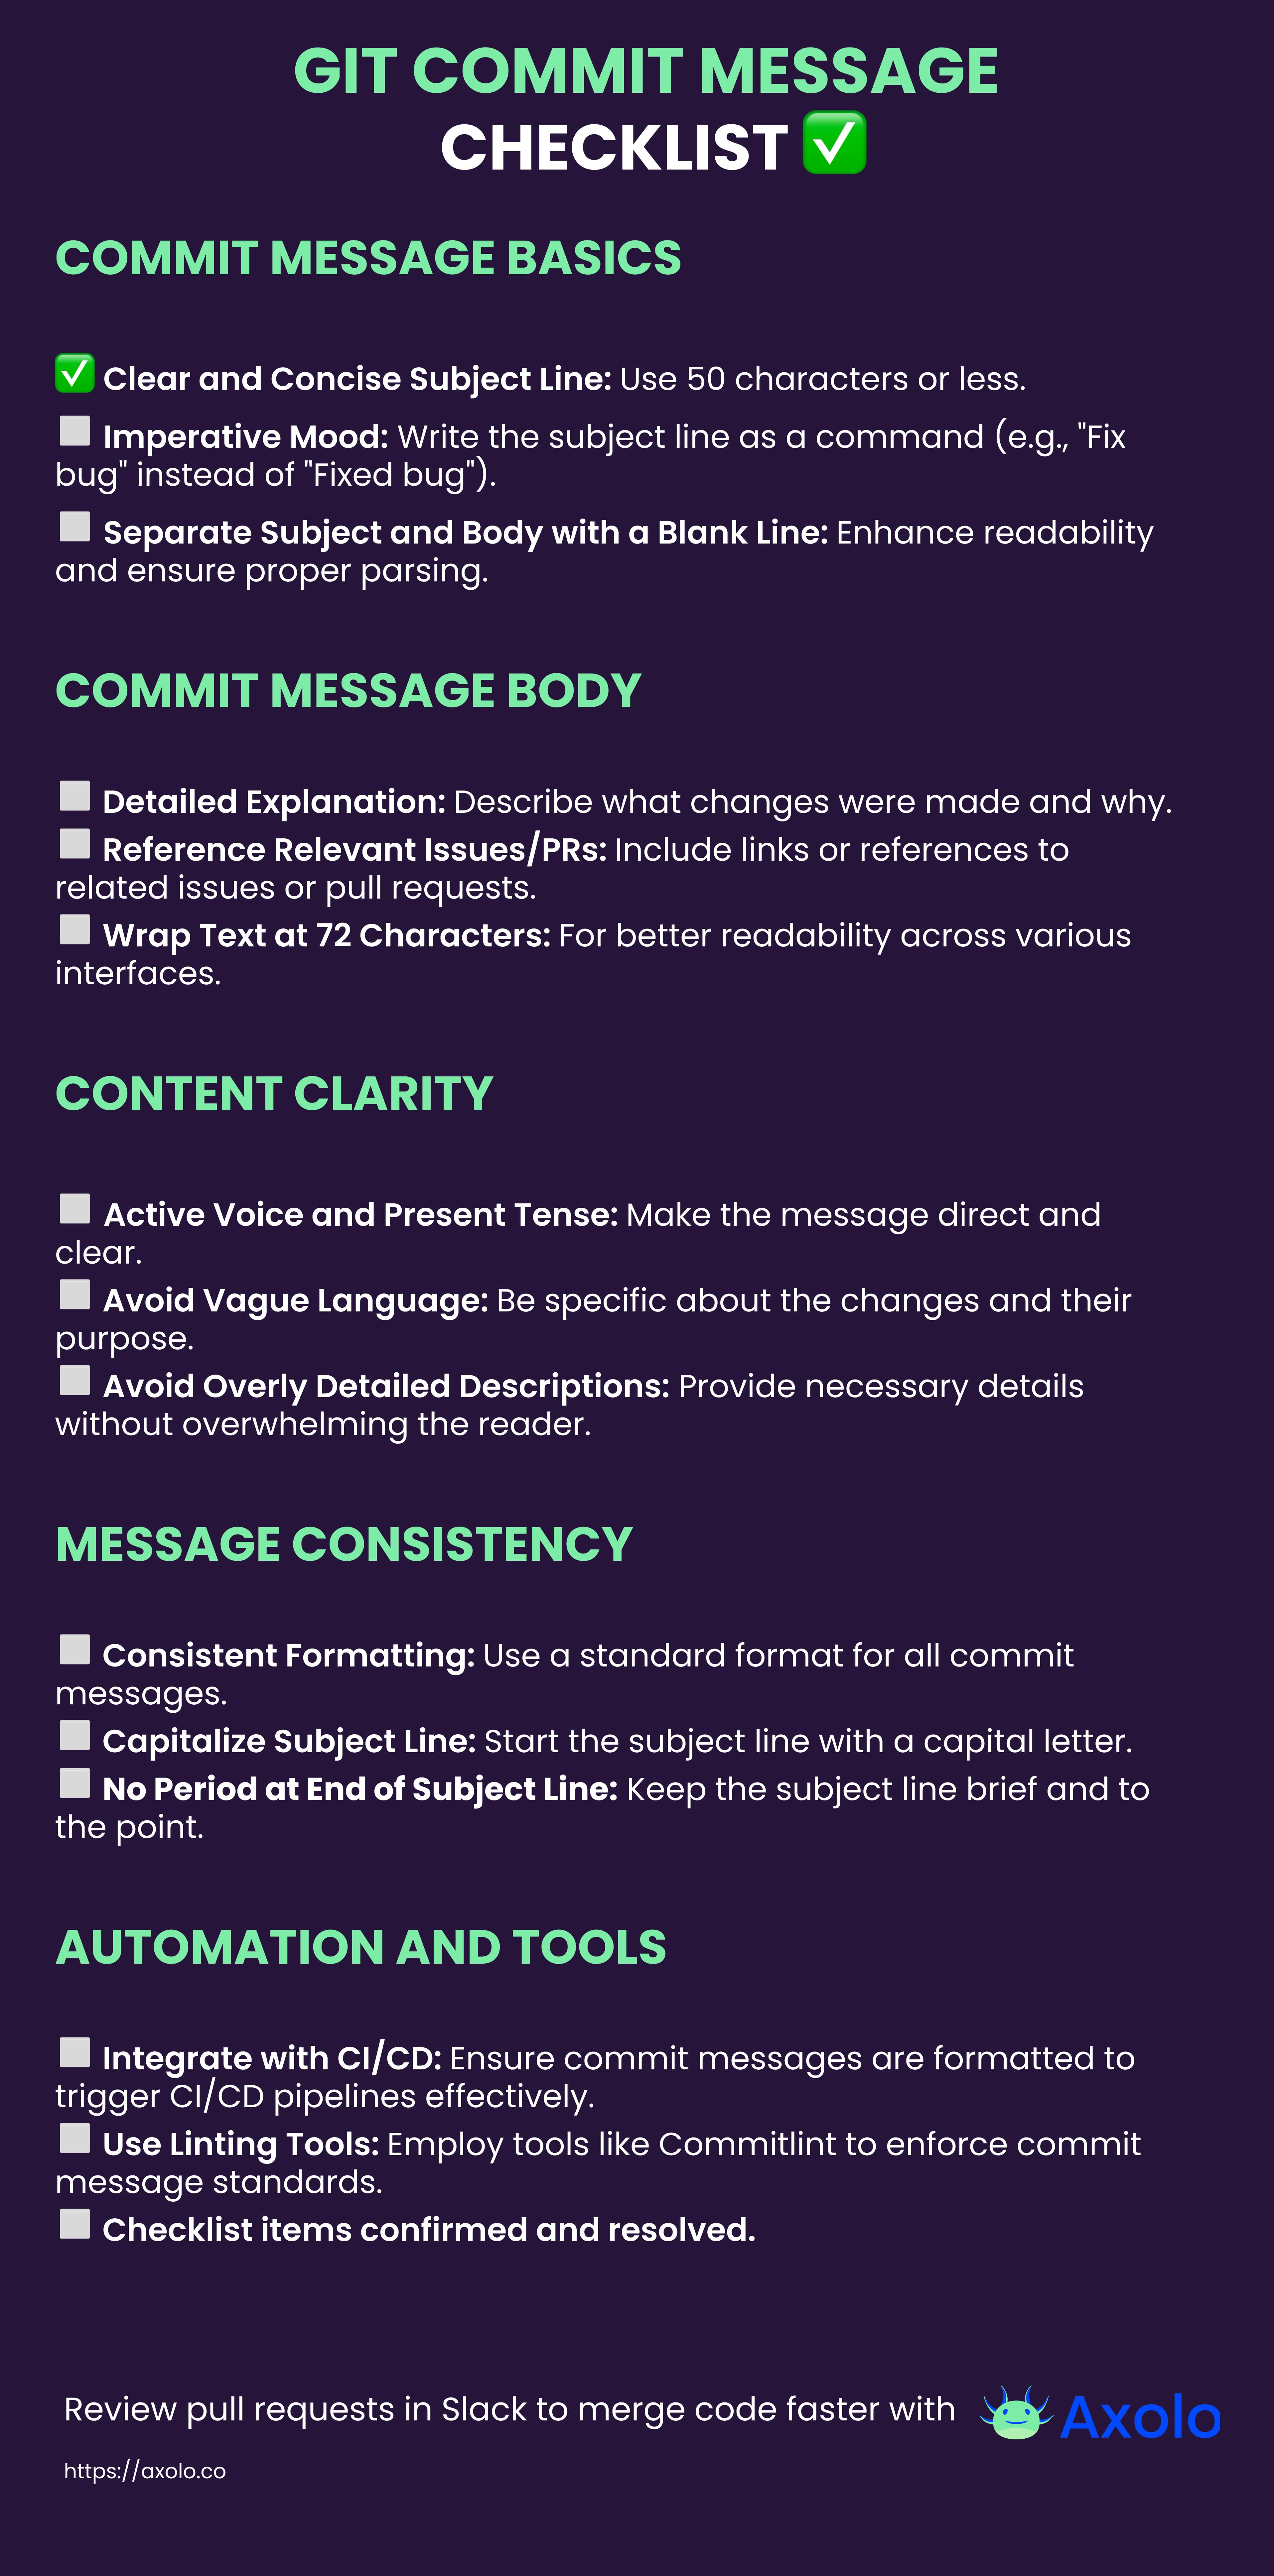
A particularly useful convention, especially in DevOps, is Conventional Commits. This practice involves prefixing your commit subject with a type, such as feat: (for a new feature), fix: (for a bug fix), docs:, or chore:. This makes the commit history scannable and enables automatic generation of changelogs.
The following video discusses these best practices, including the popular seven rules of a great commit message and the conventional commit format.
How to Write a Git Commit Message: Conventions & Best Practices #github #gitlab #bitbucket #python
This video from Cameron McKenzie provides a practical guide to the rules and conventions of writing excellent commit messages.
Watch from 03:06 to 05:07 to learn the standard rules (subject length, body wrapping, etc.). Then, watch from 07:00 to 09:25 to understand the powerful concept of using tags like 'feat' and 'fix' in your commits.
Conclusion
You've just mastered the most fundamental Git workflow. This two-step process of staging and committing is something you will do hundreds, if not thousands, of times in your career.
Key Takeaways:
- Git uses a three-stage workflow: Working Directory -> Staging Area -> Repository.
git addmoves changes from the working directory to the staging area, allowing you to craft your next commit.git committakes the staged changes and saves them as a permanent snapshot in the repository's history.- Meaningful commit messages are vital for collaboration and maintainability. A good message has a concise subject and a detailed body that explains the "why."
- Following conventions like Conventional Commits (
feat:,fix:) makes your project history professional and machine-readable.
In our next lesson, we will introduce one of Git's most powerful features: branching. You'll learn how to use branches to work on new features or bug fixes in isolation without disrupting the main line of development, a cornerstone of all modern collaborative workflows.