Hello! Welcome to the first lesson of your DevOps journey.
This course is designed to build your expertise from the ground up, ensuring you have a rock-solid foundation in the core technologies that power modern DevOps practices.
In this introductory lesson, we will focus on the very first, and perhaps most crucial, step: setting up a dedicated Linux environment. Almost all DevOps work happens on Linux systems, so having a personal "sandbox" for practice is essential for mastering the concepts we'll cover.
By the end of this lesson, you will be able to set up your own Linux environment in two different ways: as a local virtual machine (VM) on your computer and as a cloud instance using Amazon Web Services (AWS). This will give you the hands-on platform you need for all subsequent lessons.
Why Two Methods?
We'll explore two primary methods for creating your Linux environment:
- Local Virtual Machine (VM): Using software like VirtualBox, you can run a complete, isolated Linux operating system inside your current Windows or macOS computer. This is a fantastic, no-cost way to experiment freely without affecting your main system.
- Cloud Instance (AWS EC2): This involves launching a virtual server in the cloud. This method mirrors how businesses run their infrastructure and is an indispensable skill for any DevOps engineer.
Both approaches have their merits, and being familiar with both will serve you well. We'll start with the local VM, as it's self-contained and a great way to understand virtualization at a basic level.
Part 1: Setting Up a Local Virtual Machine with VirtualBox
A virtual machine is essentially a computer within a computer. We will use Oracle's VirtualBox, a free and widely-used virtualization tool, to create an Ubuntu Linux VM. Ubuntu is one of the most popular Linux distributions, especially in cloud and server environments.
The following tutorial from the official Ubuntu website provides a comprehensive, step-by-step guide. We'll use it to walk through the entire process.
How to run an Ubuntu Desktop virtual machine using ...
This official tutorial from Ubuntu will guide you through installing Ubuntu Desktop in VirtualBox. It leverages a feature called 'Unattended Install' which simplifies the setup process significantly.
Please read through the tutorial from the beginning ('1. Overview') down to the end of section '4. Explore Virtual Box'. Follow the instructions to download and install VirtualBox, download the Ubuntu Desktop ISO, and create your virtual machine. We will use the 'Unattended Install' method as described.
Key Steps and Considerations
As you follow the tutorial, pay close attention to these steps:
-
Download and Install:
- First, download and install VirtualBox for your operating system (Windows, macOS, etc.).
- Next, download the Ubuntu Desktop ISO. The tutorial may reference a specific version, but it's always a good practice to use the latest LTS (Long-Term Support) version, as it offers stability and security updates for five years. You can find it on the Ubuntu download page linked in the tutorial.
-
Create the VM:
- When creating the new VM, the "Unattended Guest OS Install" feature will save you a lot of time.
- Crucially, change the default username and password. The tutorial warns that the default
vboxuserdoes not havesudo(administrative) privileges, which you will absolutely need. Choose a username and a memorable password for yourself. - Allocate Resources: The guide suggests around 8GB of RAM and 4 CPUs for good performance. If your host machine has fewer resources, 4GB of RAM and 2 CPUs are a workable minimum. A 25GB hard disk is a good starting point.
-
First Boot and Updates:
- After the installation finishes and your new Ubuntu Desktop boots up, the first thing you should always do is update the system's package list and upgrade the installed software. This is a fundamental system administration task.
- Open the Terminal application in Ubuntu (you can find it by searching) and run the following command:
sudo apt update && sudo apt upgrade -y - You will be prompted for the password you created during setup. Note that you won't see characters appear as you type your password; this is a security feature in Linux.
You now have a fully functional Linux desktop running on your machine, ready for you to explore!
Part 2: Launching a Cloud Instance with AWS EC2
While a local VM is great for learning, most real-world DevOps work is done on cloud infrastructure. Amazon Web Services (AWS) is the dominant cloud provider, and its Elastic Compute Cloud (EC2) service is used to run virtual servers, which AWS calls "instances."
For this part, you will need an AWS account. If you don't have one, you can sign up on the AWS website. New accounts are eligible for the AWS Free Tier, which provides a certain amount of resource usage for free for 12 months. We will stick to Free Tier resources to avoid any costs.
The official AWS "Get Started" guide is the best resource for this.
Get started with Amazon EC2 - Amazon Elastic Compute Cloud
This guide from AWS Documentation walks you through launching, connecting to, and finally terminating a Linux EC2 instance. It covers all the essential concepts you need for your first cloud server.
Read through this guide carefully. Follow 'Step 1: Launch an instance', 'Step 2: Connect to your instance', and be sure to read 'Step 3: Clean up your instance' so you know how to avoid charges. The guide is very detailed, so take your time with each step.
Key Steps and Concepts
As you follow the AWS tutorial, focus on understanding these core ideas:
- Amazon Machine Image (AMI): This is a template that contains the operating system and software for your instance. For our purposes, select the Ubuntu Server LTS AMI that is marked "Free tier eligible."
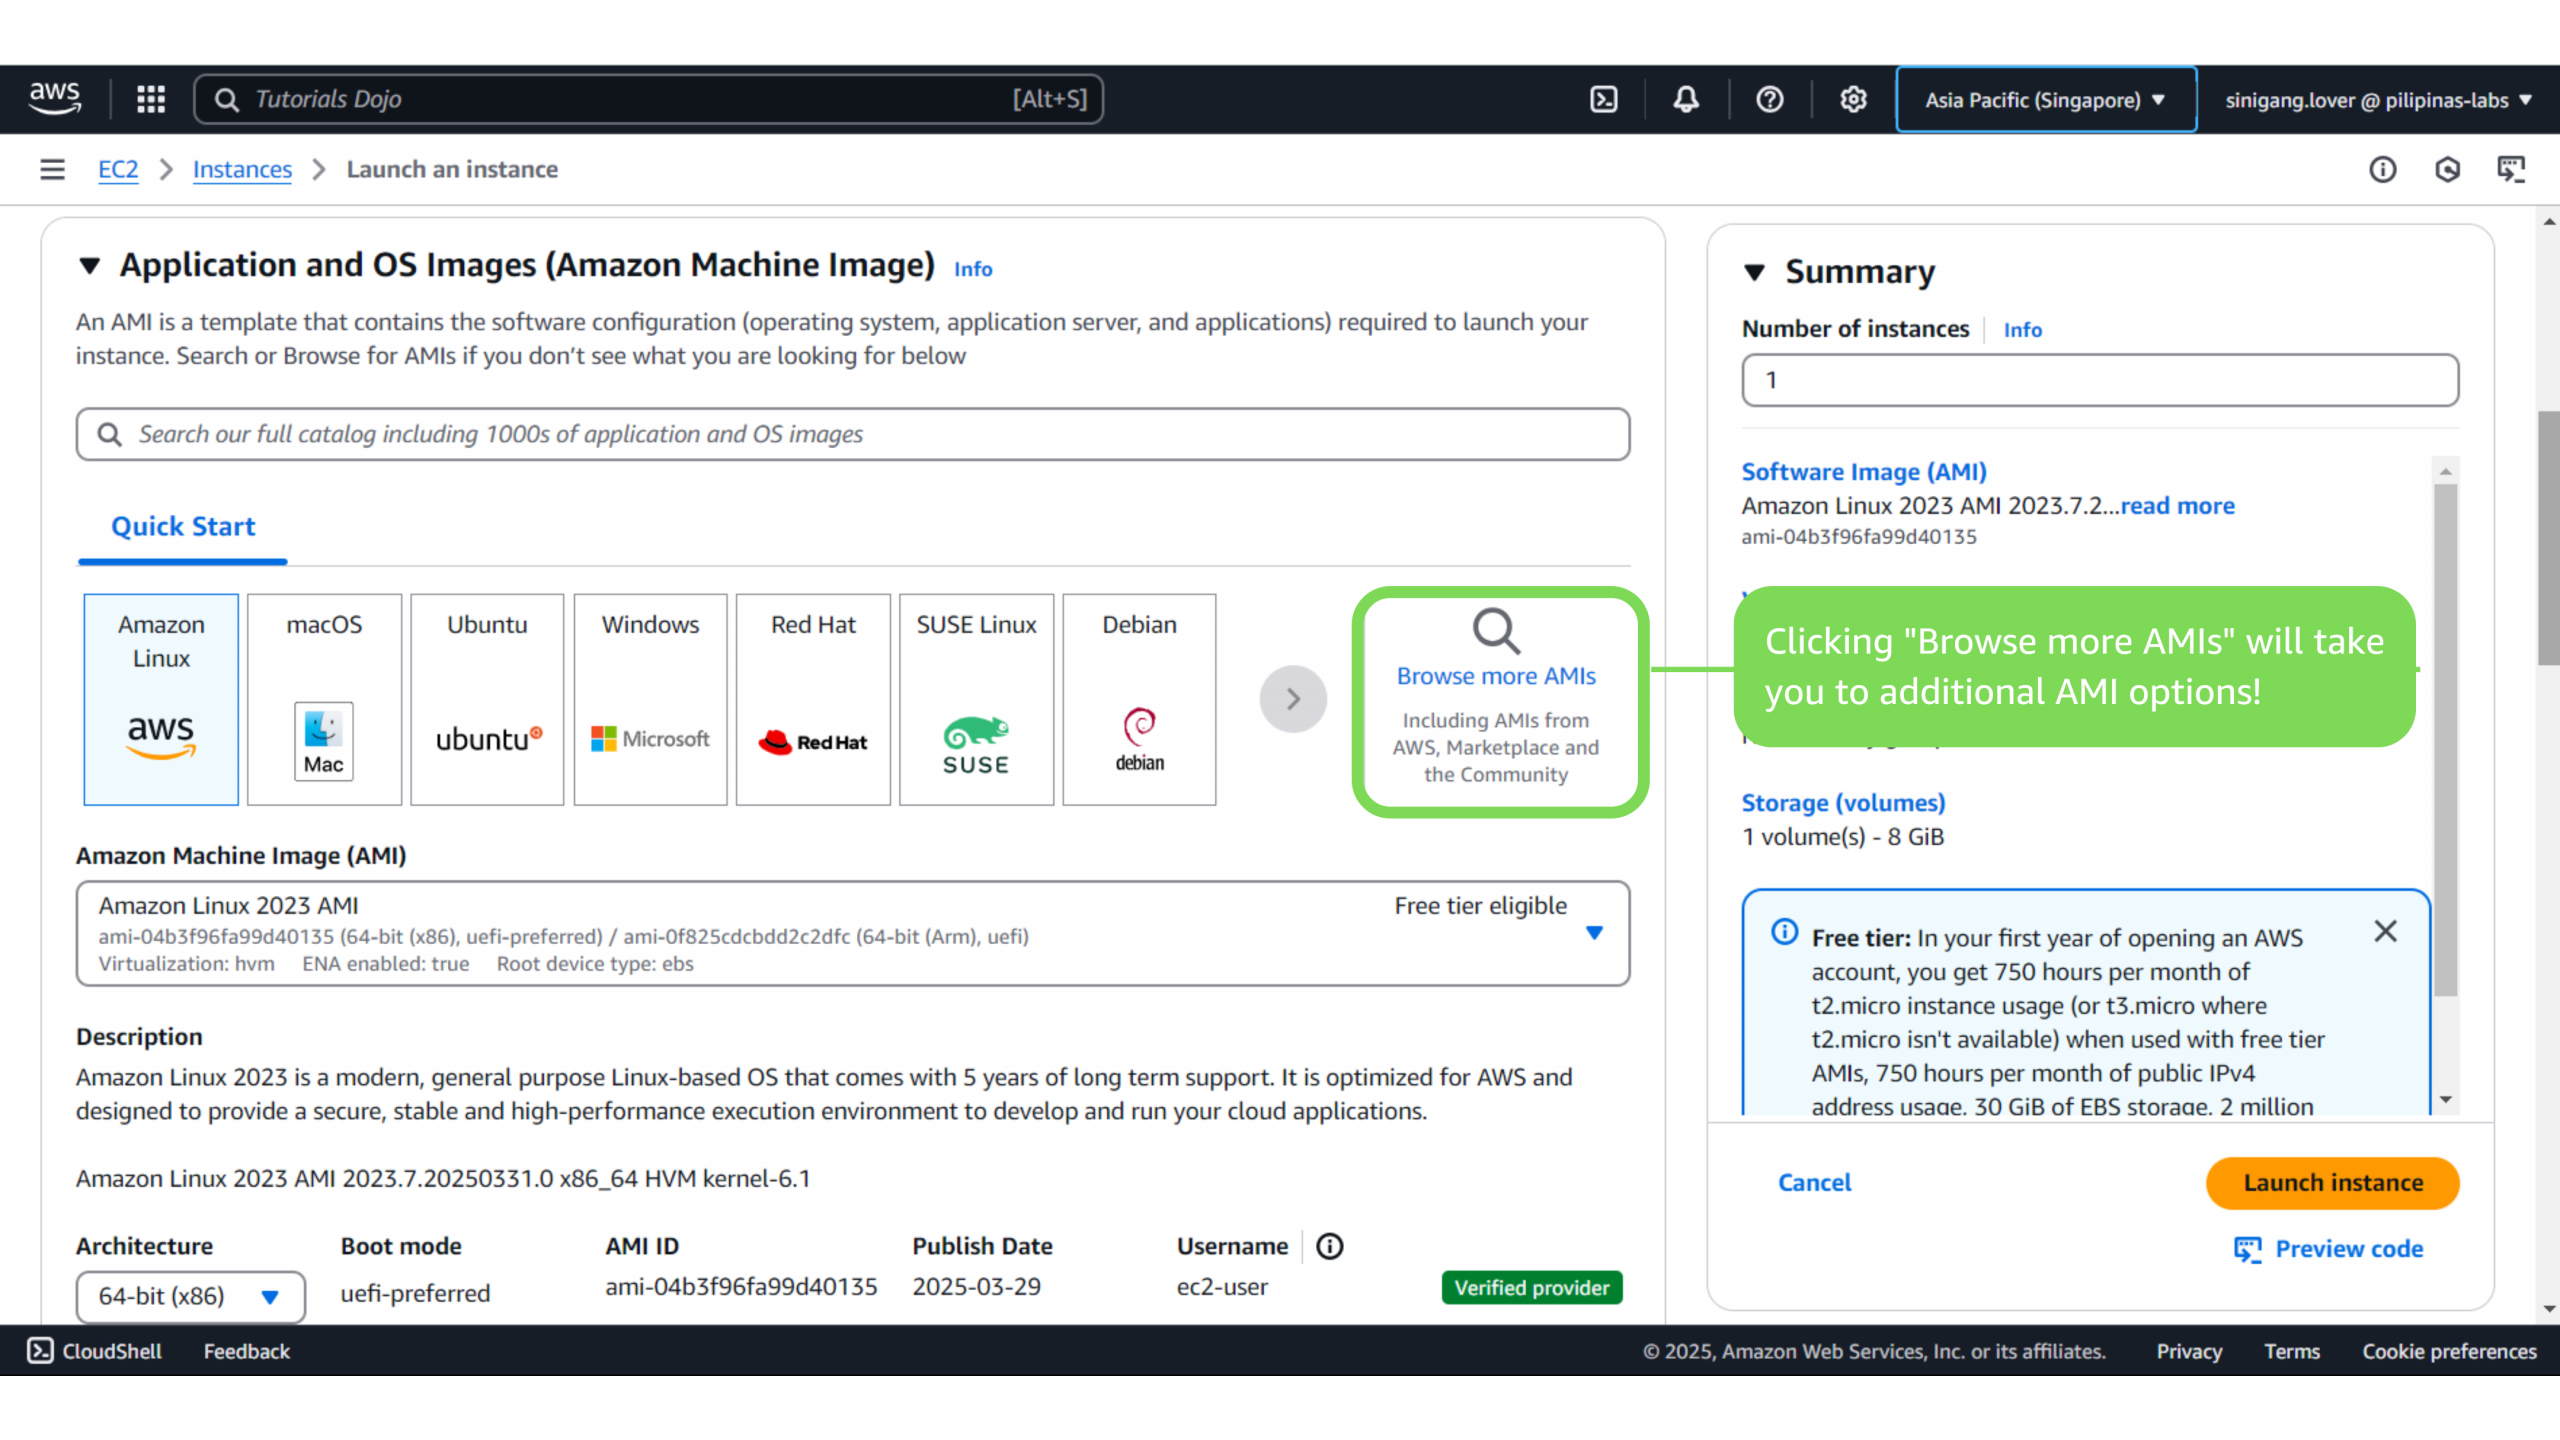
*This is the screen in the AWS console where you select the operating system (AMI) for your new EC2 instance. Notice the 'Free tier eligible' tags, which are important to select to avoid costs.*
2. Instance Type: This defines the hardware resources (CPU, RAM) for your instance. The t2.micro instance type is typically included in the Free Tier and is sufficient for our learning needs.
-
Key Pair: This is a set of cryptographic keys used to prove your identity when connecting to the instance. You will create a key pair, and AWS will provide you with a private key file (a
.pemfile) to download. Guard this file carefully; you cannot download it again. -
Security Group: This acts as a virtual firewall for your instance, controlling inbound and outbound traffic. The default settings will create a rule to allow SSH traffic from any IP address (
0.0.0.0/0). This is fine for our short-term learning but is not secure for production environments. -
Connecting with SSH: After your instance is running, you'll connect to it using Secure Shell (SSH). This is the standard command-line protocol for managing remote servers. The tutorial provides the exact
sshcommand to use, which will look something like this:ssh -i /path/to/your-key-file.pem ubuntu@public_dns_of_your_instanceYou'll run this command from the terminal on your own computer (e.g., Terminal on macOS/Linux or PowerShell/WSL on Windows).
-
Cleaning Up: This is the most critical step. Cloud resources cost money. The Free Tier is generous, but once you are finished with an instance, you must terminate it to stop incurring charges. The tutorial's "Step 3: Clean up your instance" shows you exactly how to do this.
Test your understanding!
Based on what you've just learned, what is the primary difference in how you are charged for resources when using a local VirtualBox VM versus an AWS EC2 instance?
Show answer
A local VirtualBox VM uses the resources (CPU, RAM, disk space) of your own physical computer. There are no direct monetary costs associated with running it, as you already own the hardware.
An AWS EC2 instance runs on hardware owned by Amazon in their data centers. You are charged for the time the instance is running, based on the resources you've allocated (instance type, storage, etc.). While the AWS Free Tier can cover costs for beginners, it is fundamentally a pay-as-you-go service.
Conclusion and Next Steps
Congratulations on completing this foundational lesson! You now have the practical skills to create your own Linux practice environment, which is the launchpad for everything else in this course.
Key Takeaways:
- A local virtual machine (using VirtualBox) is a free, isolated environment running on your own computer, ideal for safe experimentation.
- A cloud instance (like AWS EC2) is a virtual server running in a provider's data center, which mirrors how modern applications are deployed in the real world.
- The setup process for a VM involves installing virtualization software, obtaining an OS image (ISO), and configuring the virtual hardware.
- The setup process for an EC2 instance involves selecting an image (AMI), instance type, and configuring security (key pairs, security groups) through a web console.
- Always remember to terminate cloud resources when you are done with them to avoid unexpected costs.
For the upcoming lessons in this module, either environment will work perfectly. I recommend using the VirtualBox VM you created as your primary environment for now. It's simple, always available, and carries no risk of cost.
In our next lesson, we will boot up your new Linux system and take our first steps inside it. You'll learn how to navigate the Linux file system using absolute and relative paths, a fundamental skill for working on any Linux machine.