Hello! Welcome to the final lesson in our first module on Django Project Setup and Architecture.
In our previous lessons, we've gone from an empty directory to a fully structured Django project. We've created the project, configured its settings, and even scaffolded and registered our first app. You've already had a sneak peek at running the server to see a view in action.
Today, we will formalize that last, crucial step. This lesson is dedicated to starting the Django development server, understanding its purpose and limitations, and verifying that your entire project setup is working correctly. This is the moment where your project "comes alive" in the browser, confirming that all the foundational pieces are in place.
1. The Role of manage.py
Throughout this module, you've seen us use the command python manage.py <command>. Before we run the server, it's worth taking a moment to understand what this file does.
Django provides a command-line utility called django-admin for administrative tasks. However, when you create a project, Django also generates a manage.py file in your project's root directory. Why have both?
To understand the relationship between them, let's turn to the official documentation.
This section of the Django documentation clearly explains the purpose of manage.py and its relationship to the django-admin utility.
Read the introductory paragraphs, starting from 'django-admin is Django’s command-line utility...' down to just before the 'Usage' section. Focus on the key difference highlighted: how manage.py handles your project's settings.
In short, manage.py is a thin wrapper around django-admin that does one critical thing for you: it sets the DJANGO_SETTINGS_MODULE environment variable to point to your project's settings.py file.
This is why we use python manage.py for project-specific tasks like creating apps (startapp) or running the server (runserver). It ensures that Django's commands are executed within the context of your project's specific configuration.
2. Running the Development Server
With that context, let's run the main command for this lesson. The runserver command starts a lightweight web server on your local machine, built purely in Python.
This video provides a clear, concise demonstration of starting the server and seeing the result.
Django Tutorial for Beginners – Build Powerful Backends
In this clip from Programming with Mosh, you'll see the standard runserver command in action and the successful output in the browser.
Watch the segment from 16:46 to 18:41. In your own project terminal (with your virtual environment activated), run the same command: python manage.py runserver.
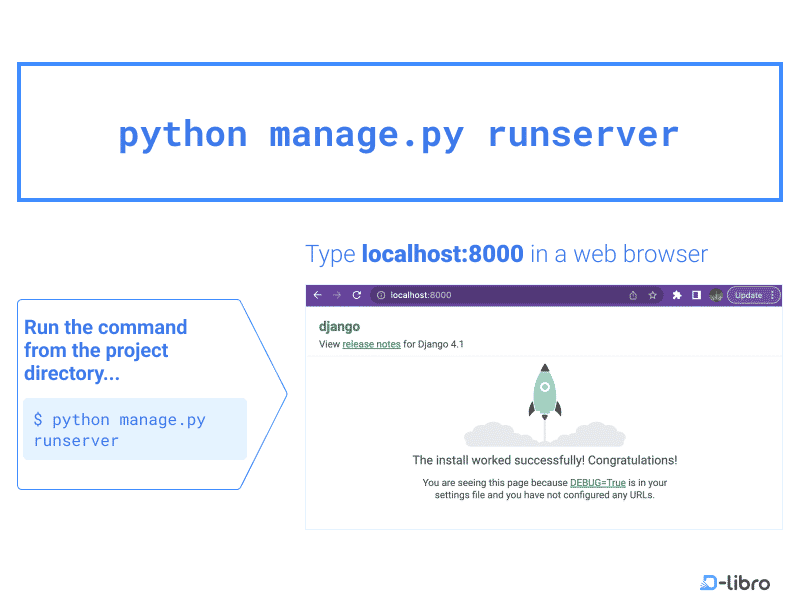
After running the command, you should see output in your terminal indicating the server has started. A key line will be:
Starting development server at http://127.0.0.1:8000/
You might also see a warning about "unapplied migrations." This is expected and normal; we will cover migrations in detail when we discuss models and databases. For now, it's safe to ignore.
Now, open your web browser and navigate to http://127.0.0.1:8000/. You should be greeted by Django's default success page.
Key Characteristics of the Dev Server
The development server is a fantastic tool, but it's important to understand its specific purpose.
- For Development Only: As its name implies, this server is intended only for use while developing. It has not been built for security or performance and should never be used in a production environment.
- Automatic Reloading: The server automatically reloads your Python code for each request. This means you can make changes to your files (like in
views.py), save them, and simply refresh your browser to see the changes without needing to restart the server. This feature significantly speeds up the development workflow.
3. Customizing and Troubleshooting
While python manage.py runserver works perfectly for basic local development, you'll often need to customize its behavior or troubleshoot common issues.
Changing the Port and IP Address
By default, the server runs on port 8000 and is only accessible from your own computer (127.0.0.1).
- To use a different port, simply specify it after the command:
python manage.py runserver 9000 - To make your server visible to other devices on your network (e.g., testing on a mobile phone or showing a colleague), you can bind it to your machine's network IP or, more commonly, to
0.0.0.0:
python manage.py runserver 0.0.0.0:8000
Binding to 0.0.0.0 tells the server to listen on all available network interfaces. However, doing this introduces a security consideration.
The DisallowedHost Error and ALLOWED_HOSTS
When you try to access the development server from a different IP address or hostname than 127.0.0.1 or localhost, Django will block the request and raise a DisallowedHost error. This is a security measure to prevent HTTP Host header attacks.
To permit access, you must explicitly add the host or IP address to the ALLOWED_HOSTS list in your settings.py file.
The following video provides an excellent practical demonstration of running the server on a public IP, encountering the DisallowedHost error, and resolving it.
How to Start a Django Project and Run the Development Server
Tony Teaches Tech walks through a very common scenario: making your development server accessible remotely and fixing the inevitable ALLOWED_HOSTS error.
Watch from 01:38 to 05:35. Pay close attention to the command used to run the server on 0.0.0.0 and the exact change made to the settings.py file to resolve the error.
This is a crucial piece of practical knowledge. Any time you deploy your application or need to access the dev server from another machine, you will need to configure ALLOWED_HOSTS.
Test your understanding!
You are developing your Django project on a laptop with the local network IP address 192.168.1.55. You want to test how the site looks on your smartphone, which is connected to the same Wi-Fi network.
What two things must you do to start the server on your laptop and successfully view the site on your phone's browser?
Show answer
- Run the server with the correct IP and port. In your terminal on the laptop, you would run:
python manage.py runserver 0.0.0.0:8000
(Orpython manage.py runserver 192.168.1.55:8000) - Update
ALLOWED_HOSTSinsettings.py. You would need to add your laptop's IP address to the list:
Then, on your phone's browser, you would navigate toALLOWED_HOSTS = ['192.168.1.55']http://192.168.1.55:8000.
Conclusion
Congratulations! You have successfully completed the first module of this course. You now have the skills to create, configure, and run a foundational Django project.
Key Takeaways:
- The
python manage.py runservercommand starts Django's built-in, lightweight development server. - This server is for development purposes only and features helpful tools like automatic code reloading.
- You can customize the server's port and IP address (e.g.,
runserver 0.0.0.0:8000) to make it accessible on your network. - For security, any hostname or IP used to access your site must be added to the
ALLOWED_HOSTSlist in yoursettings.pyfile.
With a running project, we are now ready to start building features. In our next lesson, we will begin Module 2 by exploring the heart of how Django handles web traffic: the request-response cycle. We'll trace the journey of a user's request from their browser, through Django's URL routing, to a view, and back out again as a response.