Hello! Welcome to the next lesson in our exploration of Django's authentication and authorization system.
In our last session, we covered authentication—verifying who a user is—by protecting class-based views with the LoginRequiredMixin. Today, we move on to the other side of the security coin: authorization, which is about determining what an authenticated user is allowed to do.
Our learning goal is to restrict access to views based on user permissions using @permission_required and PermissionRequiredMixin. You'll learn how Django's built-in permission system works and how to apply it to both function-based and class-based views to build more secure and role-based applications.
Understanding Django's Permission System
Before we can restrict access, we need to understand what permissions are and how they're managed. At its core, Django's permission system is tied directly to your application's models.
When you run manage.py migrate for an app that has models, Django automatically creates four default permissions for each model:
add: The user can add new objects.change: The user can edit existing objects.delete: The user can delete objects.view: The user can view objects.
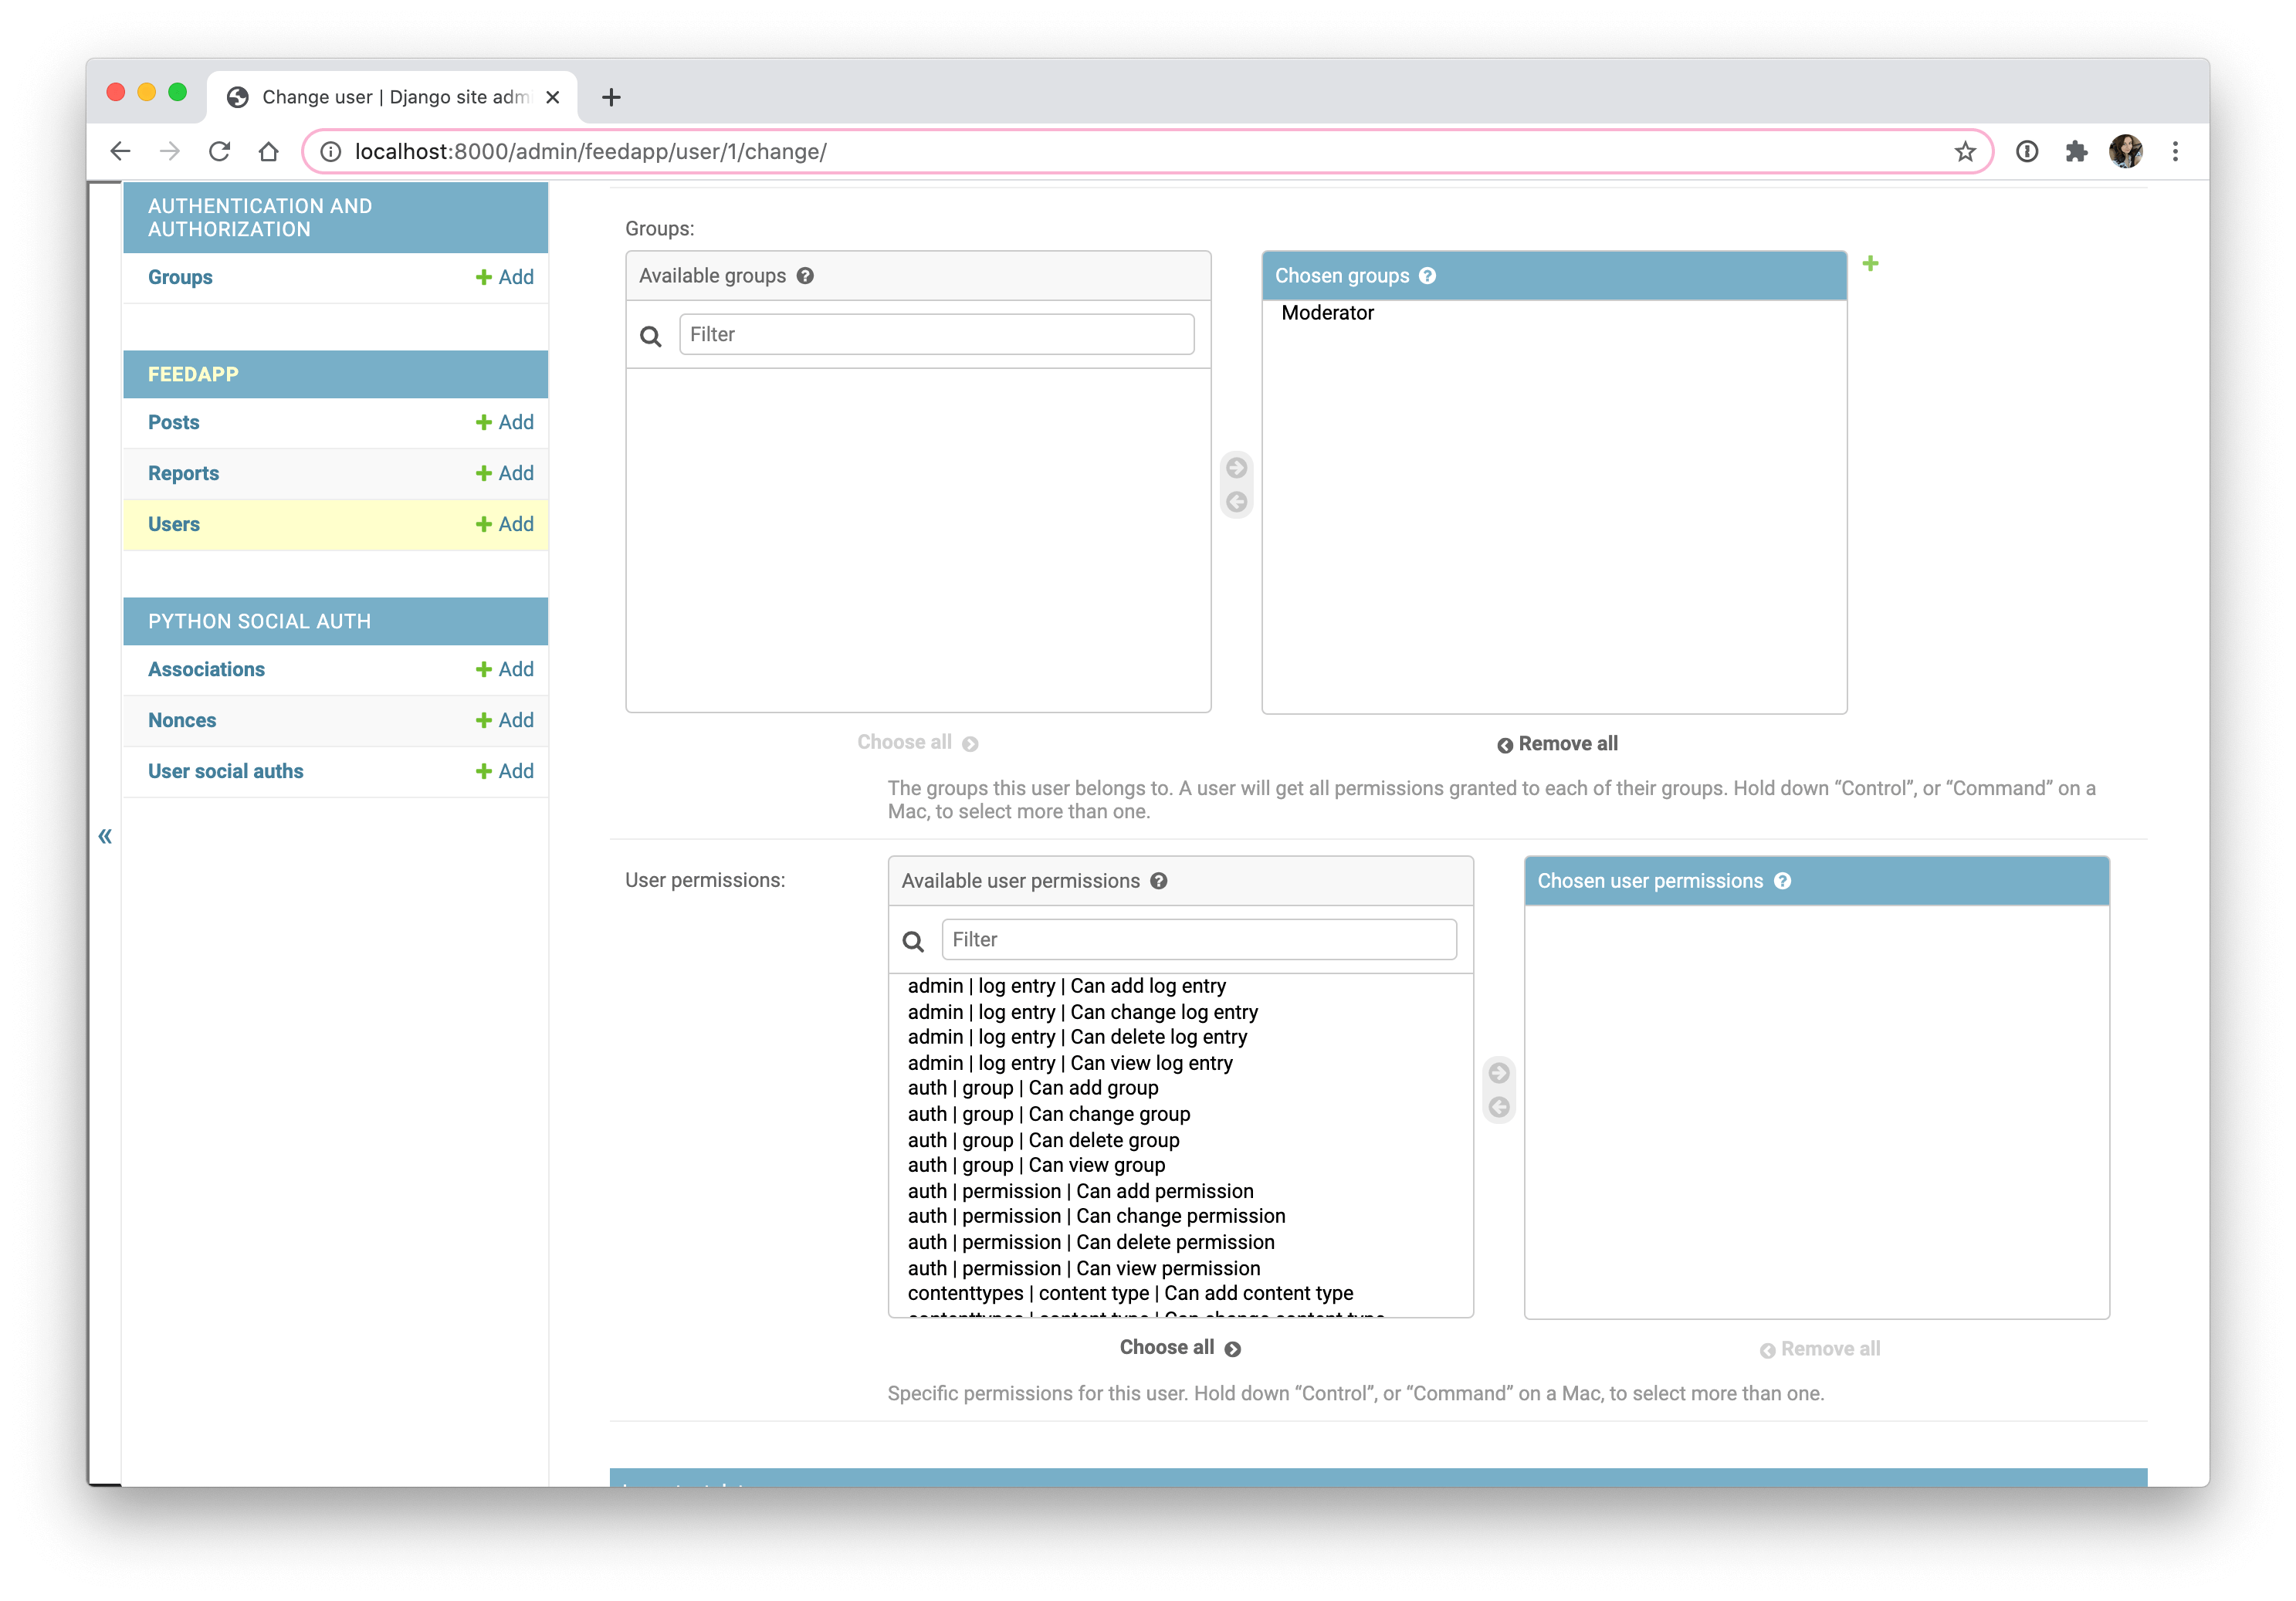
These permissions can be assigned to individual users, but the more scalable and common practice is to assign them to Groups. You can create groups like "Editors," "Moderators," or "Subscribers," assign a set of permissions to each group, and then add users to those groups. Any user in a group inherits all of its permissions. Your background in designing systems will likely appreciate this abstraction, as it simplifies permission management significantly.
The following video provides an excellent deep dive into these concepts, explaining the User, Group, and Permission models and how they relate to each other in the database.
Django Permissions system - deep dive with Users, Groups and Permissions
To start, watch this overview of Django's native permission system. It clearly explains the core models involved and how default permissions are generated for your models.
Watch from the beginning to 05:26. Pay close attention to the relationship between the User, Group, and Permission models, and the concept of model-level permissions (e.g., a user can view all documents, not just a specific one).
Permissions and group memberships are typically managed through the Django admin interface.
Restricting Function-Based Views with @permission_required
For function-based views (FBVs), Django provides the @permission_required decorator. It's a straightforward way to ensure a user has a specific permission before they can access a view.
The permission is specified in the format app_label.codename. The codename is typically action_modelname, for example, blog.change_post.
from django.contrib.auth.decorators import permission_required

# User must have the 'add_choice' permission on the 'polls' app's model.
@permission_required('polls.add_choice')
def my_view(request):
    # ... view logic
By default, if a user is logged in but lacks the permission, the @permission_required decorator redirects them to the login page (settings.LOGIN_URL). This might not be the desired behavior; often, you want to show a "Permission Denied" error instead.
To achieve this, you can combine it with the @login_required decorator from our previous lessons and set raise_exception=True. This will cause Django to return an HTTP 403 Forbidden response.
from django.contrib.auth.decorators import login_required, permission_required

@login_required
@permission_required('polls.add_choice', raise_exception=True)
def my_view(request):
    # ... view logic
The video you started earlier has a fantastic practical demonstration of using this decorator.
Django Permissions system - deep dive with Users, Groups and Permissions
Let's continue with the 'Django Permissions system' video to see a practical example of applying the @permission_required decorator to a function-based view.
Watch from 07:31 to 12:45. The presenter secures a document list view, demonstrates how a superuser bypasses the check, and shows how a regular user gets a 403 error. Observe how they then grant the permission to the user via the admin panel to allow access.
Restricting Class-Based Views with PermissionRequiredMixin
For class-based views (CBVs), we use a mixin, just as we did with LoginRequiredMixin. The PermissionRequiredMixin provides the same functionality as the decorator but in a way that integrates cleanly with CBVs.
You add it to the view's inheritance list (again, it should be one of the first) and specify the required permission using the permission_required class attribute.
from django.contrib.auth.mixins import PermissionRequiredMixin
from django.views.generic.edit import UpdateView
from .models import Article

class ArticleUpdateView(PermissionRequiredMixin, UpdateView):
    model = Article
    fields = ['title', 'body']
    success_url = '/articles/'

    # The permission required to access this view
    permission_required = 'news.change_article'
A key difference in default behavior is that PermissionRequiredMixin returns a 403 Forbidden response for logged-in users who lack the necessary permission. This is often the behavior you want and aligns with setting raise_exception=True on the decorator.
The following video provides a clear walkthrough of setting up a user group and then protecting a CBV with this mixin.
Learn Django - Class-Based Permission Checks
This video from Very Academy focuses specifically on using PermissionRequiredMixin with class-based views. It walks through creating a group, assigning permissions, and applying the mixin.
Watch from 01:04 to 12:07. Focus on how a group is created in the admin (06:30), how a user is added to it, and how the PermissionRequiredMixin is applied to an UpdateView (09:01) to restrict access.
For a concise textual summary of both approaches, the Mozilla Developer Network guide is a great reference.
Django Tutorial Part 8: User authentication and permissions
This article from MDN provides a quick, clear summary of how to use both @permission_required and PermissionRequiredMixin.
Read the section titled 'Views'. It shows the code for both the function-based decorator and the class-based mixin, and clearly notes the difference in their default behavior when a permission check fails.
Test your understanding!
You are building a project management app. You have a Project model in an app named projects. You want to create a view that allows users to delete a project, but only if they are in a "Project Managers" group that has the delete_project permission.
You decide to use a class-based DeleteView. How would you write this view to enforce the permission requirement?
Show answer
You would use the PermissionRequiredMixin and set the permission_required attribute. Remember to also import reverse_lazy for the success_url as is best practice for CBVs.
from django.contrib.auth.mixins import PermissionRequiredMixin
from django.views.generic.edit import DeleteView
from django.urls import reverse_lazy
from .models import Project

class ProjectDeleteView(PermissionRequiredMixin, DeleteView):
    model = Project
    success_url = reverse_lazy('project-list') # Assuming you have a URL named 'project-list'

    # This is the key part for authorization
    permission_required = 'projects.delete_project'
Any authenticated user who is not a superuser and does not have the projects.delete_project permission (either directly or through a group) will receive a 403 Forbidden error when trying to access this view.
Advanced Permission Handling
While blocking entire views is the most common use case, Django's permission system also allows for more granular control.
1. Checking Permissions in Views and Templates:
Sometimes you don't want to block a whole page, but just hide a specific button or section. You can check for permissions directly:
- In a view:
request.user.has_perm('app_label.permission_codename') - In a template:
{% if perms.app_label.permission_codename %}
This is useful for conditionally rendering UI elements, like showing an "Edit" button only to users who can actually edit.
2. Creating Custom Permissions:
Beyond the default add, change, delete, and view, you can define your own custom permissions in a model's Meta class. This is useful for actions that don't map directly to CRUD operations, like can_publish_article or can_verify_user.
class Article(models.Model):
    # ... model fields

    class Meta:
        permissions = [
            ("can_publish_article", "Can publish article"),
        ]
After adding this, you need to run makemigrations and migrate to add the new permission to the database. You can then use it just like any other permission.
Conclusion
You've now learned how to implement authorization, the crucial second step in securing your Django application. By leveraging groups and Django's permission tools, you can build robust, role-based access control.
Key Takeaways:
- Django automatically creates
add,change,delete, andviewpermissions for each model. - Using Groups is the best practice for managing permissions for multiple users.
- Use the
@permission_requireddecorator to protect function-based views. Addraise_exception=Trueto return a 403 error. - Use the
PermissionRequiredMixinto protect class-based views, which returns a 403 error by default for unauthorized users. - You can check permissions conditionally in templates (
{{ perms }}) and views (user.has_perm()) for more granular control.
Preview of the Next Lesson:
We are now at a turning point in the course. Having covered the fundamentals of building a traditional, server-rendered Django application, we will now shift our focus to building REST APIs. In the next module, we'll install Django REST Framework (DRF) and dive into its core concept: Serialization, the process of converting complex data types, like Django model instances, into a format that can be easily rendered into JSON.