Hello! Welcome back.
In our last lesson, you created the essential skeleton of an HTML document with the <!DOCTYPE html>, <html>, <head>, and <body> elements. Your index.html file is a valid webpage, but it's currently a blank canvas.
Today, we'll start filling that canvas. This lesson focuses on the fundamental task of structuring text content. You will learn how to use heading, paragraph, and line break elements. By the end, you'll be able to take a plain block of text and organize it into a clear, readable hierarchy—a core skill for presenting any information on the web.
Why Structure Matters: Whitespace and Line Breaks
First, let's address a common point of confusion for newcomers to HTML. If you open your index.html file and type several lines of text inside the <body>, hitting "Enter" to separate them, you might be surprised by the result.
<body>
  This is the first line.
  This is the second line.
</body>
When you view this in your browser, it will appear as: "This is the first line. This is the second line."
This happens because HTML is whitespace insensitive. Browsers collapse multiple spaces, tabs, and newlines in your code into a single space when rendering the page. To control the structure, you need to use specific HTML tags.
The simplest way to force a line break is with the <br> tag. Let's watch a short video that explains this concept and introduces the <br> tag.
HTML5 and CSS3 beginner tutorial 4 - Line breaks, paragraphs and headings
This video from Quentin Watt Tutorials clearly demonstrates why hitting 'Enter' in your code doesn't work as you might expect and introduces the <br> tag as the solution for creating a line break.
Watch from 00:33 to 03:26. Pay close attention to the explanation of 'whitespace insensitivity' and see how the <br> tag is used to force a new line.
The <br> tag is what's known as a void element (or self-closing tag). It doesn't have content inside it, so it doesn't need a closing tag like </br>. You simply place it where you want a line break.
Creating Paragraphs
While <br> is useful for breaks within a single thought (like lines in a poem or an address), a more common and structured way to separate blocks of text is by using the paragraph tag, <p>.
Wrapping text in <p> and </p> tells the browser that this is a distinct paragraph. Browsers automatically add some vertical space (a margin) before and after each paragraph element, which helps to visually separate them.
This next video segment demonstrates how to create paragraphs and highlights the readability benefits in both the browser and your code.
HTML5 and CSS3 beginner tutorial 4 - Line breaks, paragraphs and headings
Continuing with the same instructor, this clip explains how to use the <p> tag to create paragraphs and shows the difference in spacing compared to a simple line break.
Watch from 03:15 to 05:12. Notice how the browser adds space between the two paragraph elements.
Building a Hierarchy with Headings
Paragraphs and line breaks help organize the body of your text, but to create a clear structure for your entire page, you need headings. Headings give readers a quick sense of the page's content and how it's organized.
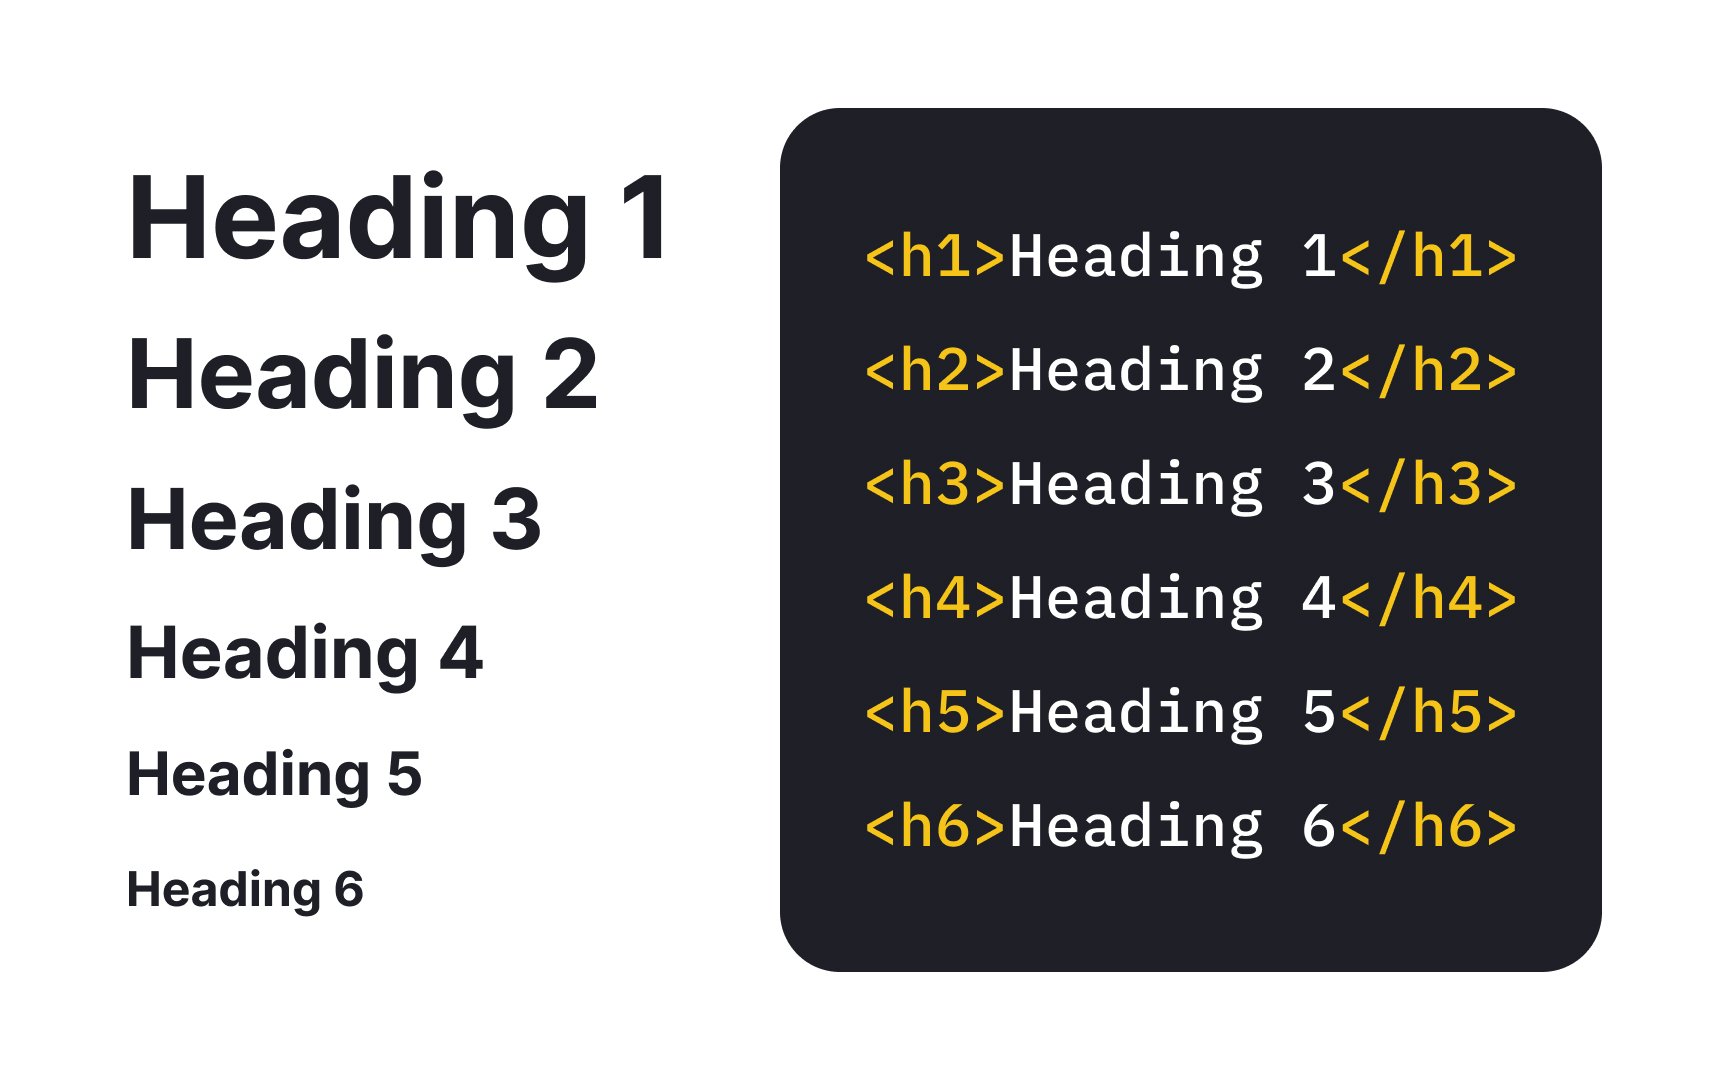
HTML provides six levels of headings, from <h1> to <h6>.
<h1>: The most important heading, typically used once per page for the main title.<h2>: A major section heading.<h3>: A sub-section heading.- ...and so on, down to
<h6>for the least important subheading.
It's crucial to understand that these tags are for structural hierarchy, not just for styling text. Search engines and accessibility tools like screen readers rely on this hierarchy to understand your content's layout. You should use them in logical order (e.g., don't skip from an <h1> to an <h4>).
This quick video shows how the different heading tags look.
This clip from the Bro Code video we saw in the last lesson provides a fast demonstration of all six heading levels.
Watch from 05:45 to 06:28 to see a quick demonstration of <h1> through <h6>.
To give you a clear reference, this image shows the code and the typical browser rendering side-by-side.
Reading and Best Practices
To bring all this together and learn some important best practices, please read the following sections from a freeCodeCamp article. It will serve as a great summary and reference.
HTML for Beginners – HTML Basics With Code Examples
This article, 'HTML for Beginners', provides concise definitions and examples for the tags we've just discussed. It also includes important advice on when and when not to use them.
Please read the following parts of the article: Under the 'Tags and Elements' heading, read the subsections for 'Headings', 'Paragraph', and 'Line Breaks'. Scroll down to the main 'Best Practices' heading and read points 1 and 3, which discuss the proper use of these tags.
A key takeaway from the best practices is to not use tags for visual styling. For example, don't use a heading just to make text bold, and don't use <br> tags to create space between elements. We will learn the correct way to handle styling with CSS in a later module.
Practice: Structuring Your First Page
Now it's time to apply what you've learned. Open the index.html file you created in the last lesson and replace its empty <body> with the code below. Your task is to add the necessary <h1>, <h2>, <p>, and <br> tags to structure this text.
Instructions:
- Make "My Journey into Web Development" the main heading of the page (
<h1>). - Make "The Beginning" a secondary heading (
<h2>). - The text block below "The Beginning" should be a single paragraph (
<p>). - Make "My Goals" another secondary heading (
<h2>). - The text block below "My Goals" should also be a single paragraph (
<p>). - Inside the "My Goals" paragraph, add a line break (
<br>) after "full-stack development".
Here is the unstructured text to put in your <body>:
My Journey into Web Development

The Beginning
This is the start of my coding adventure. I'm building my first webpage from scratch. It's exciting to see how a few lines of code can create something that appears in a web browser.

My Goals
I'm learning HTML to build a strong foundation. My ultimate goal is to become proficient in full-stack development. This means learning frontend technologies like CSS and JavaScript, as well as backend systems.
Once you've added your tags, save the file and view it in your browser using Live Server.
Click here to see the solution.
<body>
  <h1>My Journey into Web Development</h1>

  <h2>The Beginning</h2>
  <p>This is the start of my coding adventure. I'm building my first webpage from scratch. It's exciting to see how a few lines of code can create something that appears in a web browser.</p>

  <h2>My Goals</h2>
  <p>I'm learning HTML to build a strong foundation. My ultimate goal is to become proficient in full-stack development.<br>This means learning frontend technologies like CSS and JavaScript, as well as backend systems.</p>
</body>
Conclusion
Great work! You've taken your first steps in making web content meaningful and readable. By structuring text, you're not just organizing it for human eyes, but also for the machines that help us navigate the web.
Here are the key takeaways from this lesson:
- HTML ignores extra whitespace in your code; use tags to create structure.
- Headings (
<h1>-<h6>) define the structural hierarchy of your content. - Paragraphs (
<p>) are used to group blocks of text. - Line breaks (
<br>) are used to force a new line within an element.
In the next lesson, we will continue exploring how to structure content by learning how to create ordered and unordered lists, which are essential for organizing items like navigation links, feature lists, and steps in a process.