Hello! Welcome back to our module on "The Mixing Framework."
In our last lesson, we established the critical first step of any professional mix: developing a strategy. You learned how to analyze a raw recording to create a "problem list" and how to use reference tracks as your "North Star" to guide your decisions.
Now, with a clear plan in mind, it's time to get hands-on and build the foundation of our mix. This lesson is about creating the static mix. This is arguably the most important stage of mixing, where we establish the core balance of the song using only two tools: the volume fader and the pan knob. Our goal is to create an initial static mix by setting volume levels and panning positions before applying any other processing like EQ or compression.
If you get this stage right, the rest of the mix will fall into place much more easily.
1. The "Fader-Only" Philosophy
Before we touch any controls, it's important to understand the philosophy behind the static mix. The core idea is that a great song should sound good with just its volume levels and stereo placement balanced correctly. No amount of fancy EQ or compression can fix a mix where the instruments are fighting for attention at a fundamental level.
As the creator of the popular synth Serum, Steve Duda, once said, he could likely do a better mix than most students just by using faders. This highlights the immense power of getting the levels right.
Mixing EDM: The Complete Beginner's Guide
This short excerpt from the article 'Mixing EDM: The Complete Beginner's Guide' from EDMProd reinforces this fundamental concept.
Please read the section titled 'Volume'. Focus on the main takeaway: focus first on the volume of each track. Notice how drastically the audio examples change with only volume adjustments.
This initial fader-and-pan balance is called a "static" mix because we aren't yet using automation to make levels change over time. We are finding the single best balance for the most important section of the song.
2. The Static Mix Workflow: Setting Levels
So, how do we build this static mix? While there are a few methods, the most common and effective workflow involves building the mix from the ground up.
Let's watch a video that demonstrates this process clearly.
How to ACE the static mix (levels and panning)
The following video from Mastering.com, 'How to ACE the static mix', demonstrates a highly effective workflow. Pay close attention to the process of bringing instruments in one by one based on their importance.
Watch the first four minutes of the video, which cover these key points: Introduction (00:00 - 01:07): Understand the two key elements: volume balance and panning. Balancing in 'Height Order' (01:07 - 02:36): Observe how the mixer pulls all faders down and brings in the lead vocal first, then balances everything else around it. Looping and Grouping (02:36 - 04:04): Notice the technique of looping the loudest section of the song and how it's okay to solo groups (like drums) to get their internal balance right before mixing them with everything else.
To summarize the level-setting workflow:
- Find and Loop the Loudest Section: As discussed in the article "How to Ace the 'Static Mix'", this is usually the last chorus. If you can make the mix work here, where everything is playing at once, it will be much easier to manage the sparser sections later.
- Bring All Faders Down: Start from complete silence. This forces you to make conscious decisions about every single element.
- Build in Order of Importance:
- Identify the most important element of the song. For most pop, rock, and vocal-centric music, this is the lead vocal. For dance music, it might be the kick drum.
- Bring up the fader for this main element until it's at a healthy level on your master meter (a good target is to have its peaks around -10 to -6 dBFS).
- One by one, bring in the other instruments, balancing each new element relative to what's already playing. Ask yourself, "How loud should this snare be compared to the vocal?" or "How loud should this bass be compared to the kick and vocal?"
This iterative process of listening and adjusting is the core of creating the initial balance.
3. Creating Space with Panning
As you add more instruments, the mix can start to sound crowded and "messy," even if the levels are good. This is where panning comes in. Panning is the act of placing a sound somewhere in the stereo field, from hard left to hard right.
The primary goals of panning at this stage are to:
- Create clarity by separating instruments that occupy similar frequency ranges.
- Create a sense of width and space.
- Establish a stable center for the foundational elements.
A common approach is to keep the most important, low-frequency elements in the center and pan other elements around them.
- Center: Lead Vocal, Kick Drum, Snare, Bass Guitar.
- Left/Right: Rhythm Guitars, Keyboards, Synths, Hi-hats, Backing Vocals, Percussion.
Now, let's see how panning is integrated into the workflow.
How to ACE the static mix (levels and panning)
Continuing with the same video, let's see how panning is introduced to create space and clarity.
Watch from 04:55 to 10:29. Notice how: Background vocals are panned hard left and right to create space for the lead vocal. As more elements are added and the mix gets 'messy', panning becomes crucial for separation. It's an iterative process: adjust levels, pan, adjust levels again.
As the video demonstrates, don't be afraid to pan things wide! This is a powerful tool for achieving a wide, professional-sounding mix.
4. Practical Application in FL Studio
Since you're comfortable in FL Studio, let's connect these concepts directly to your DAW. It's crucial to know exactly which knobs and faders to use.
FL STUDIO | Mixing Basics - Levels
Now, let's translate this to your DAW. This official video from the FL Studio channel will clarify exactly which controls to use for setting levels and organizing your mix.
Please watch these two sections: Mixing and Levels (00:38 - 02:32): This gives a quick overview of mixing in FL Studio and shows how to create a bus track for the drums—a great technique for grouping related instruments that we'll cover in more detail soon. FL Studio Level Controls (07:24 - 10:11): This is a very important section. It details the different places you can adjust volume. For our static mix, focus on using the main Mixer Fader for each track.
The key takeaway is to use the main fader on each mixer track for your static mix balance and the pan knob located just above it for stereo placement.
A Practical Vocal Panning Example
Given your interest in vocals, here’s a common way panning is used to create a full, wide vocal sound. You often have a main lead vocal, plus additional layers for harmonies or doubles.
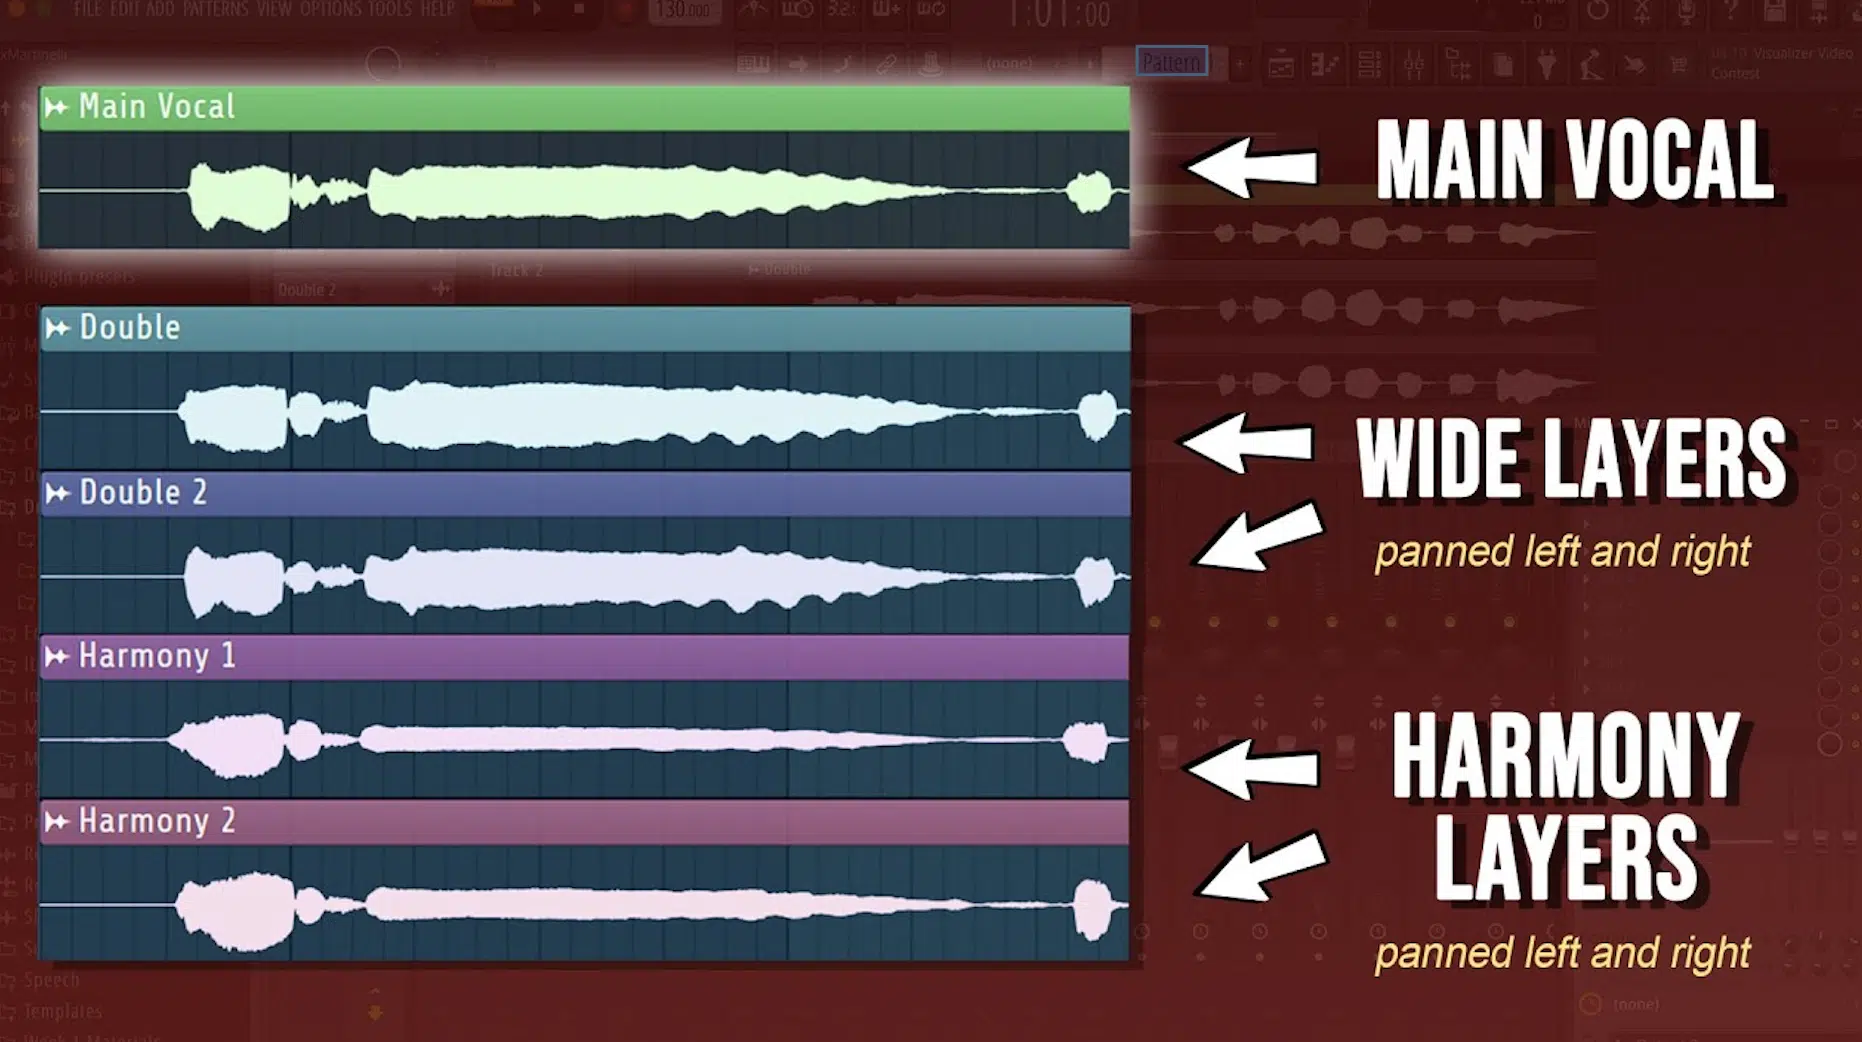
So, how would you pan these layers? Here is a great visual guide.

Test your understanding!
You are starting a static mix for a song. Your raw recording has a lead vocal, a bass guitar, a kick drum, a snare drum, and two different rhythm guitar parts. Following the "balancing in height order" workflow, what is the most likely order you would bring these instruments into the mix, and where would you initially pan them?
Show answer
- Lead Vocal: Bring this in first. Keep it panned to the Center.
- Kick Drum: Bring this in next, balancing it against the vocal. Keep it panned to the Center.
- Snare Drum: Balance this with the vocal and kick. Keep it panned to the Center.
- Bass Guitar: Balance this with the kick, snare, and vocal to form the core groove. Keep it panned Center.
- Rhythm Guitar 1: Pan this to the Left (e.g., 80-100% Left).
- Rhythm Guitar 2: Pan this to the Right (e.g., 80-100% Right) to balance the first guitar and create a wide stereo image.
This approach establishes a powerful, solid center for the rhythm and lead vocal, while using the guitars to create width and space.
Conclusion
Today, we've built the most important part of any mix: the static mix. This foundation, created with only volume and panning, dictates the clarity, power, and overall feel of your track.
Key Takeaways:
- The static mix is the process of setting initial volume levels and pan positions before using any other effects.
- A strong static mix often solves problems that you might otherwise try to fix with EQ or compression.
- The standard workflow is to loop the loudest section, bring all faders down, and then build the mix in order of importance, starting with the lead element.
- Panning is used to create space, width, and separation between instruments, with core elements typically in the center and supporting elements panned to the sides.
In our next lesson, we will build on this foundation. We will take a deeper dive into using panning to position elements in the stereo field and create a sense of width and separation, exploring techniques like the LCR method and how to visualize the mix as a three-dimensional space.