Hello! Welcome to the final lesson in our module on dynamic control.
In the last lesson, we explored sidechain compression, a creative way to use one track's signal to control the dynamics of another. We saw how this can create both rhythmic energy and clarity in a mix. Today, we're shifting our focus to the ultimate tool for controlling peaks and maximizing volume: the limiter.
Your goal for this lesson is to learn how to use a limiter on a bus or master track to prevent peaks from exceeding a target level. This is a critical step in both mixing and mastering, ensuring your tracks are loud, punchy, and free from digital distortion.
1. What is a Limiter?
Think of a limiter as a compressor's very strict older sibling. While a compressor gently reduces the volume of signals above a threshold, a limiter acts like a brick wall. Its primary job is to ensure that absolutely no audio passes above a set output level, known as the ceiling.
This is achieved by using an extremely high, almost infinite compression ratio (e.g., 100:1 or ∞:1). Any signal that tries to exceed the ceiling is slammed down, preventing digital clipping.
How To Use A Limiter: The Definitive Guide (2025)
To start, let's get a clear definition. The article 'How To Use A Limiter: The Definitive Guide' from EDMProd explains this concept well.
Read the section titled 'What Is a Limiter?'. This will solidify the relationship between compression and limiting and introduce the concepts of the 'ceiling' and 'brickwall limiting'.
This "brickwall" nature makes limiters indispensable for two main reasons:
- Safety: Preventing your final mix from clipping the 0 dBFS (decibels Full Scale) digital ceiling.
- Loudness: Allowing you to increase the overall perceived volume of your track without causing distortion from stray peaks.
2. The Key Controls in FL Studio's Fruity Limiter
You're already familiar with the Fruity Limiter plugin from our lessons on compression and gating. Now, we'll focus on its LIMIT tab.
Fruity Limiter Basics | FL Studio 24 (2025)
This short video provides a great, practical introduction to the limiter mode in Fruity Limiter, focusing on the most important controls.
Watch this clip from 0:00 to 01:12. The presenter quickly shows you the difference between the compressor and limiter modes and demonstrates how the 'Ceiling' and 'Gain' knobs work together.
As the video shows, the primary controls you'll use in the LIMIT tab are:
- CEIL (Ceiling): This sets the absolute maximum output level. No sound will pass this point. This is the "target level" you want to prevent your peaks from exceeding.
- GAIN: This is the input gain. You push the volume of your track into the limiter with this knob. As you increase the gain, the limiter works harder to keep the peaks below the ceiling, making the overall track louder.
- ATT (Attack) & REL (Release): These control how quickly the limiter reacts to peaks and how long it takes to stop limiting. For mastering, a very fast attack is crucial to catch transient peaks. Many limiters have a "look-ahead" function, which introduces a tiny delay to the signal so the limiter can "see" peaks coming and react instantly.

For an in-depth look at these controls, the official FL Studio manual is the best source.
Fruity Limiter - Effect Plugin
Let's consult the official documentation for Fruity Limiter. This will give you a precise understanding of each parameter on the LIMIT tab.
Read the sections 'Limiter Controls' and 'Envelope'. Pay close attention to the descriptions for GAIN, CEIL, ATT, and REL. Also, note the explanation of the look-ahead function associated with the ATT knob.
3. Application 1: Limiting the Master Track
The most common use for a limiter is on the master track as the very last plugin in your effects chain. The goal is to make your final mix competitively loud for release while preventing any clipping.
Here is a practical workflow:
- Placement: Add Fruity Limiter to the last slot on your Master mixer track.
- Set the Ceiling: A safe starting point is -0.3 dB to -1.0 dB. Setting it slightly below 0 dB provides "headroom" to prevent intersample peaks, which can occur when your digital audio is converted to an analog signal or a compressed format like MP3.
- Increase Gain: Play the loudest section of your song on a loop. Slowly increase the
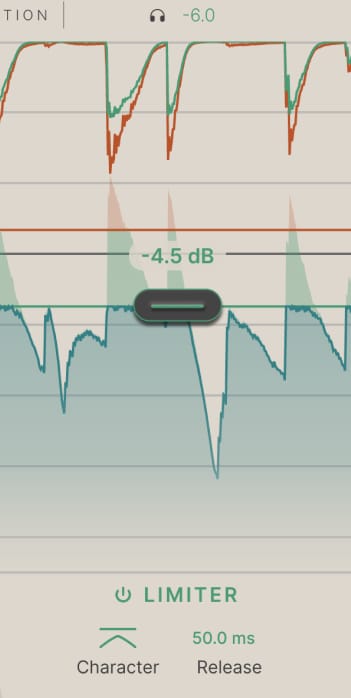
GAINknob. You will see the gain reduction curve on the display start to work, and you'll hear the track get louder. - Listen Critically: The key is to find the sweet spot. Push the gain until you start to hear negative artifacts like distortion or a "squashed," lifeless sound, then back it off slightly. You want loudness, but not at the expense of your mix's dynamics.
This video demonstrates the process in a mastering context. While it uses FL Studio's Maximus, the principle of setting a ceiling and increasing post-gain is identical to what we're doing in Fruity Limiter.
How To Master in FL Studio | Complete Tutorial - Only Stock & All Genres
The video 'How To Master in FL Studio' from Mix Elite shows how to apply a limiter (or maximizer) in the final stage of mastering to achieve target loudness.
Watch from 14:25 to 16:30. Pay attention to how he sets the ceiling to -1 dB for MP3 export and then increases the post-gain to bring up the volume. This is the exact process you will follow with Fruity Limiter's 'Ceil' and 'Gain' knobs.
Test your understanding!
You are preparing a track for Spotify. You place a limiter on your master track and set the ceiling to -0.1 dB. Why might a setting of -1.0 dB be a safer choice for the ceiling?
Show answer
A ceiling of -1.0 dB provides more headroom to prevent intersample peaks. These are peaks that can occur between the digital samples of your audio when it's converted to an analog signal or a lossy format like MP3. These hidden peaks can cause clipping on some playback systems, even if your file's peaks are below 0 dBFS. Setting the ceiling lower is a common practice to ensure clean playback across all platforms.
4. Application 2: Limiting a Bus Track
Limiters are also powerful tools on group buses (e.g., a drum bus). When you send multiple tracks to a bus, their combined peaks can sometimes be unpredictable and overly loud.
Placing a limiter on a bus can help you:
- Control Peaks: Tame the loudest hits (like a sharp snare or cymbal) from a drum kit, preventing them from overwhelming the mix or triggering the master limiter too aggressively.
- Add "Glue": By gently shaving off the peaks and increasing the gain slightly, you can reduce the dynamic range of the group, making the elements feel more cohesive and "glued" together.
How To Use A Limiter: The Definitive Guide (2025)
The EDMProd article we looked at earlier also has a great section on using a limiter for this purpose.
Read the subsection titled 'Group Bus Limiting'. It explains how a limiter can act as a peak controller on a bus and help glue elements together.
For example, on a drum bus, you might set the limiter's ceiling just low enough to catch the very loudest 1-2 dB of the snare peaks. This allows you to turn up the entire drum bus for more impact without the snare causing unwanted spikes in your mix's overall level.
Conclusion
Excellent work! You've now covered the final, crucial component of dynamic control. Using a limiter effectively is the key to producing mixes that sound professional, loud, and clean.
Key Takeaways:
- A limiter is a "brickwall" compressor that prevents audio from exceeding a set Ceiling.
- On the master track, a limiter is used to increase perceived loudness with the Gain knob while setting a safe ceiling (e.g., -0.3 dB to -1.0 dB) to prevent clipping.
- On a bus track, a limiter can control unruly peaks from a group of instruments and help "glue" them together.
- The main skill is balancing the desire for loudness with the need to preserve the dynamics and punch of your mix. Always listen for unwanted distortion.
With EQ, compression, gating, and limiting now in your toolkit, you have a complete set of foundational processors to shape and control any sound.
In our next module, we will shift from controlling dynamics to creating atmosphere and dimension. We'll begin by exploring Reverb, learning how to distinguish between different reverb types and use them to place your vocals and instruments in a convincing virtual space.