Hello! Welcome to your first lesson. I'm excited to start this journey with you into the world of sound engineering.
Given your hands-on learning preference and your goal to master the studio workflow, we're going to dive right into a concept that is the absolute foundation of digital audio: clipping. Understanding this will prevent countless headaches during recording and mixing.
This lesson directly addresses the first learning outcome of the course: explaining the concept of digital audio clipping and the 0 dBFS ceiling. This is the most important rule in digital recording and mixing, and everything we do from here, especially in our first module on gain staging, will build upon this principle. Since you're already proficient in FL Studio, we'll make sure to connect these ideas directly to what you see and hear in your DAW.
What is Digital Clipping?
Let's start with a simple analogy. Imagine your audio signal is water and your recording system is a glass. The glass has a fixed size; you can't pour more water into it than it can hold. If you try, the water overflows and is lost forever.
In digital audio, that "overflow" point is called 0 dBFS, which stands for "decibels full scale." It is the absolute maximum level a digital audio system can handle. Any signal that tries to go louder than 0 dBFS gets its peaks "clipped" off.

This isn't just a visual change; it has a very distinct and unpleasant sound. To get a clear idea of what digital clipping is and why it's a problem, please read the first two sections of the following article. It uses the same water-glass analogy and explains the crucial difference between digital and analog clipping.
Digital Clipping: The Ultimate Guide to Prevention & 32-Bit ...
This article from BOYA provides a fantastic, non-technical introduction to what digital clipping is and why it's so detrimental to your audio.
Please read the first two main sections: 'What Is Digital Clipping and Why Is It So "Brutal"' and 'Digital vs. Analog Clipping: A Tale of Brutality vs. Art'. Focus on understanding the 'chopped off' waveform concept and the sonic difference between harsh digital clipping and the often-desirable warmth of analog saturation.
As you just read, while analog equipment can sometimes produce a pleasant, warm saturation when pushed hard, digital clipping produces harsh, crackling distortion. It's a technical error, not a creative effect.
The Irreversible Damage of Clipping
The most critical thing to understand about digital clipping is that it is permanent. When the waveform is clipped, that information is gone for good. You can't get it back simply by turning the volume down.
To see why, let's watch a short video that visualizes this concept.
How to set Levels to Avoid Clipping (Gain Staging 101)
The channel Learn Audio Engineering provides a great visual metaphor called the 'digital skyscraper' to explain the 0 dBFS ceiling.
Watch the segment from 01:44 to 02:32. Pay close attention to the animation of the waveform hitting the 'ceiling' and being squared off. This directly illustrates why the audio information is lost.
Because the data is permanently lost, prevention is the only real solution. While there are some repair tools that try to "guess" what the clipped waveform should have looked like, they are a last resort and often produce unnatural-sounding results. Recording it correctly the first time is always the best approach.
The 0 dBFS Ceiling in FL Studio
Now, let's bring this into your world: FL Studio. The meters on your Mixer channels show the audio level in dBFS. When a meter's peak reading goes above 0 dB, it will turn red or orange, warning you that clipping is occurring.
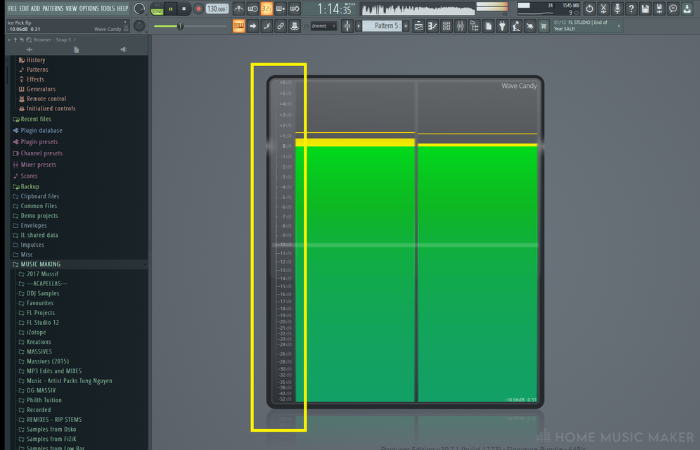
However, there's a crucial detail about how modern DAWs like FL Studio work. You may have noticed that sometimes an individual mixer track can go "into the red" without you hearing obvious distortion. This is because FL Studio's internal audio engine uses a 32-bit floating-point format.
Think of it like this: inside the software, your "glass" has a ridiculously huge amount of extra space (headroom). An individual track can exceed 0 dB, and the data isn't immediately clipped or lost.
BUT, and this is the most important part:
- When the audio is sent to your audio interface to be converted into sound for your speakers or headphones...
- ...or when you export (render) your song to a standard file format like a WAV or MP3...
...that audio passes through a final conversion stage that has a strict 0 dBFS ceiling. At that point, any signal above 0 dB will be clipped permanently.
Therefore, the golden rule is: Individual mixer tracks can go over 0 dB, but your Master Fader must never go over 0 dB.
The official FL Studio manual explains this very well.
This section of the FL Studio manual is essential reading. It clarifies the difference between clipping on an insert (mixer) track versus the Master track.
Please read the section titled 'Using FL Studio Peak Meters'. Focus on the explanation of why audio inside FL Studio (32-bit float) can exceed 0 dB, but why the Master Mixer track output cannot.
Test your understanding!
You are working on a mix in FL Studio. You notice that the mixer track for your lead vocal is peaking at +1.5 dB and the meter is red. However, the Master track meter is peaking at -3.0 dB.
Is your final audio being distorted by digital clipping? Explain why or why not.
Show answer
No, the final audio is not being clipped.
Explanation: Because FL Studio uses a 32-bit float internal audio engine, the lead vocal track has enough headroom to go above 0 dBFS without losing information. As long as the Master track—which sums all the tracks together—remains below 0 dBFS, the signal sent to your speakers and your final rendered file will be clean and free of digital clipping. The -3.0 dB peak on the Master track confirms that you have 3 dB of headroom before clipping would occur.
Conclusion
Excellent work on completing your first lesson. You've just learned the single most important rule in digital audio production.
Here are the key takeaways:
- 0 dBFS (decibels full scale) is the absolute maximum level in any digital audio system.
- A signal that exceeds 0 dBFS results in digital clipping, which creates harsh, unpleasant distortion.
- Digital clipping is an irreversible loss of data. The best way to deal with it is to prevent it from happening in the first place.
- In FL Studio, individual mixer tracks can safely peak above 0 dB due to the 32-bit float engine, but your Master track must always remain below 0 dB to avoid clipping in your final output.
In our next lesson, we'll continue building our foundation by looking at how to set up a new project in FL Studio, specifically focusing on sample rate and bit depth. These settings are another crucial factor in defining the quality of your digital audio.