Hello! Welcome back to our module on "Advanced Configuration, Caching, & Monitoring."
In our last lesson, we saw how Spring Profiles allow us to manage environment-specific properties using application.yml. This is perfect for changing values like database URLs or logging levels. Today, we'll take this concept a step further to control the very structure of our application.
This lesson focuses on implementing profile-specific beans using the @Profile annotation. Instead of just changing property values, you'll learn how to conditionally register entire Java objects—like services, repositories, or configuration classes—based on the active environment. This gives you maximum control, enabling you to, for example, use a mock service for local development and a real one in production.
1. From Configuration Properties to Application Behavior
In the previous lesson, we configured properties for dev and prod environments. But what if the behavior itself needs to change?
Consider a notification system in your application:
- In a
devenvironment, you don't want to send real emails to users during testing. You just want to print the notification to the console. - In a
prodenvironment, you must send a real email.
This requires two different implementations of a notification service. Manually swapping them in the code is not an option. This is exactly the problem the @Profile annotation solves. It lets you tell Spring: "Only create and use this specific bean if a certain profile is active."
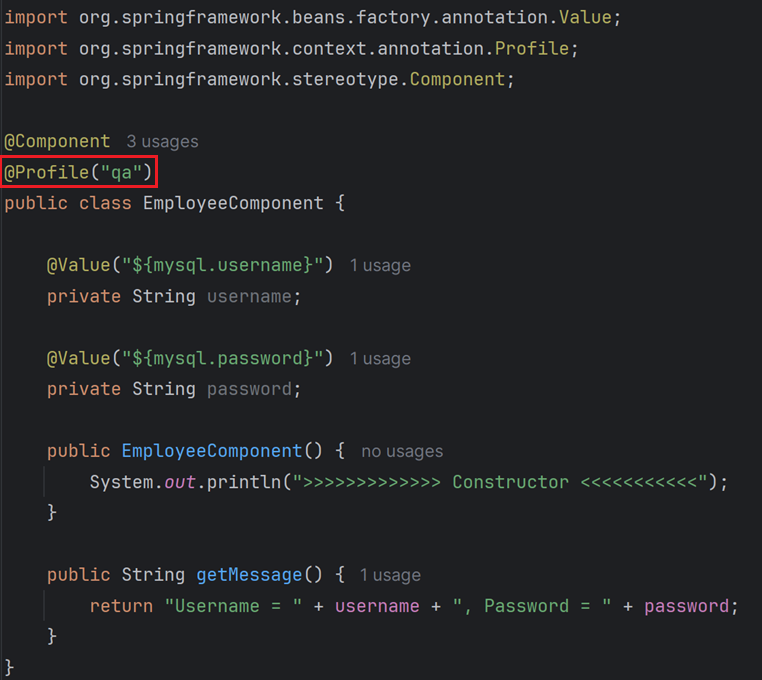
2. How @Profile Works Under the Hood
The @Profile annotation is a powerful conditional tool that integrates deeply into Spring's startup process. Understanding its mechanics will give you the deeper insight you're looking for.
Mechanics of Spring Boot Profiles and Configurations
To understand the core concept, let's start with the article "Mechanics of Spring Boot Profiles and Configurations". It explains how profiles enable the logical grouping of beans.
Read the first two subsections: "What Are Spring Profiles?" and "Logical Grouping of Beans". This will clarify how Spring uses profiles to decide which beans to include in the application context.
As the article explains, beans annotated with @Profile are candidates for inclusion in the Spring ApplicationContext. During application startup, Spring checks the active profile(s) and performs the following steps:
- Scanning: Spring scans your application for components. When it finds a bean with a
@Profileannotation, it marks it as conditional. - Matching: It compares the profile(s) listed in the annotation with the currently active profile(s) (set via
spring.profiles.active). - Registration/Exclusion:
- If there's a match, Spring proceeds to create an instance of the bean and register it in the
ApplicationContext. - If there is no match, the bean is completely excluded. It is never instantiated, and Spring won't try to resolve its dependencies. This is highly efficient, as it avoids creating unnecessary objects and speeds up application startup.
- If there's a match, Spring proceeds to create an instance of the bean and register it in the
Internally, the @Profile annotation is actually a specialized version of a more generic annotation, @Conditional. This provides a clue to its role: it's a gatekeeper that determines whether a component should exist at all.
3. Practical Implementation: A Profile-Specific Notification Service
Let's build the dev vs. prod notification service we discussed earlier. This pattern—an interface with multiple profile-specific implementations—is extremely common in backend development.
Step 1: Define the Interface
First, define a contract for what a notification service should do. Your experience with Java interfaces will be very relevant here.
public interface NotificationService {
    void sendNotification(String to, String subject, String body);
}
Step 2: Create the Development Implementation
This implementation will only log the notification to the console. We'll associate it with the dev profile.
import org.slf4j.Logger;
import org.slf4j.LoggerFactory;
import org.springframework.context.annotation.Profile;
import org.springframework.stereotype.Service;

@Service
@Profile("dev")
public class ConsoleNotificationService implements NotificationService {

    private static final Logger logger = LoggerFactory.getLogger(ConsoleNotificationService.class);

    @Override
    public void sendNotification(String to, String subject, String body) {
        logger.info("--- MOCK NOTIFICATION (DEV PROFILE) ---");
        logger.info("To: {}", to);
        logger.info("Subject: {}", subject);
        logger.info("Body: {}", body);
        logger.info("------------------------------------");
    }
}
Step 3: Create the Production Implementation
This implementation would contain the logic to send a real email. For this example, we'll just log a different message to simulate it. We associate it with the prod profile.
import org.slf4j.Logger;
import org.slf4j.LoggerFactory;
import org.springframework.context.annotation.Profile;
import org.springframework.stereotype.Service;

@Service
@Profile("prod")
public class EmailNotificationService implements NotificationService {

    private static final Logger logger = LoggerFactory.getLogger(EmailNotificationService.class);

    @Override
    public void sendNotification(String to, String subject, String body) {
        // In a real application, you would integrate with an email client library here.
        logger.info("Sending REAL email notification to {} with subject '{}'", to, subject);
    }
}
Step 4: Inject and Use the Service
Now, you can inject NotificationService into any other component. Spring's dependency injection mechanism, guided by the active profile, will provide the correct implementation.
@Service
public class OrderProcessingService {

    private final NotificationService notificationService;

    // Constructor-based dependency injection
    public OrderProcessingService(NotificationService notificationService) {
        this.notificationService = notificationService;
    }

    public void processOrder(String orderId) {
        // ... business logic to process the order
        System.out.println("Processing order " + orderId);

        notificationService.sendNotification("customer@example.com", "Order Confirmed", "Your order " + orderId + " has been confirmed.");
    }
}
When you run the application with spring.profiles.active=dev, the ConsoleNotificationService is injected. When run with spring.profiles.active=prod, the EmailNotificationService is injected. The OrderProcessingService doesn't need to know or care which implementation it's using.
The Baeldung article provides an excellent, complete example of this pattern using a data source configuration. This will solidify your understanding of how to implement profile-specific beans.
Please read section 7, "Example: Separate Data Source Configurations Using Profiles". Pay close attention to how the interface is defined and then implemented by two different classes, each annotated with @Profile. Also, note how the tests use @ActiveProfiles to control which bean gets injected.
4. Advanced Profile Conditions with Logical Operators
The @Profile annotation is even more powerful. You can specify complex conditions using logical operators.
The Baeldung article you just reviewed also explains how to use logical operators for more complex conditions.
Now, read section 2, "Use @Profile on a Bean". Focus on the syntax for the NOT operator ! and the AND operator &.
Here is a summary of the operators you can use:
- OR (the default): A bean is active if any of the listed profiles are active.
// Active if 'dev' OR 'qa' profile is active @Profile({"dev", "qa"}) - NOT (
!): A bean is active if a specific profile is not active. This is useful for creating default beans or components that should run in any non-production environment.// Active in any environment EXCEPT 'prod' @Profile("!prod") - AND (
&): A bean is active only if all specified profiles are active. This is useful for highly specific configurations.// Active ONLY if 'prod' AND 'aws-cloud' profiles are both active @Profile("prod & aws-cloud")
You can also apply @Profile to @Configuration classes. If a configuration class is excluded, all @Bean methods within it are also excluded. This is a great way to enable or disable entire sets of beans at once.
Test your understanding!
You are creating a service for feature flagging. You have an interface FeatureFlagService. You need to create three implementations:
EnabledFeatureFlagService: Should be active only when theprodprofile is active.DisabledFeatureFlagService: Should be active in any profile that is notprod.ExperimentalFeatureFlagService: Should be active only when both thedevandexperimentalprofiles are active simultaneously.
How would you annotate each of these implementation classes?
Show answer
EnabledFeatureFlagService:@Service @Profile("prod") public class EnabledFeatureFlagService implements FeatureFlagService { /* ... */ }DisabledFeatureFlagService:@Service @Profile("!prod") public class DisabledFeatureFlagService implements FeatureFlagService { /* ... */ }ExperimentalFeatureFlagService:@Service @Profile("dev & experimental") public class ExperimentalFeatureFlagService implements FeatureFlagService { /* ... */ }
Conclusion
You've now added another essential tool to your backend development toolkit. By using the @Profile annotation, you can create flexible, robust, and environment-aware applications that adapt their behavior, not just their configuration properties.
Key Takeaways:
- The
@Profileannotation conditionally registers Spring beans based on the active environment. - This is the standard pattern for providing different implementations of an interface for different environments (e.g., development mocks vs. production services).
- The annotation can be applied to any Spring component (
@Service,@Component,@Configuration, etc.) or@Beanmethod. - Spring efficiently handles this by not even creating beans that don't match the active profile.
- You can use logical operators like
!(NOT) and&(AND) for more fine-grained control over bean registration.
What's Next?
We've now covered how to manage both configuration values and component behavior across different environments. However, as configurations get more complex, injecting individual values with @Value can become cumbersome.
In the next lesson, we will explore @ConfigurationProperties, a feature that allows you to bind structured YAML or properties files directly to type-safe Java objects. This is a powerful way to organize your application's configuration and it works seamlessly with the Spring Profiles you've just mastered.