Hello! Welcome back to our module on database integration with Spring.
In our last lesson, we built a solid theoretical foundation, exploring the "why" behind modern data persistence. We dissected the Object-Relational Impedance Mismatch and understood the distinct roles of JPA as the standard specification and Hibernate as the powerful implementation that brings it to life.
Today, we transition from theory to practice. Our goal is to configure a Spring Boot application to communicate with a database. This is the first and most critical step in making our application's data persistent. We will cover:
- The essential dependencies required for data access.
- How to configure a Data Source to connect to an external database like MySQL.
- How to fine-tune the behavior of JPA and Hibernate using
application.properties.
By the end of this lesson, you'll have a clear, practical understanding of how to wire up the persistence layer of a Spring Boot application.
1. The Persistence Stack: From Abstraction to Connection
Before we dive into configuration, let's briefly revisit the layers of technology we're working with. The following image provides a great mental model for how these components build on one another.
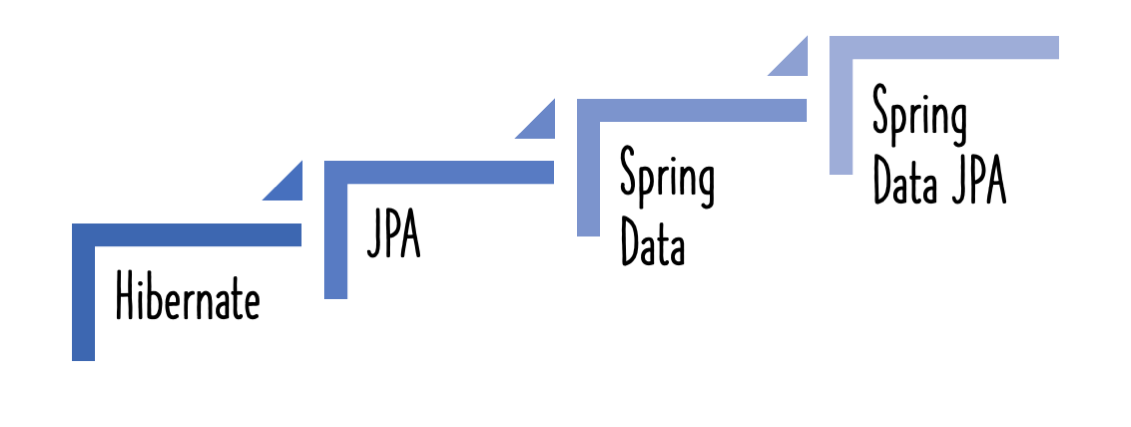
Your application code will primarily interact with Spring Data JPA's simple interfaces. Spring Boot's "auto-configuration" magic detects these technologies on your classpath and automatically wires them together. Our main job is simply to tell Spring Boot which database to connect to and how to connect to it.
2. Step 1: Add the Necessary Dependencies
To enable data persistence, a Spring Boot project needs two key ingredients in its build configuration (e.g., pom.xml for Maven):
-
Spring Boot Starter for Data JPA (
spring-boot-starter-data-jpa): This is the main dependency. It's a "starter" that transitively pulls in several crucial libraries:- Spring Data JPA: The core Spring module for JPA-based repositories.
- Hibernate: The default JPA implementation (the engine).
- JPA API: The standard interfaces and annotations (like
@Entity). - HikariCP: A high-performance JDBC connection pool. We'll touch on this later.
-
JDBC Driver: A specific driver for the database you intend to use. Since you're familiar with MySQL, we'll use the MySQL driver (
mysql-connector-j).
The easiest way to add these is by using the Spring Initializr (start.spring.io), as we did in previous modules.
Configuring Spring Data JPA with Spring Boot
The following article, "Configuring Spring Data JPA with Spring Boot" by Thorben Janssen, clearly outlines the dependencies you'll need. It serves as a good reference.
Please read the short section under the heading "Required Dependencies". It confirms the two types of dependencies we just discussed: the starter and the database-specific JDBC driver.
To see this in action, the official Spring guide on accessing data with MySQL shows exactly which dependencies to select in the Spring Initializr.
Getting Started | Accessing data with MySQL
The official guide "Accessing data with MySQL" provides a practical walkthrough. It's a great hands-on supplement to the conceptual article.
Navigate to the section "Starting with Spring Initializr". Focus on step 3 in the list, which shows the selection of Spring Data JPA and MySQL Driver alongside other common dependencies.
With these dependencies in place, Spring Boot is ready to configure our persistence layer. Now, we just need to provide the connection details.
3. Step 2: Configure the Data Source
A DataSource in Java is essentially a factory for connections to the physical database. Spring Boot needs to know how to create this DataSource bean. While it can automatically set up a connection to an in-memory database (like H2) with zero configuration, for any real-world application, you'll be connecting to a standalone database.
This is done by adding properties to the src/main/resources/application.properties file. These properties are the most important part of today's lesson.
There are four primary properties you must set:
spring.datasource.url: The JDBC connection URL. This string tells the driver where to find the database. Its format is specific to the database vendor. For MySQL, it looks like this:jdbc:mysql://<host>:<port>/<database_name>.spring.datasource.username: The username for connecting to the database.spring.datasource.password: The password for that user.spring.datasource.driver-class-name: The fully qualified name of the JDBC driver class. While Spring Boot is smart and can often infer this from the URL, it's good practice to specify it explicitly for clarity.
The following guide provides a clear, practical example of these properties configured for a MySQL database.
Getting Started | Accessing data with MySQL
Let's return to the official Spring guide. This section shows the exact properties you need to add to your application.properties file.
Read the part of the guide under the heading "Preparing to Build the Application". Look for the code block showing the contents of the application.properties file. This is the central piece of configuration we're focusing on.
As you can see from the guide, a typical configuration for a local MySQL database named mydatabase would look like this:
spring.datasource.url=jdbc:mysql://localhost:3306/mydatabase
spring.datasource.username=myuser
spring.datasource.password=secret
spring.datasource.driver-class-name=com.mysql.cj.jdbc.Driver
Once Spring Boot finds these properties, it automatically:
- Creates and configures a
DataSourcebean. - By default, it uses HikariCP for connection pooling. A connection pool is a cache of database connections maintained so that they can be reused. Creating a new database connection is an expensive operation, so pooling significantly improves application performance.
Test your understanding!
Imagine you are setting up a project to connect to a PostgreSQL database with the following details:
- Host:
db.example.com - Port:
5432 - Database Name:
user_service_db - Username:
app_user - Password:
S3cur3P@ss!
Write the four essential spring.datasource.* properties you would add to your application.properties file. (You can make a reasonable guess for the driver-class-name or look it up).
Show answer
The PostgreSQL JDBC URL format is jdbc:postgresql://<host>:<port>/<database_name>. The driver class is org.postgresql.Driver.
spring.datasource.url=jdbc:postgresql://db.example.com:5432/user_service_db
spring.datasource.username=app_user
spring.datasource.password=S3cur3P@ss!
spring.datasource.driver-class-name=org.postgresql.Driver
4. Step 3: Configure JPA and Hibernate Properties
Beyond simply connecting to the database, you'll often want to control the behavior of JPA and its underlying provider, Hibernate. Spring Boot makes this easy by exposing common settings via spring.jpa.* properties.
Let's look at two of the most useful properties for development.
spring.jpa.hibernate.ddl-auto
This property controls Hibernate's ability to automatically create or modify the database schema (the tables, columns, etc.) based on your Java entity classes. It's incredibly powerful but must be used with care. Common values include:
create: Drops the existing schema and creates a new one when the application starts. All data is lost. Useful for running tests.create-drop: The same ascreate, but also drops the schema when the application shuts down cleanly.update: Attempts to update the existing schema to match your entity classes. It will add new tables and columns but typically won't remove them. Useful during early development.validate: Checks if the existing schema matches your entity classes and throws an error if it doesn't.none: (Default for most external databases) Disables this feature entirely.
Important: For production environments, you should always use none. Schema changes should be managed deliberately using a database migration tool like Flyway or Liquibase, which we will cover in a future lesson. Using update in production is risky and can lead to data loss.
spring.jpa.show-sql
When set to true, this property instructs Hibernate to print every SQL statement it executes to the console. This is an indispensable tool for debugging and understanding what the ORM is doing behind the scenes. You can see the exact SELECT, INSERT, UPDATE, and DELETE statements generated from your Java code.
Putting it all together, a development-focused application.properties might look like this:
# DataSource Configuration
spring.datasource.url=jdbc:mysql://localhost:3306/mydatabase
spring.datasource.username=myuser
spring.datasource.password=secret

# JPA/Hibernate Configuration
spring.jpa.hibernate.ddl-auto=update
spring.jpa.show-sql=true
For a more in-depth look at these and other properties, the Thorben Janssen article is a great resource.
Configuring Spring Data JPA with Spring Boot
This final reading covers JPA-specific properties and how to configure them.
Please read the sections "Configuring JPA and Hibernate Properties" and "Configuring Database Creation". These sections explain the spring.jpa.properties prefix and the crucial ddl-auto property.
Conclusion
Excellent work! You've successfully configured your first data-driven Spring Boot application. While it may seem like just a few lines in a properties file, you've now connected a vast ecosystem of powerful frameworks.
Key Takeaways:
- Database connectivity in Spring Boot starts with adding the
spring-boot-starter-data-jpaand a JDBC driver dependency. - The connection itself is configured via
spring.datasource.*properties (url,username,password) inapplication.properties. - Spring Boot automatically provides a high-performance connection pool (HikariCP) out of the box.
- You can control Hibernate's behavior using
spring.jpa.*properties, withddl-autoandshow-sqlbeing two of the most useful during development.
What's Next?
Our application is now connected to the database, but it doesn't know what to save. In our next lesson, "Define JPA entities using @Entity, @Table, @Id, and @GeneratedValue," we will bridge that final gap. You'll learn how to take a plain Java class and, using a few simple annotations, map it to a database table, turning it into a JPA entity that Hibernate can manage.