Hello! In our last lesson, we explored the crucial concept of inter-annotator reliability (IAR) and established why measuring agreement with statistics like Krippendorff's Alpha is fundamental to creating a trustworthy dataset. You now have the theoretical tools to assess the quality of your human-generated labels.
Today, we transition from theory to practice. This lesson is about designing the experiment that puts your annotation guidelines to the test: the pilot annotation exercise. Think of this as a dry run before you commit to the massive effort of large-scale labeling. We will walk through how to plan and execute a small, focused pilot study that will expose weaknesses in your schemas and guidelines, allowing you to fix them early. The goal is to create a concrete, step-by-step plan that you can immediately apply to your project data.
Why a Pilot Isn't Optional: The Completeness Illusion
When you write annotation guidelines, you have a clear mental model of what each label means. The rules seem complete and unambiguous because you, the author, already possess the context. However, an annotator encountering the task for the first time lacks that intuition. This gap between what feels clear to you and what is actually clear to others is sometimes called the "completeness illusion." A pilot study is the single most effective way to bridge this gap.
The primary purpose of a pilot is not to get a high agreement score right away. Its purpose is to find problems. A pilot that uncovers numerous ambiguities and edge cases is a resounding success, because it saves you from discovering those problems after you've already labeled thousands of examples incorrectly.
How To Write Effective Data Annotation Guidelines That Annotators ...
This article from Digital Divide Data explains why even well-intentioned guidelines often fail and how a pilot exercise is the essential first step to correct this.
Please read the first two sections to understand the core rationale for this lesson: Begin with The Completeness Illusion. This section perfectly frames why your own understanding of the guidelines isn't enough. Then, read about Building the Feedback Loop. This reinforces that revising guidelines is not a sign of failure but a normal and necessary part of the process.
The Anatomy of a Pilot Annotation Exercise
A well-structured pilot can be completed quickly and provides invaluable feedback. We can model our plan on the professional workflows used by data annotation services. The entire process—from initial briefing to a final report—is about creating a tight feedback loop.
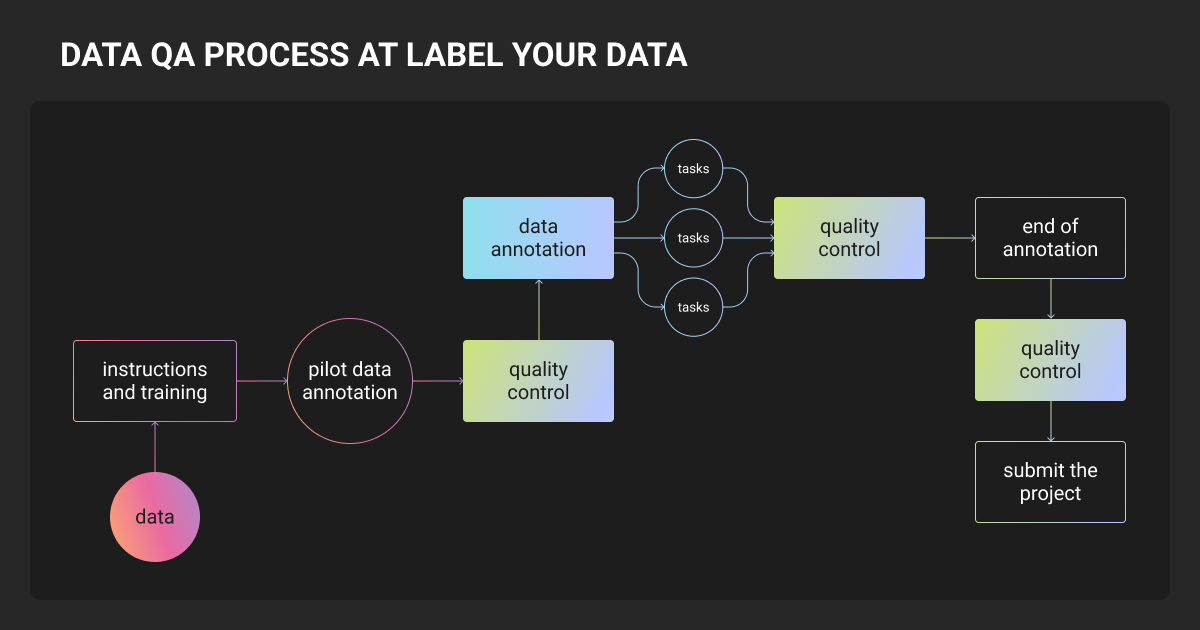
Let's break this down into a three-phase plan.
Phase 1: Preparation
Before you can test anything, you need to assemble the necessary components.
- Your Guidelines: You'll need the v1.0 drafts of your image and text annotation guidelines that you developed in the previous lessons.
- Your Annotators: For a pilot, you don't need a large team. Two or three people are ideal. You can act as one annotator, and perhaps ask one or two colleagues or friends to help. The key is to have annotators who were not involved in writing the guidelines.
- Your Data Sample: Select a small but diverse batch of data. A good starting point is 50-100 images and 50-100 text complaints. Crucially, this sample should not just contain easy, clear-cut examples. Intentionally include:
- Images: A mix of well-lit and poorly-lit photos, blurry pictures, meals with ambiguous items, and some perfectly normal meals.
- Text: A mix of straightforward complaints, potentially sarcastic or ambiguous comments, and irrelevant posts.
- Your Tool: You don't need sophisticated software for a pilot. A simple Google Sheet or Excel file where each row is a data point (image ID or text) and columns are for annotators' labels will work perfectly.
Phase 2: Execution
This is where the labeling happens. We can model this phase on a structured, time-boxed approach.
How to Run a Successful Data Annotation Pilot in 48 Hours
This article from Impact Outsourcing provides a fantastic, practical template for executing a pilot. It breaks the process down into concrete, timed stages.
Please read the following sections to understand the execution workflow: Start with Briefing and Calibration. This describes the critical first meeting to align annotators. Next, read Production with Gold Standard Monitoring. While their recommendation of 1,000 samples is for a commercial pilot, the principles of independent work and monitoring apply to our smaller scale.
Following this model, your execution phase has two main parts:
-
Calibration Session (approx. 1 hour): Get all your pilot annotators together.
- Goal: Ensure everyone understands the task and to surface the most obvious ambiguities immediately.
- Process:
- Everyone reads the guidelines.
- Together, you label the first 10-20 items from your sample set.
- For each item, compare your answers. When there's a disagreement, discuss why. This conversation is where you'll get your first insights. For example: "I labeled this as
quantity_insufficientbecause the plate looks half-empty." "I labeled itquantity_sufficientbecause for a primary school child, that's a standard portion." This disagreement instantly reveals that your guideline needs a more objective definition of "sufficient," perhaps using a reference object in the photo.
-
Independent Annotation (asynchronous): After the calibration session, the annotators work alone to label the rest of the pilot sample. This is crucial because you want to measure how consistently they can apply the rules without constant discussion.
Phase 3: Analysis and Iteration
Once the labeling is complete, the real work begins: turning the annotations into insights. This is not just about calculating a score; it's about diagnosis.
How To Write Effective Data Annotation Guidelines That Annotators ...
Let's revisit this article to focus on how to use the outputs of your pilot.
Please read these two sections: Using Inter-Annotator Agreement as a Diagnostic. This explains that the pattern of disagreement is more important than the overall score. Gold Standard Sets as Calibration Tools. This introduces a powerful technique for ongoing quality control, which starts in the pilot.
Your analysis should include these steps:
- Calculate IAR: Using a Python script, calculate the Krippendorff's Alpha for your pilot data. This gives you a single, chance-corrected number summarizing the overall consistency.
- Analyze Disagreements: Create a confusion matrix to see which labels are most often confused. High disagreement between
quality_poor_preparationandquality_contaminationtells you the boundary between them is unclear. - Gather Qualitative Feedback: Talk to your annotators. Ask them: "Which items were hardest to label? Where did you feel you were guessing? What parts of the guidelines were confusing?"
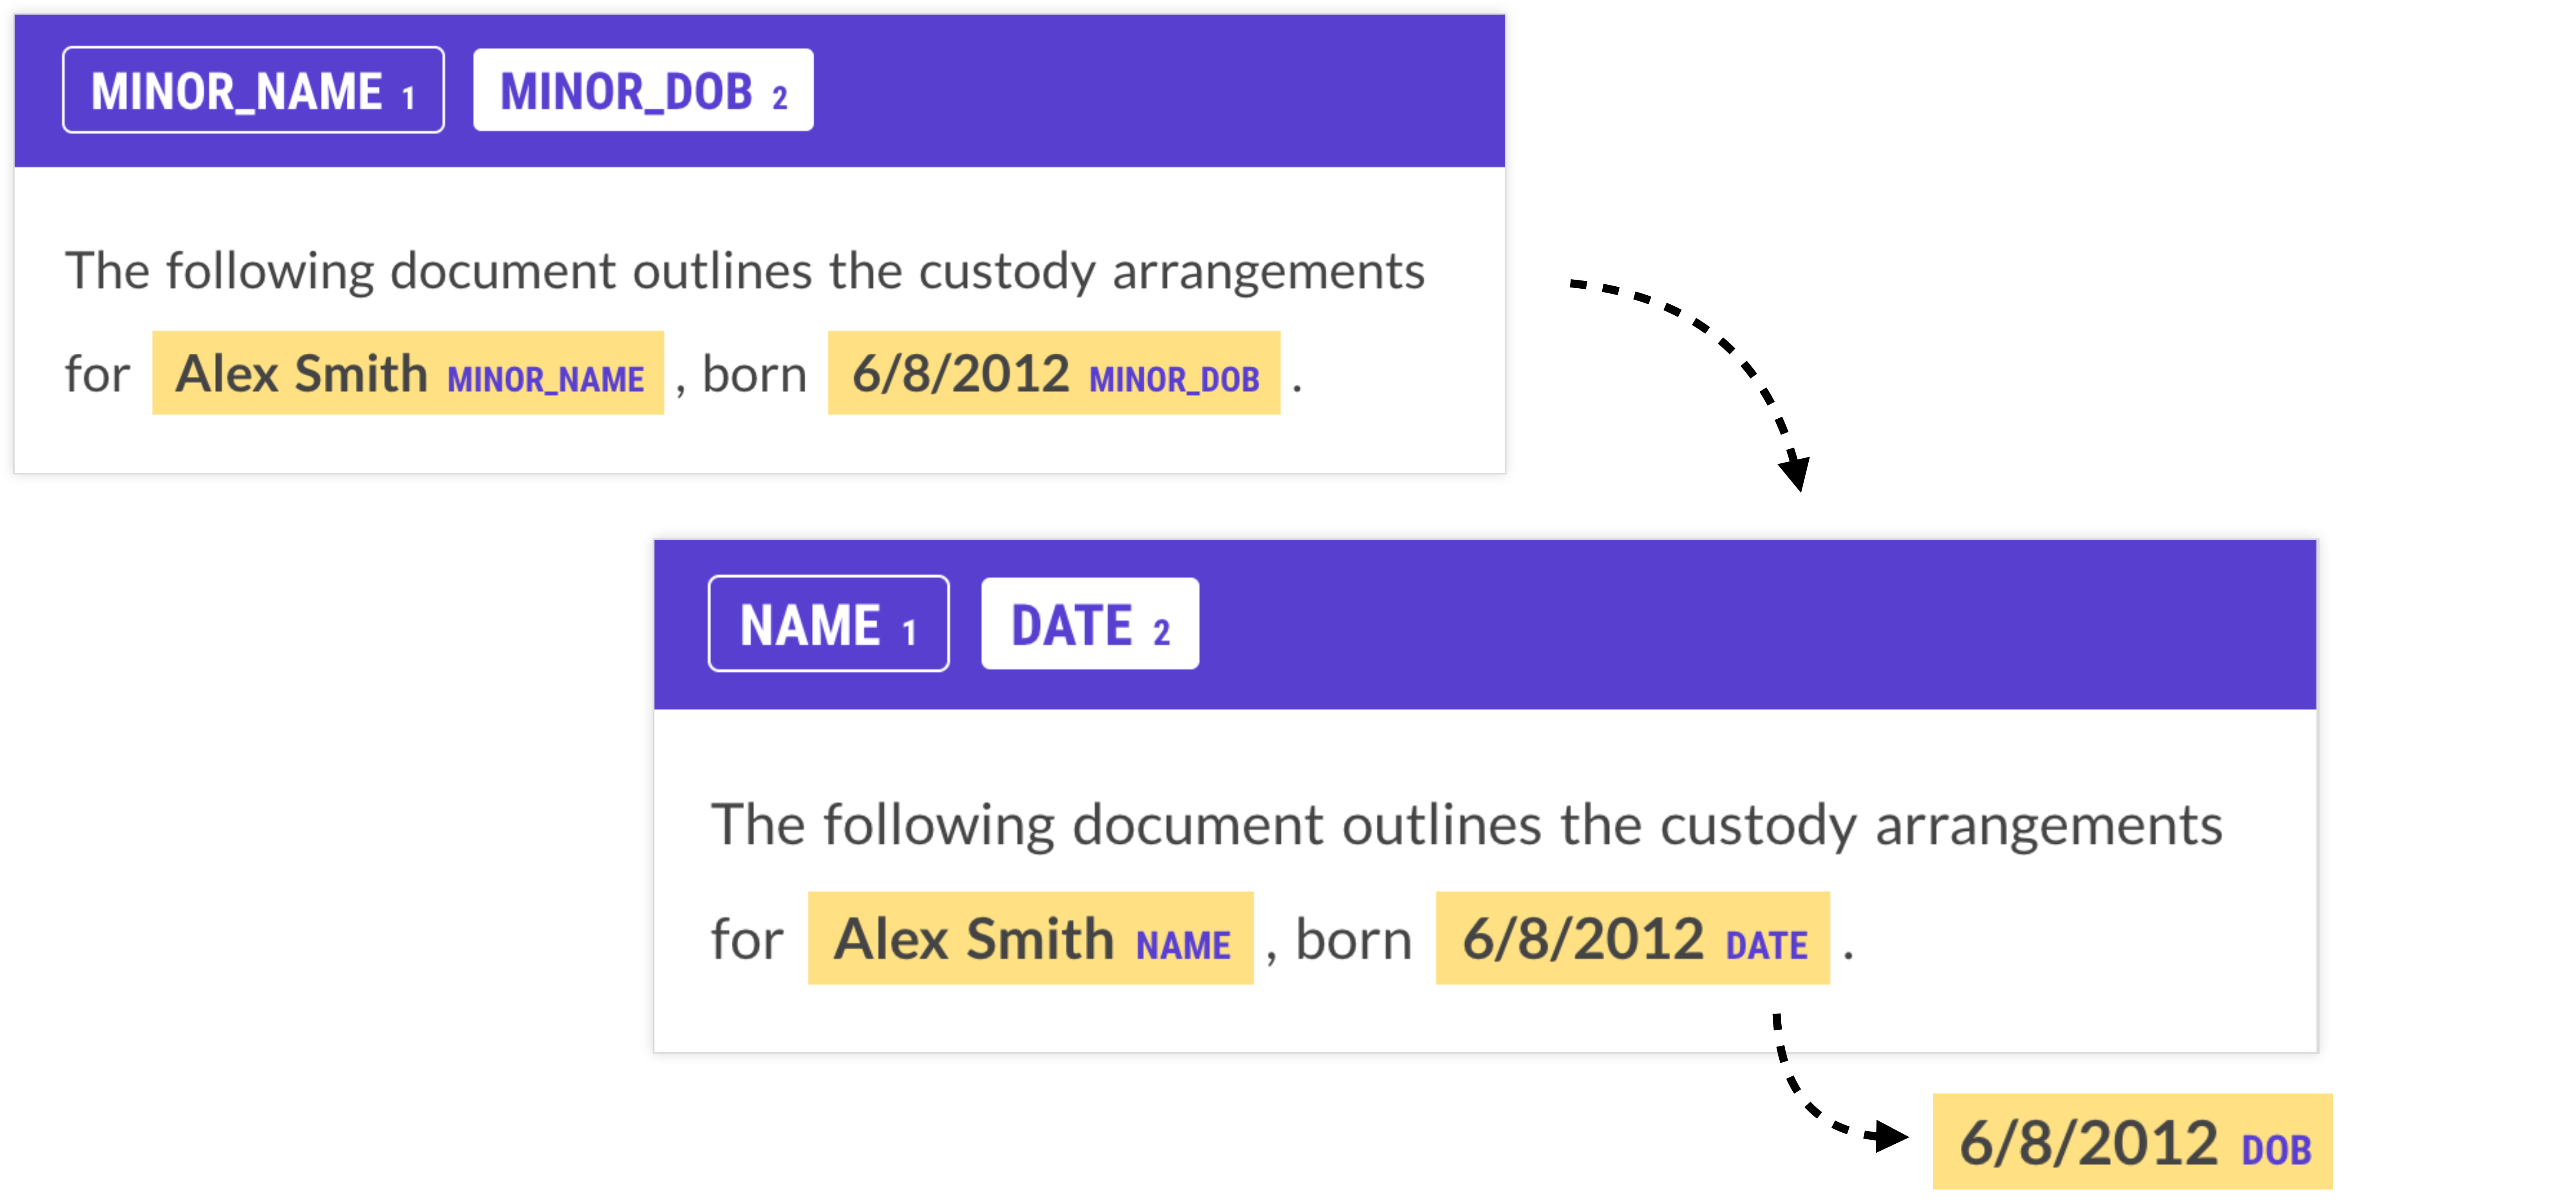
- Revise the Guidelines: This is the most important output of the pilot. Use the disagreements and feedback to create version 1.1 of your guidelines. Make your rules more explicit, add examples for edge cases, and clarify definitions.
Your Pilot Plan: A Concrete Checklist
To bring this all together, here is a checklist to guide you in planning your own pilot exercise. Your deliverable for this lesson is to fill this out.
Mid-Day Meal Annotation Pilot Plan
1. Define Pilot Scope:
- Number of images to label: [Your target, e.g., 75]
- Number of text complaints to label: [ యుur target, e.g., 75]
- Number of annotators: [ యుur target, e.g., 3 (including yourself)]
2. Prepare Materials:
- Finalize v1.0 of Image Annotation Guidelines document.
- Finalize v1.0 of Text Annotation Guidelines document.
- Curate a sample set of images, ensuring a mix of easy, hard, and ambiguous cases.
- Curate a sample set of text complaints with similar diversity.
- Set up a simple annotation tool (e.g., a shared spreadsheet with columns for each annotator).
3. Schedule the Pilot:
- Schedule a 1-hour calibration session with all annotators.
- Set a deadline for completing the independent annotation (e.g., 2-3 days).
- Schedule a 1-hour debrief and analysis session to review results and gather feedback.
4. Define Pilot Outputs & Success Criteria:
- Primary Goal: Identify at least 3-5 specific ambiguities in each set of guidelines that need clarification.
- Key Output 1: A documented IAR score (Krippendorff's Alpha) for the image set and the text set.
- Key Output 2: A v1.1 of the Image & Text guidelines, with a "changelog" section detailing the improvements made based on pilot feedback.
Conclusion
In this lesson, you've learned how to design a pilot annotation study, a critical step in building any supervised machine learning model. This process transforms your guidelines from a static document into a living hypothesis that can be tested, measured, and improved with data.
Key Takeaways:
- A pilot study is an essential experiment to test and validate your annotation guidelines before large-scale labeling.
- Its main purpose is to find ambiguities and edge cases, not to achieve perfect agreement scores.
- A structured pilot involves three phases: Preparation (gathering materials), Execution (calibration and independent labeling), and Analysis (calculating IAR and revising guidelines).
- Disagreements are not failures; they are valuable data that point directly to the weakest parts of your instructions.
You have now completed the entire module on "Designing the Ground Truth." You've gone from defining violations to creating schemas, writing guidelines, measuring reliability, and now, planning a pilot to test it all.
In our next lesson, we will begin the next module, "Data Strategy for Real-World Messiness." Now that you have a robust process for creating high-quality labels, we will turn our attention to the raw material itself: the noisy, messy data scraped from the internet, and how to begin cleaning it.