Hello again. In our last lesson, we designed the foundational data structures for a more advanced rendering system. By creating a DrawCommand interface and concrete command objects, we've prepared to move away from immediate-mode rendering and unlock a new tier of performance optimizations.
This lesson builds directly on that foundation. We will now implement a render pass that records, sorts by state, and executes those draw commands to enable GPU batching. This is where the deferred architecture we designed begins to pay significant dividends. Instead of just drawing things, we will first build a complete representation of the frame, optimize it, and then execute it. This is a core technique used in high-performance game engines and rendering systems, and it will bring a substantial performance boost to your whiteboard application, especially in complex scenes.
The "Why": The High Cost of State Changes
Before we dive into the implementation, let's solidify why this matters. In the previous lesson, we mentioned that frequent state changes are expensive for the GPU. A "state" includes the set of shaders, textures, blending modes, and other parameters the GPU needs to draw something. Every time you switch from a red pen to a blue pen, you are changing the GPU's state.
In an immediate-mode system, your code might issue commands like this:
- Set state to "Red Pen".
- Draw path A.
- Set state to "Blue Pen".
- Draw path B.
- Set state to "Red Pen".
- Draw path C.
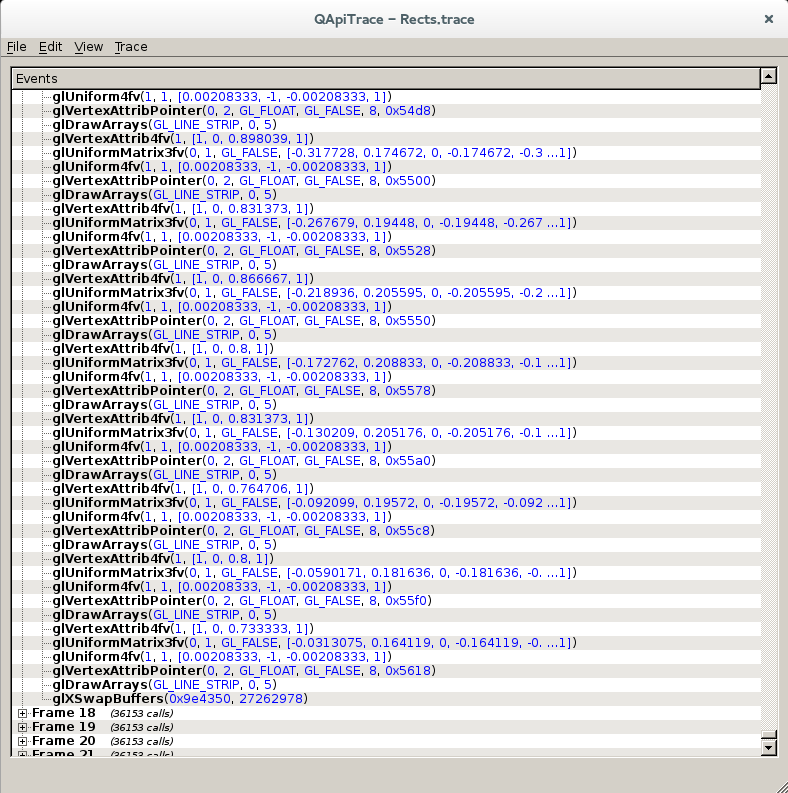
The GPU pipeline, which is designed for massive parallelism, must halt and reconfigure itself for each state change. This is a major source of inefficiency. A trace of low-level OpenGL calls for a simple application often reveals this pattern: a stream of state-setting calls (glUniform...) interleaved with draw calls (glDrawArrays).
By recording our commands first, we can reorder them to group calls that use the same state. The sequence above could be reordered to:
- Set state to "Red Pen".
- Draw path A.
- Draw path C.
- Set state to "Blue Pen".
- Draw path B.
We've reduced three state changes to two. In a scene with thousands of strokes of varying colors and widths, this optimization is not just beneficial; it's essential for maintaining a high frame rate.
The "How": Sorting Commands with a Key
To achieve this reordering, we will implement a technique called sort-based bucketing. Instead of sorting our DrawCommand objects directly (which is complex), we will generate a numeric sort key for each command. This key is an integer (typically 64-bit) that encodes all the properties relevant to sorting. When we sort the commands by this key, they naturally group together by state.
This is a standard, battle-tested technique in game development. The following article from a developer on the God of War series provides an excellent, in-depth explanation.
Order your graphics draw calls around!
This blog post is a fantastic practical guide to sort-based rendering. It explains precisely how and why this technique is used in major game engines.
Start by reading the section "Sort-based draw call bucketing". Pay close attention to how a 64-bit key is constructed from different state properties, like translucency, material, and depth. The most significant bits are used for the coarsest sorting categories. Then, read "Adding commands". This explains how to integrate non-drawing commands (like state changes) into the same sorting system, which is relevant for our SaveCommand, RestoreCommand, etc.
Inspired by this, we can design a sort key for our whiteboard application. The SkPaint object holds most of the relevant state (color, stroke width, blend mode), but comparing SkPaint objects directly is inefficient. Instead, we can assign a unique ID to each distinct SkPaint configuration we use.
A simplified 64-bit sort key for our application might look like this:
| Bits | 63-56 | 55-48 | 47-16 | 15-0 |
|---|---|---|---|---|
| Purpose | Layer | Translucency | Paint ID | Sequence/Depth |
| Description | UI vs. Canvas content | Opaque vs. Transparent | ID of the SkPaint |
Order within the same batch |
- Layer (8 bits): Allows us to separate rendering into coarse phases. For example, background elements (like a grid) can be layer 0, user strokes layer 1, and UI elements layer 2. This ensures the UI is always drawn on top.
- Translucency (8 bits): A crucial sort criterion. Opaque objects should generally be drawn first (front-to-back to benefit from early depth testing), while transparent objects must be drawn last (back-to-front for correct blending).
- Paint ID (32 bits): A unique identifier for the
SkPaintstate. All strokes using the same pen will have the same Paint ID, causing them to be grouped together by the sort. - Sequence (16 bits): A simple counter to preserve the original drawing order for objects that are otherwise identical in state. This ensures stability.
Implementing the Render Pass
Now let's outline the implementation of this render pass, which consists of three phases executed every frame: Record, Sort, and Execute.
1. The Record Phase
First, we need a structure to hold our command and its associated sort key.
struct SortableCommand {
    uint64_t key;
    std::unique_ptr<DrawCommand> command;

    // We'll need a comparison operator for sorting
    bool operator<(const SortableCommand& other) const {
        return key < other.key;
    }
};

class RenderPass {
public:
    void addCommand(uint64_t key, std::unique_ptr<DrawCommand> cmd) {
        m_commands.emplace_back(SortableCommand{key, std::move(cmd)});
    }

    // ... Sort and Execute methods to follow
private:
    std::vector<SortableCommand> m_commands;
};
In your main application loop, instead of drawing directly to the canvas, you will now populate this list. You will iterate over your visible strokes (retrieved from the Quadtree and culled against dirty regions) and for each one, you will:
- Generate its sort key.
- Create a
DrawPathCommand. - Add it to the
RenderPass.
// Pseudocode for the Record phase
RenderPass pass;
uint16_t sequence = 0;

for (const auto& stroke : visibleStrokes) {
    uint64_t key = generate_sort_key(stroke.layer, stroke.paint, sequence++);
    pass.addCommand(key, std::make_unique<DrawPathCommand>(stroke.path, stroke.paint));
}
2. The Sort Phase
This phase becomes remarkably simple thanks to the sort key and the C++ standard library.
// Inside your RenderPass class
void sort() {
    std::sort(m_commands.begin(), m_commands.end());
}
That's it. After this call, the m_commands vector is perfectly ordered for efficient GPU execution.
3. The Execute Phase
Finally, we iterate through the sorted list and execute each command.
// Inside your RenderPass class
void execute(SkCanvas* canvas) {
    for (const auto& sortedCmd : m_commands) {
        sortedCmd.command->execute(canvas);
    }
}

void clear() {
    m_commands.clear();
}
The full render loop logic for a frame now looks like this:
- Create
RenderPassobject. - Record: Populate the pass with commands for all visible objects.
- Sort: Call
pass.sort(). - Execute: Call
pass.execute(canvas). - Clear the pass to be ready for the next frame.
This entire architecture—recording commands into a buffer, potentially reordering them, and then submitting them for execution—is the fundamental programming model for modern graphics APIs like Vulkan and DirectX 12.
Commands and Command Buffers | "Submit Work to a Device/GPU" | Vulkan Lecture Series, Episode 4
This lecture from a university course on Vulkan provides an excellent, clear explanation of the command buffer model that we are emulating at a higher level with Skia.
First, watch the introduction to understand the concept of commands and queues. The key idea is that commands are recorded into a buffer and submitted as a package, never individually. Next, focus on the distinction between action-type and state-type commands. Our DrawPathCommand is an "action" command, while a TransformCommand or a conceptual BindPaintCommand would be a "state" command. Sorting ensures that we minimize these state changes between actions. Finally, see how this maps to the CPU/GPU relationship in the segment on command buffer recording. The recording happens on the "host" (CPU), and the resulting command buffer is sent to the "device" (GPU) for execution. This is exactly what our record-sort-execute sequence does.
A Professional Engine Architecture: Record-Stage-Commit
The system we've designed is a simplified version of a pattern used in professional, cross-platform rendering engines. This pattern is sometimes called the "record-stage-commit" model.
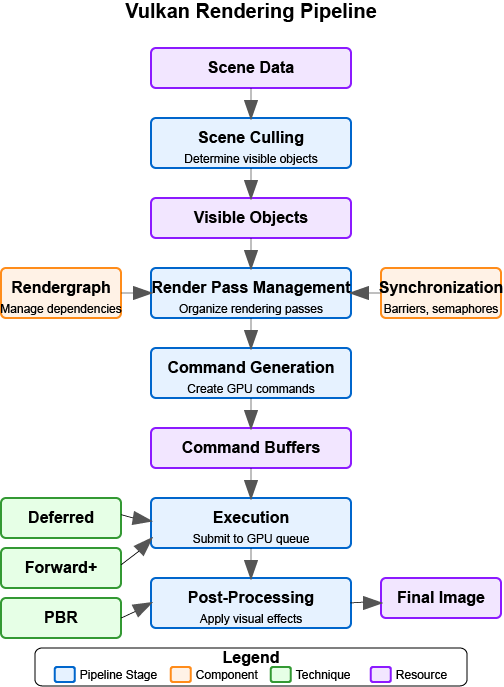
A more formal breakdown of this professional architecture is provided in the following post. It's a fantastic read that will connect what you're building to the architecture of large-scale engines.
Musings on cross-platform graphics engine architectures – Part 2 – Will push pixels for food
This article discusses the design of a modern graphics engine, focusing on command submission. It validates our approach and shows how it scales.
First, read the section "Command submission: Recording and execution". The author describes creating a high-level CommandBuffer that is just a list of opcodes and data, which the engine layer then interprets. This is exactly what we've done: our DrawCommand vector is this high-level command buffer. Next, read about the "record-stage-commit" model. This is the full, multi-threaded version of our pattern: Record: Multiple threads generate small, independent command buffers (our RenderPass could be one of these). Stage: The high-level command buffers are translated into native GPU commands. For us, this is where the sorting happens. Commit: All the staged, sorted command lists are submitted to the GPU for execution.
This "record-stage-commit" model highlights the power of decoupling command generation from execution. It not only enables sorting and batching but also facilitates parallelization, as different parts of the scene can be processed on different CPU threads, each generating its own command list.
Conclusion
In this lesson, you've taken the intermediate DrawCommand structure from the previous lesson and built a complete, optimized render pass around it. This is a significant step up from immediate-mode rendering and aligns your application's architecture with that of modern, high-performance graphics engines.
Key Takeaways:
- GPU Batching: The primary goal is to minimize expensive state changes by grouping draw calls that share the same state (paint, textures, shaders).
- Sort Keys: A numeric sort key is an efficient and powerful mechanism to encode rendering state, allowing for a simple
std::sortto organize an entire frame's worth of commands for optimal performance. - Record, Sort, Execute: This three-phase process forms the core of a deferred render pass. The application logic records its drawing intentions, the pass sorts them for efficiency, and then executes the optimized command list.
- Command Buffer Architecture: This pattern of recording commands to a buffer for later processing is the fundamental model of modern graphics APIs like Vulkan and DirectX 12, enabling high-throughput and parallel rendering.
You have now implemented some of the most critical rendering optimizations for your whiteboard. The system is now far more scalable and will handle complex scenes with many strokes much more gracefully.
With the rendering pipeline now highly optimized, our next focus will be on application persistence. In the following lesson, we will move to a different but equally important area: designing a versioned binary file format to save and load the complete state of your whiteboard document.