Welcome back! In our previous lesson, we established the crucial link between our application and the GPU by initializing a Skia GrDirectContext. This object gives Skia control over the graphics hardware through OpenGL. Now, we are ready to take the final step in our setup: creating a canvas to draw on.
Today's lesson focuses on mapping our native SDL window to a Skia SkSurface. This object represents a specific drawing destination—in our case, the memory buffer of the window displayed on your screen. By the end of this session, you will have a complete, hardware-accelerated rendering pipeline, turning your abstract window object into a tangible, GPU-backed drawing canvas.
What is an SkSurface?
At its core, a surface in computer graphics is simply a block of memory that holds pixel data. Skia is designed to draw to a variety of surface types. It can render to a simple block of CPU memory (a raster surface), a GPU texture, or even a document-oriented backend like a PDF or SVG file. Our goal is to create a specific kind of surface: one that is directly connected to the default framebuffer of the window we created with SDL.
When you create an OpenGL context for a window, the graphics driver allocates at least two buffers: a front buffer (what you currently see on the screen) and a back buffer (where the next frame is drawn). Our SkSurface will point to this back buffer. All our Skia drawing commands will render into it, and once we're done with a frame, we'll "swap" the buffers, making our newly drawn content visible.
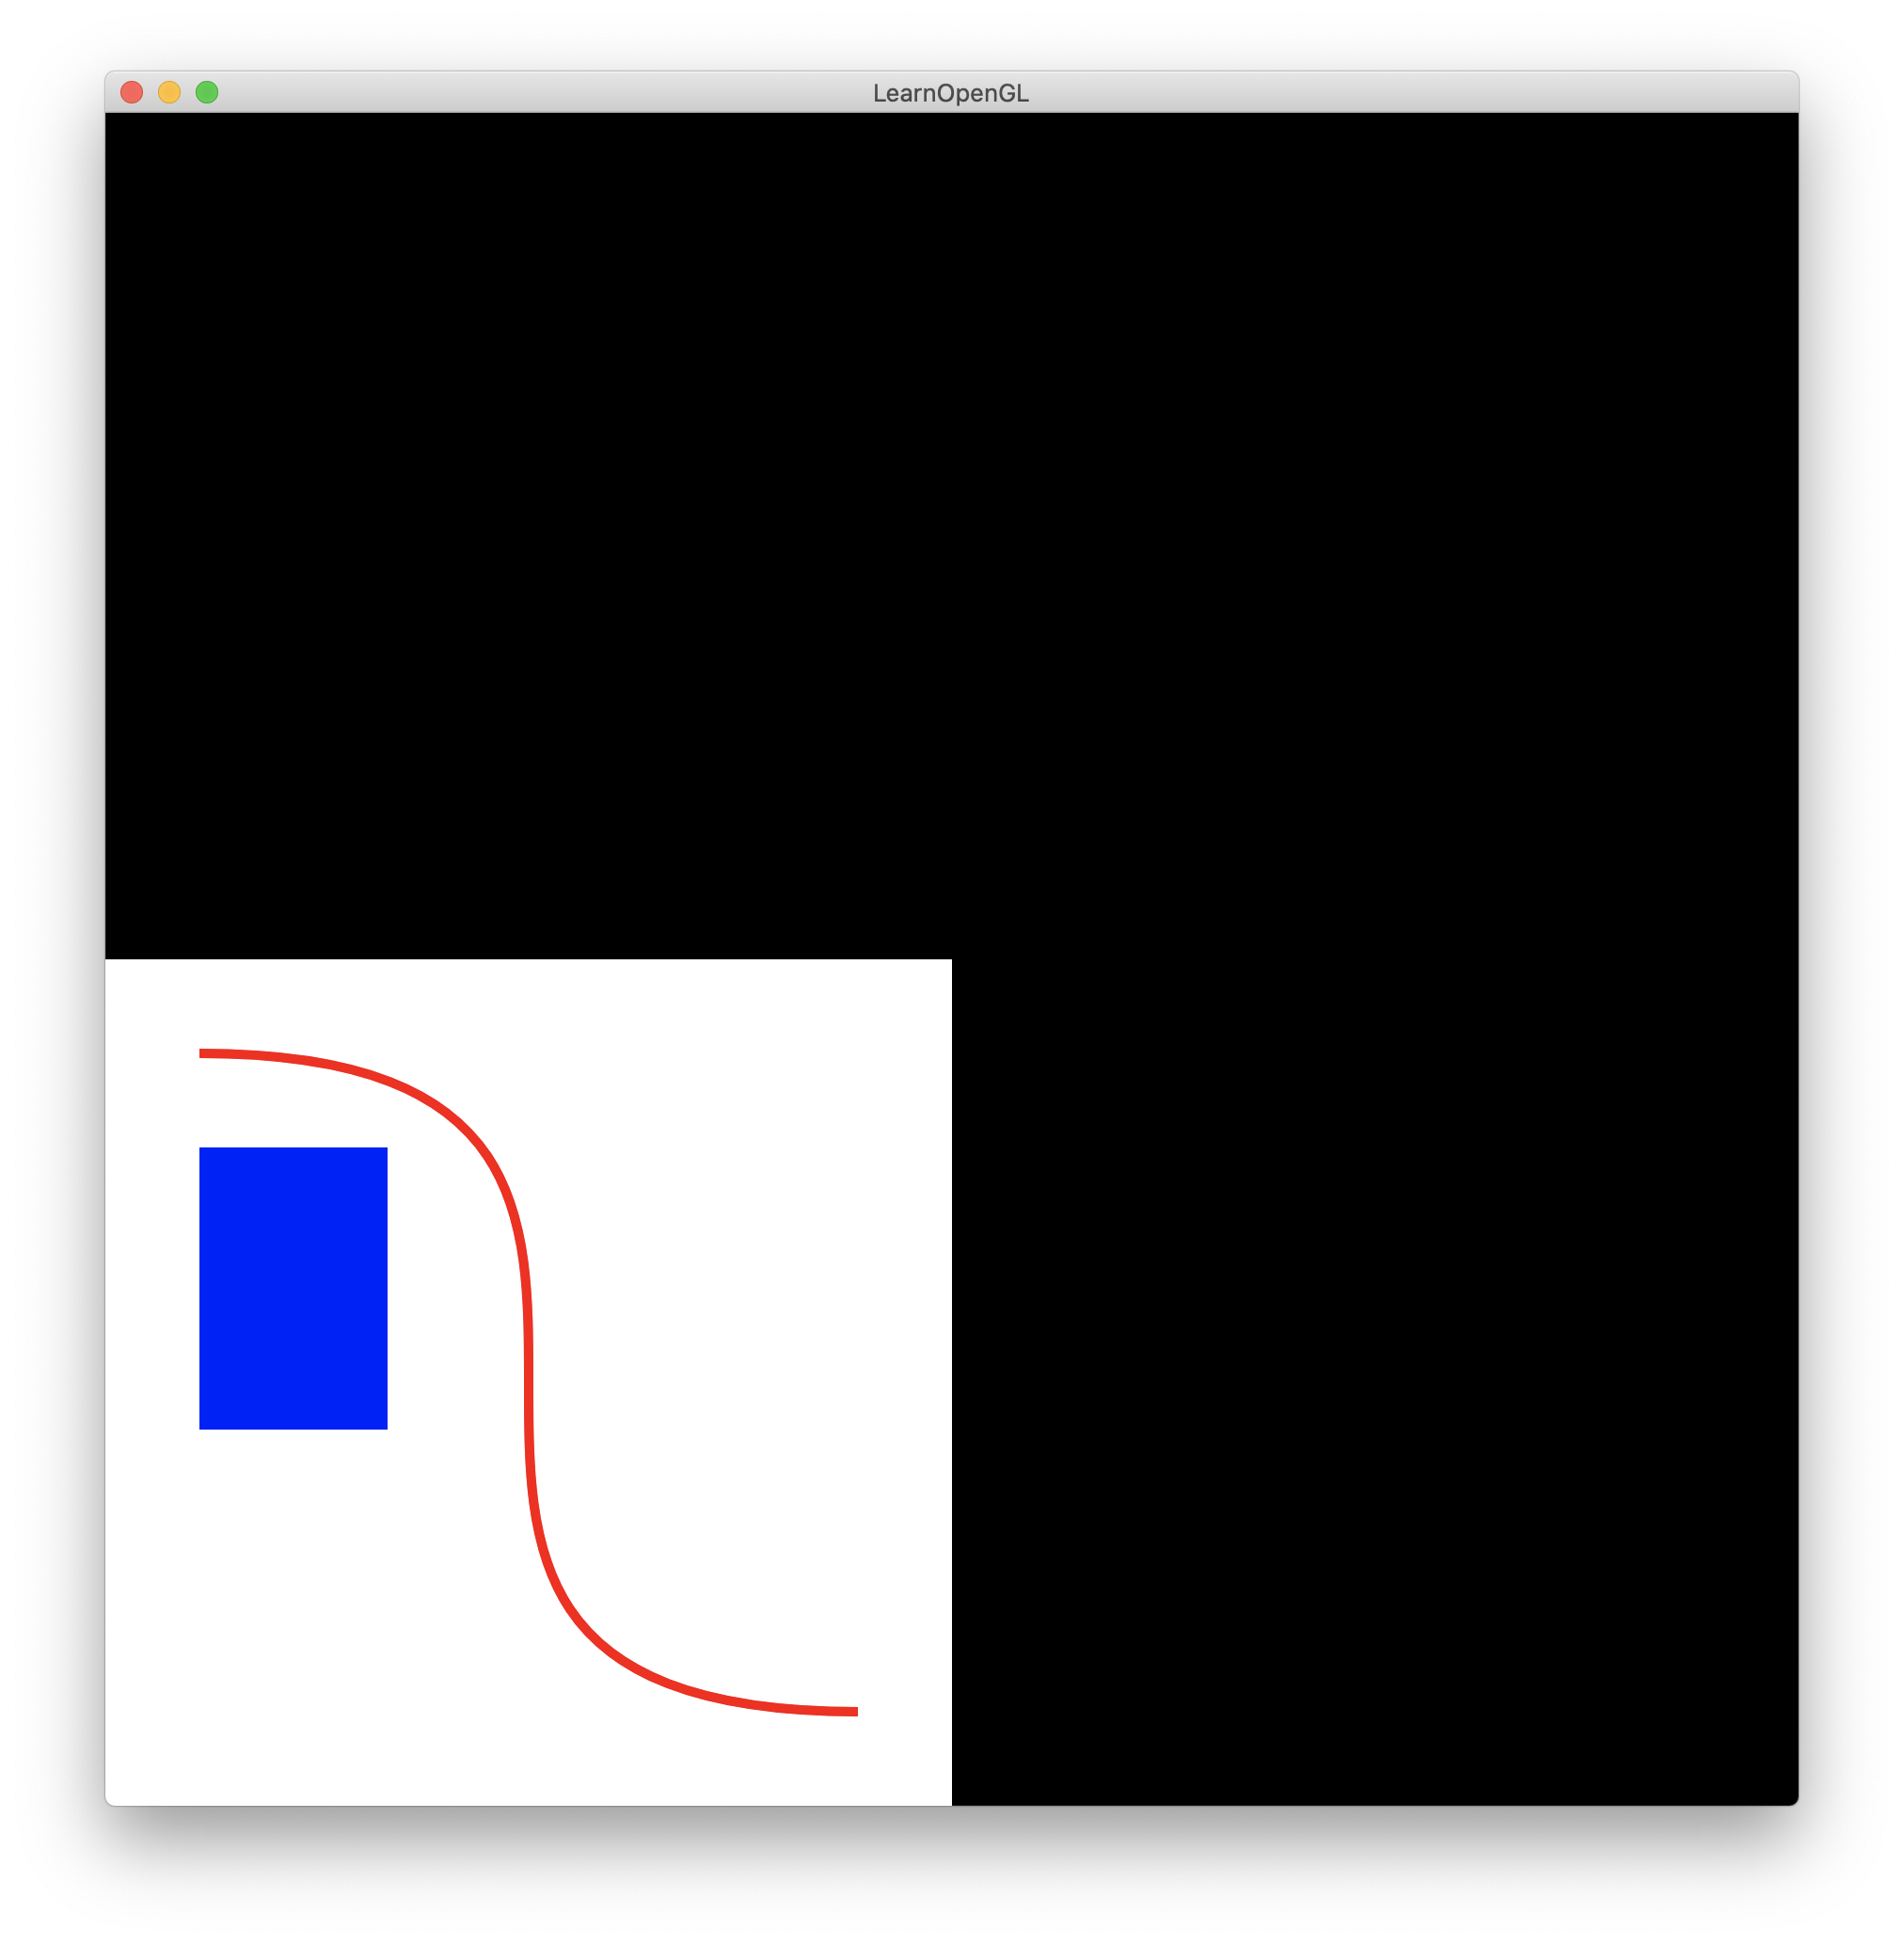
The image below illustrates this concept. The entire native window has a black background, but Skia is instructed to draw only within a specific rectangular area (the SkSurface), which is cleared with white and then has a blue rectangle and a red curve drawn onto it.
The High-Level Abstraction
Modern UI frameworks often provide convenient wrappers that handle the low-level setup for you. To put our C++ work in context, it's helpful to see what this looks like at a higher level of abstraction. The following video demonstrates setting up a Skia canvas using SkiaSharp (a C# wrapper for Skia) and a SKGLControl.
Building a Game Engine with Google's Skia | Episode 1: Project Setup & Window Creation
This video from the "Laurence Creates" channel shows how to integrate Skia in a .NET application. While the language is C#, the concepts are directly analogous to our C++ implementation.
First, watch the segment from this point. Notice how an SKGLControl is created and added to a Form (the window). This single control encapsulates the GrDirectContext, the SkSurface, and the link to the window's framebuffer. We are essentially building the C++ equivalent of this control from scratch. Next, see the result from this segment, where the canvas is cleared to a color using e.surface.canvas.clear(). The e.surface object here is the SkSurface, and canvas is the SkCanvas we draw with. This is exactly what we're aiming to achieve.
Understanding this helps clarify our objective: we are manually performing the steps that are bundled inside a component like SKGLControl, giving us maximum control over the rendering pipeline, which is essential for a high-performance application.
Wrapping the Native Framebuffer in C++
To create our GPU-backed SkSurface, we need to tell Skia how to find and interpret the window's existing OpenGL framebuffer. This is a multi-step process where we describe the native buffer to Skia and then ask Skia to wrap it. The Skia API for this has evolved over time. We will focus on the modern API, as it's what you'll use in your project.
The process looks like this:
-
Describe the Framebuffer Properties: We populate a
GrGLFramebufferInfostruct. For the default window framebuffer, the most important fields are:fFBOID: The OpenGL Framebuffer Object ID. For the default framebuffer provided by the window manager, this is simply0.fFormat: The internal format of the framebuffer's color attachment. This typically corresponds to an OpenGL enum likeGL_RGBA8.
-
Create a Backend Render Target: We use the
GrGLFramebufferInfoto create aGrBackendRenderTarget. This is Skia's abstract representation of a render target that exists on the GPU backend, detached from any specific API. We use the factory functionGrBackendRenderTargets::MakeGL. -
Wrap the Render Target into a Surface: Finally, we use our
GrDirectContextand theGrBackendRenderTargetto create theSkSurface. The key function here isSkSurfaces::WrapBackendRenderTarget.
Let's look at a complete code example that performs these steps. The following Gist uses GLFW instead of SDL, but the Skia-specific initialization logic is identical.
This Gist provides an up-to-date example of setting up a GPU-backed Skia surface. It's a great reference for modern Skia C++ projects.
First, focus on the init_skia function within the main code block. Read from the creation of the interface down to the call to SkSurfaces::WrapBackendRenderTarget. Trace the three steps outlined above: The GrGLFramebufferInfo is created and filled. GrBackendRenderTargets::MakeGL is called to create the backendRenderTarget. SkSurfaces::WrapBackendRenderTarget is called to create the final sSurface. Pay close attention to the parameters of WrapBackendRenderTarget. It needs the context, the render target, the surface origin (kBottomLeft_GrSurfaceOrigin for OpenGL), and the color type. Next, read the comment thread discussion about the necessary preprocessor defines. You'll find a key piece of practical advice: you must define both SK_GANESH and SK_GL before including Skia headers to enable the GPU backend functionality. Finally, in the comments, note the discussion about the API evolution. A user points out that GrBackendRenderTarget is now created via a factory function, and the surface itself is created with a function in the SkSurfaces namespace. This is a valuable insight into how libraries like Skia evolve and why official examples can sometimes lag behind the latest API design.
An Older API: For Context
You may encounter older Skia code or examples that use a different set of functions. For instance, an official Skia example for SDL uses a slightly dated approach. It's useful to recognize it.
example/SkiaSDLExample.cpp - platform/external/skia - Git at Google
This is an older, but still functional, example of SDL and Skia integration from the Android source tree.
Locate the comment "Wrap the frame buffer". You'll see it populates a GrBackendRenderTargetDesc structure. This struct served the same purpose as the modern GrGLFramebufferInfo and GrBackendRenderTarget combined. Then, it calls SkSurface::MakeFromBackendRenderTarget to create the surface. While this API is deprecated, you can see the conceptual parallel to the modern SkSurfaces::WrapBackendRenderTarget function.
Knowing both the old and new APIs will make you more effective at navigating the Skia ecosystem, from official documentation to community-provided examples. For your project, you should use the modern approach shown in the GLFW Gist.
Drawing the First Frame
Once you have your sk_sp<SkSurface> surface, the final steps to draw a frame are straightforward:
- Get the Canvas: Call
SkCanvas* canvas = surface->getCanvas();. This canvas is the object you will use for all your drawing commands (drawRect,drawPath, etc.). - Issue Draw Commands: Use the
canvaspointer to draw your scene. For example:canvas->clear(SK_ColorWHITE);. - Flush Commands to GPU: Call
grContext->flushAndSubmit();. This takes all the drawing commands you've issued on the canvas and sends them in an optimized batch to the GPU for execution. - Present the Frame: Call
SDL_GL_SwapWindow(window);. This tells the windowing system to swap the back buffer (which you just drew on) with the front buffer, making your new frame visible on the screen.
You have now connected all the pieces: Window -> GL Context -> Skia GrDirectContext -> SkSurface -> SkCanvas.
Conclusion
In this lesson, we completed the foundational setup for our high-performance whiteboard. You learned how to take the GrDirectContext and use it to wrap the native window's framebuffer, resulting in a GPU-accelerated SkSurface ready for drawing.
Key Takeaways:
- An
SkSurfaceis Skia's abstraction for a drawing destination. We created one that is backed by the GPU and tied to our SDL window. - The modern process involves describing the native framebuffer with
GrGLFramebufferInfo, wrapping it in aGrBackendRenderTarget, and finally creating theSkSurfacewithSkSurfaces::WrapBackendRenderTarget. - The
kBottomLeft_GrSurfaceOriginflag is critical when working with OpenGL to align Skia's coordinate system with OpenGL's. - Once the
SkSurfaceis created, you get anSkCanvasto issue draw commands, flush them with theGrDirectContext, and swap the window's buffers to display the result.
With the full rendering pipeline in place, we can now shift our focus to what happens inside each frame. In the next lesson, we will architect a robust, high-performance application loop that efficiently handles events, updates state, and renders graphics, setting the stage for building interactive features.