Introduction
In the last lesson, you documented your GET /api/products endpoint, making it appear in the Swagger UI. This was a great first step, but most APIs need to handle more specific requests.
This lesson builds on that foundation by tackling the GET-by-ID endpoint (e.g., /api/products/{id}). Documenting this route introduces two crucial concepts for your exam readiness:
- Path Parameters: How to tell Swagger about dynamic parts of a URL, like the product
id. - Multiple Response Codes: How to document different outcomes, such as a successful
200 OK, a404 Not Foundwhen the ID doesn't exist, and a400 Bad Requestfor an invalid ID format.
By the end of this lesson, you will have a complete and professional documentation entry for your GET-by-ID route.
Documenting Path Parameters and Multiple Responses
Documenting an endpoint that fetches a single resource involves describing the parameter in the URL and the various things that can happen as a result. A user might provide a valid ID, an ID that doesn't exist, or a completely malformed ID. Our documentation needs to account for all three scenarios.
Let's watch a video that demonstrates this process clearly.
NodeJS Swagger API Documentation Tutorial Using Swagger JSDoc
The video 'NodeJS Swagger API Documentation Tutorial' by Maksim Ivanov perfectly illustrates how to document a 'get by id' route. It covers defining the path parameter and documenting both the success (200) and not-found (404) responses.
Watch from 00:17:35 to 00:19:24. Focus on these key parts: Path: How the URL is defined with curly braces: /books/{id}. Parameters: The new parameters section that describes the id from the URL. Responses: How both the 200 and 404 responses are defined.
The JSDoc Structure for GET-by-ID
As you saw in the video, we add a parameters section to our YAML block and list multiple status codes under responses. We will also add a 400 response, which is critical for handling invalid MongoDB ObjectId formats—a common requirement in production APIs and exams.
Here is the complete JSDoc block you will use.
/**
 * @swagger
 * /api/products/{id}:
 *   get:
 *     summary: Retrieve a single product by its ID
 *     tags: [Products]
 *     parameters:
 *       - in: path
 *         name: id
 *         required: true
 *         description: The ID of the product to retrieve.
 *         schema:
 *           type: string
 *     responses:
 *       200:
 *         description: A single product.
 *         content:
 *           application/json:
 *             schema:
 *               $ref: '#/components/schemas/Product'
 *       400:
 *         description: Invalid ID format provided.
 *       404:
 *         description: The product was not found.
 *       500:
 *         description: Some server error
 */
Let's break down the new additions:
/api/products/{id}:: The curly braces{id}tell Swagger that this part of the path is a variable. Important: Do not use the colon syntax (e.g.,/api/products/:id) that Express uses; it will not work with Swagger.parameters:: This is an array of objects, where each object describes a parameter.- in: path: Specifies that the parameter is in the URL path.name: id: The name of the parameter. This must match the name inside the curly braces in the path.required: true: Indicates that this parameter is mandatory.description:Explains what the parameter is for.schema: { type: string }: Defines the data type of the parameter. MongoDB ObjectIds are represented as strings.
responses:: We now have multiple codes defined.200:: The success case. Just like before, we use$refto point to ourProductschema because the API will return a single product object.400:: For "Bad Request". Your API logic will return this if a client sends a malformed ID (e.g., "not-an-id").404:: For "Not Found". This is returned when the ID is validly formatted but doesn't correspond to any product in the database.
The article "Documenting Node.js API using Swagger" provides another clear text example of this structure under its "GET" section, reinforcing this pattern.
Your Turn: Implement and Verify
Now, let's add this documentation to your project.
- Open your product routes file (
src/routes/productRoutes.js). - Find the route handler for getting a single product (e.g.,
router.get('/:id', ...)). - Copy and paste the YAML JSDoc block from above and place it directly before that route handler.
- Restart your server.
- Refresh your Swagger UI page (
http://localhost:PORT/api-docs).
You should now see the new GET /api/products/{id} endpoint listed under the "Products" tag. Expand it, and you'll find a "Parameters" section and a "Responses" section listing all the status codes you defined. The UI will even provide a field for you to test the endpoint by entering an ID.
Your new endpoint documentation should look something like this:
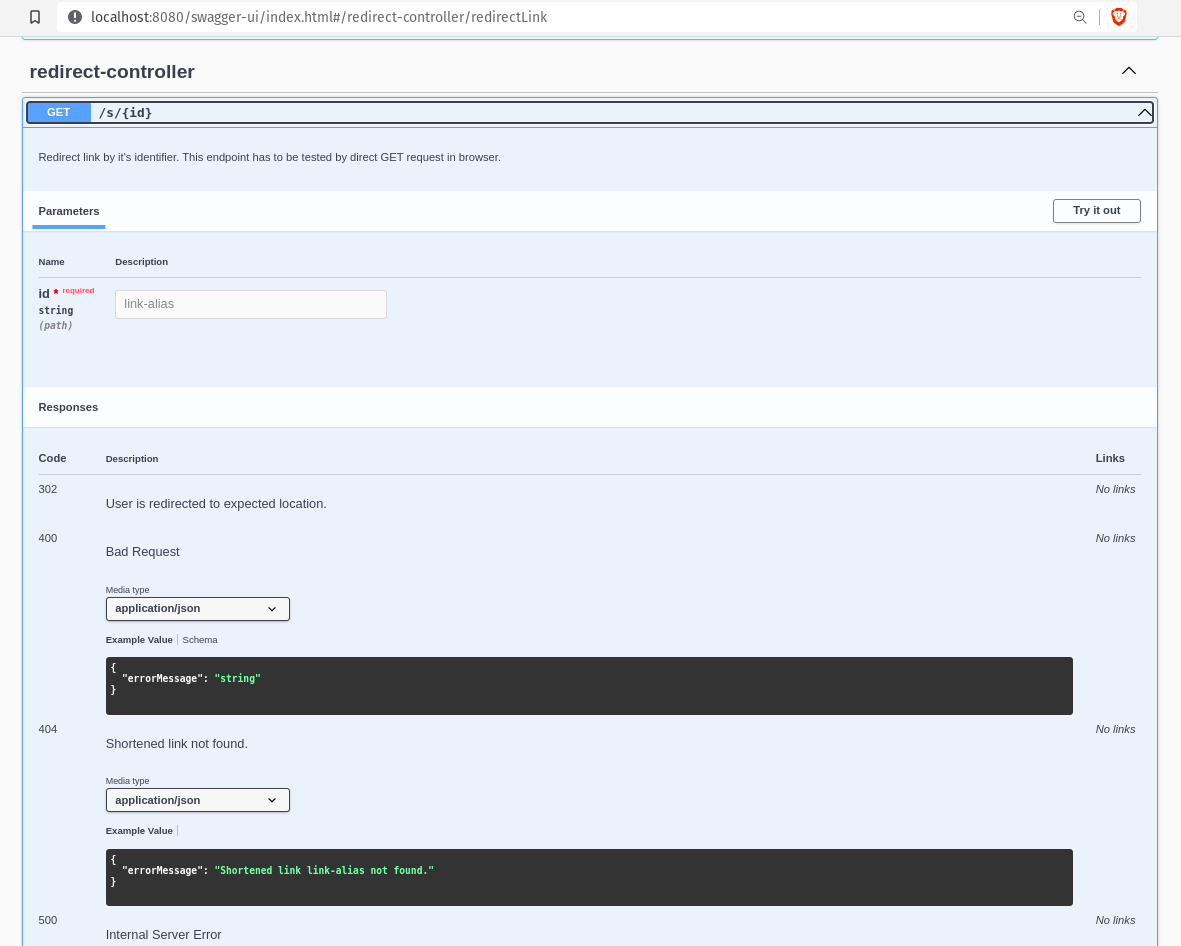
A quick but important tip: If your new endpoint doesn't appear, the most likely cause is a YAML indentation error. YAML is very strict. Every level of indentation must be exactly two spaces. Double-check your spacing carefully. The video "Automatically Generate Swagger Docs With ExpressJS & NodeJS" mentions this as a common pitfall around the 28:22 mark.
Conclusion
You have now documented a more complex endpoint, covering path parameters and multiple response codes. This is a fundamental skill for creating clear, professional, and testable API documentation.
Key Takeaways:
- Path parameters are defined in the endpoint URL using curly braces, like
/path/{paramName}. - Use the
parameterssection in your JSDoc to describe each path parameter, including its name, location (in: path), and whether it's required. - Document all significant response codes (
200,400,404) in theresponsessection to give developers a complete picture of the endpoint's behavior. - For a successful
200response that returns a single object, you can directly reference your reusable schema using$ref.
Next Up:
In the next lesson, we'll document the POST and PUT endpoints. This will introduce the concept of a requestBody, which is used to describe the JSON data a client must send when creating or updating a resource.